Adding Filament Runout Detection to an Anycubic Kossel with Marlin 1.1.8 and BIQU 3D Filament Detection Module
I have several Anycubic Kossel 3D Printers that work great for the price ($180-320 depending on the model). One issue I’ve run into is when a reel of filament gets low, I can’t reliably print with it for fear of running out mid-print and wasting the plastic. With some changes to the Marlin firmware (version 1.1.8 as of this writing) and adding a sensor for less than $5, I was able to fix this! The inspiration came from a Thingiverse model by Nenex that mounts this cheap sensor to the 2020 extrusions that make up most of the Anycubic Kossel’s body.

Sources:
https://www.thingiverse.com/thing:2764075
BIQU 3D Filament Detection Module
Installation
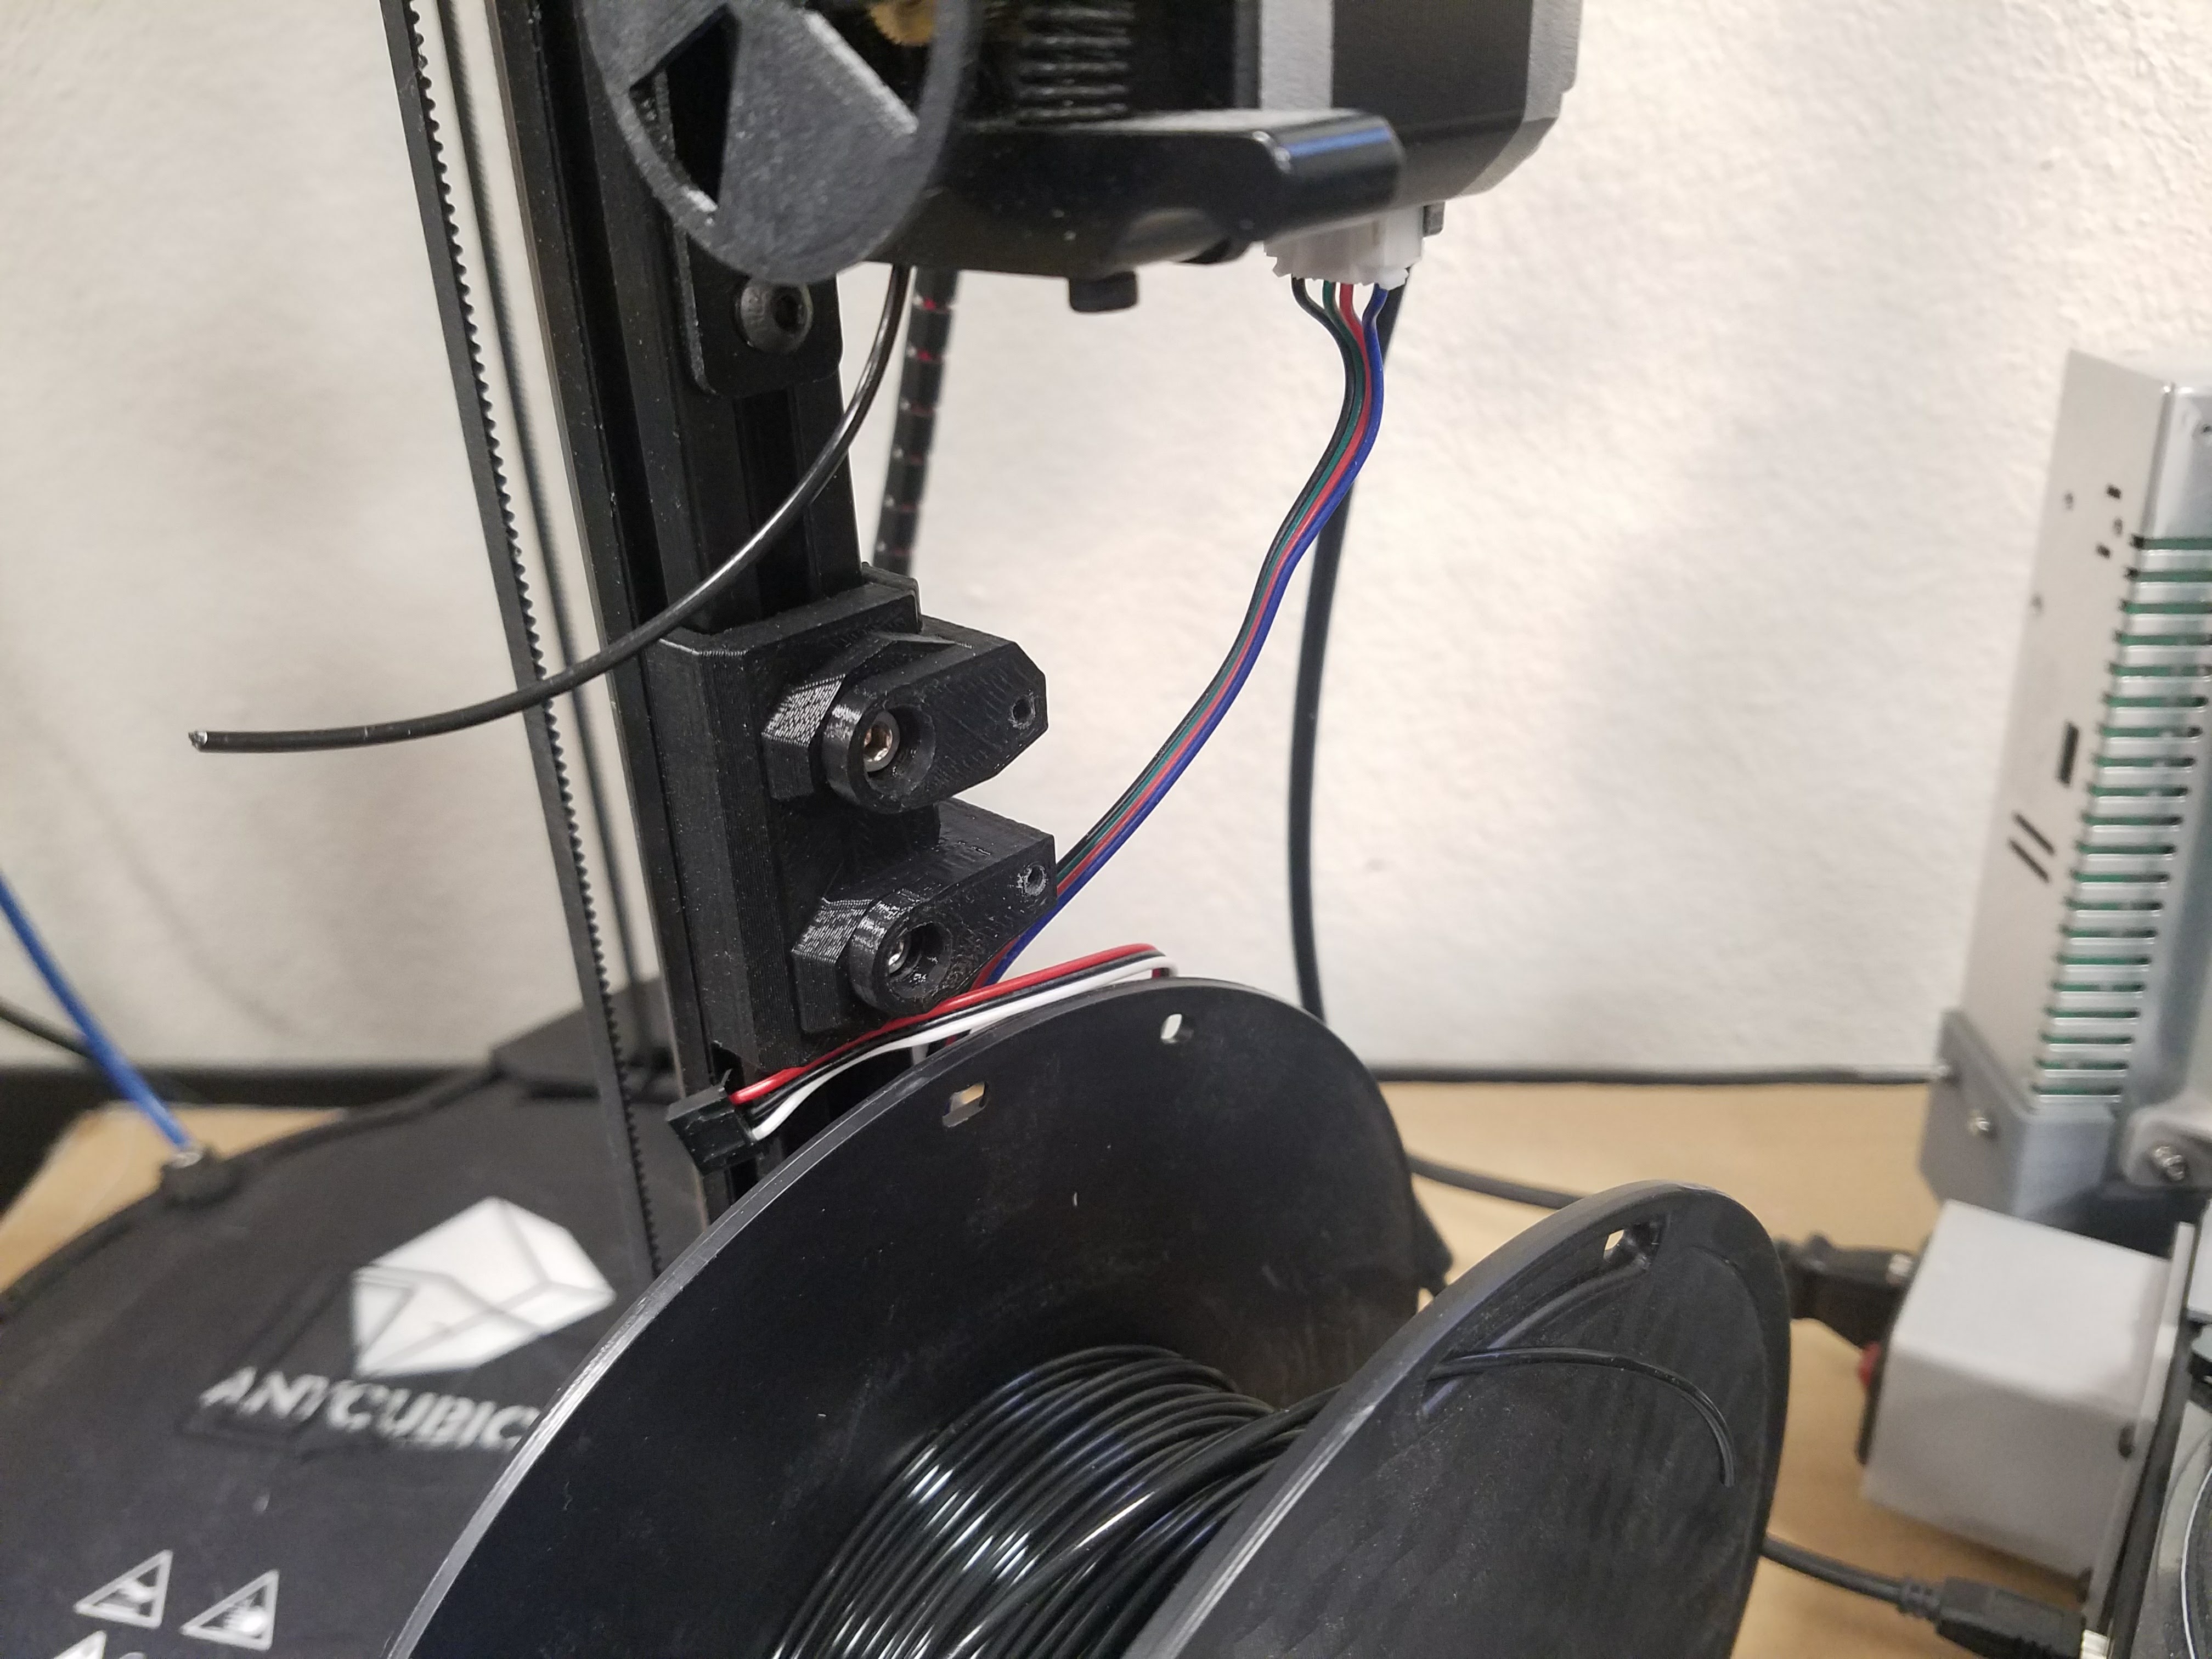
Print the two parts from Thingiverse to attach the sensor to the 3D printer. You will also need two M4x12 screws, two M4 t-nuts, and two M3x25 screws.
Chamfering the Brass Guides
Before assembly, I suggest taking the sensor apart and chamfering the brass guides that the filament rides in. Without this, I was getting significant scraping on the filament and the PLA bits were beginning to build up inside the sensor.


Cable Install
Reassemble the sensor and install it to the 2020 extrusion mount with the M3x25 screws. Plug the cable into the sensor. It will only go in one way.


Make sure the power is off and then remove the bed and plug the cable into the S0 header pins. The cable can go both ways and mine works with the red wire plugged into the header farthest from the stepper motor drivers in the S pin. If you wire it backwards, everything will appear to function until the sensor doesn’t have filament and then the board will shut off. Reinstall the bed and turn the power back on.


Changing Marlin Firmware Settings
You can download my copy of Marlin and adjust the size for your own printer (my z-height is shorter than stock since I replaced the pulleys with shorter linear rails) or go in and change the needed settings in your own copy of Marlin.
Marlin-1.1.8-Anycubic-Kossel-2-Linear.zip
This printer is a newer one by Anycubic that comes with the power supply, heated bed, and bed leveling. Because of that, my settings for the Z-endstop are specific for it.
If you download mine, some settings to adjust in Configuration.h are:
- Line 89: #define STRING_CONFIG_H_AUTHOR
- Line 139: #define CUSTOM_MACHINE_NAME
- Line 538: #define DELTA_HEIGHT (should be closer to 320mm)
- Line 589: #define Z_MIN_ENDSTOP_INVERTING false (some other sensors use true)
- Line 593: #define Z_MIN_PROBE_ENDSTOP_INVERTING false (same reason)
- Line 780: #define Z_PROBE_OFFSET_FROM_EXTRUDER -15.49
If you download your own copy of Marlin from http://marlinfw.org/, you can get it setup for your own printer and turn on the filament runout sensor with these changes (use the Find tool in the Arduino software):
In pins_RAMPS.h change line 255 to:
- #define FIL_RUNOUT_PIN 11
In Configuration.h uncomment:
- #define FILAMENT_RUNOUT_SENSOR
In Configuration_adv.h also uncomment:
- #define ADVANCED_PAUSE_FEATURE
- #define PARK_HEAD_ON_PAUSE
- #define HOME_BEFORE_FILAMENT_CHANGE
Flash your new firmware by plugging into your computer with the USB cable Anycubic sends with their printers. Under the Tools menu in the Arduino IDE change the board to Arduino/Genuino Mega or Mega 2560 and change the Processor to ATmega 2560 (Mega 2560), and click Upload.
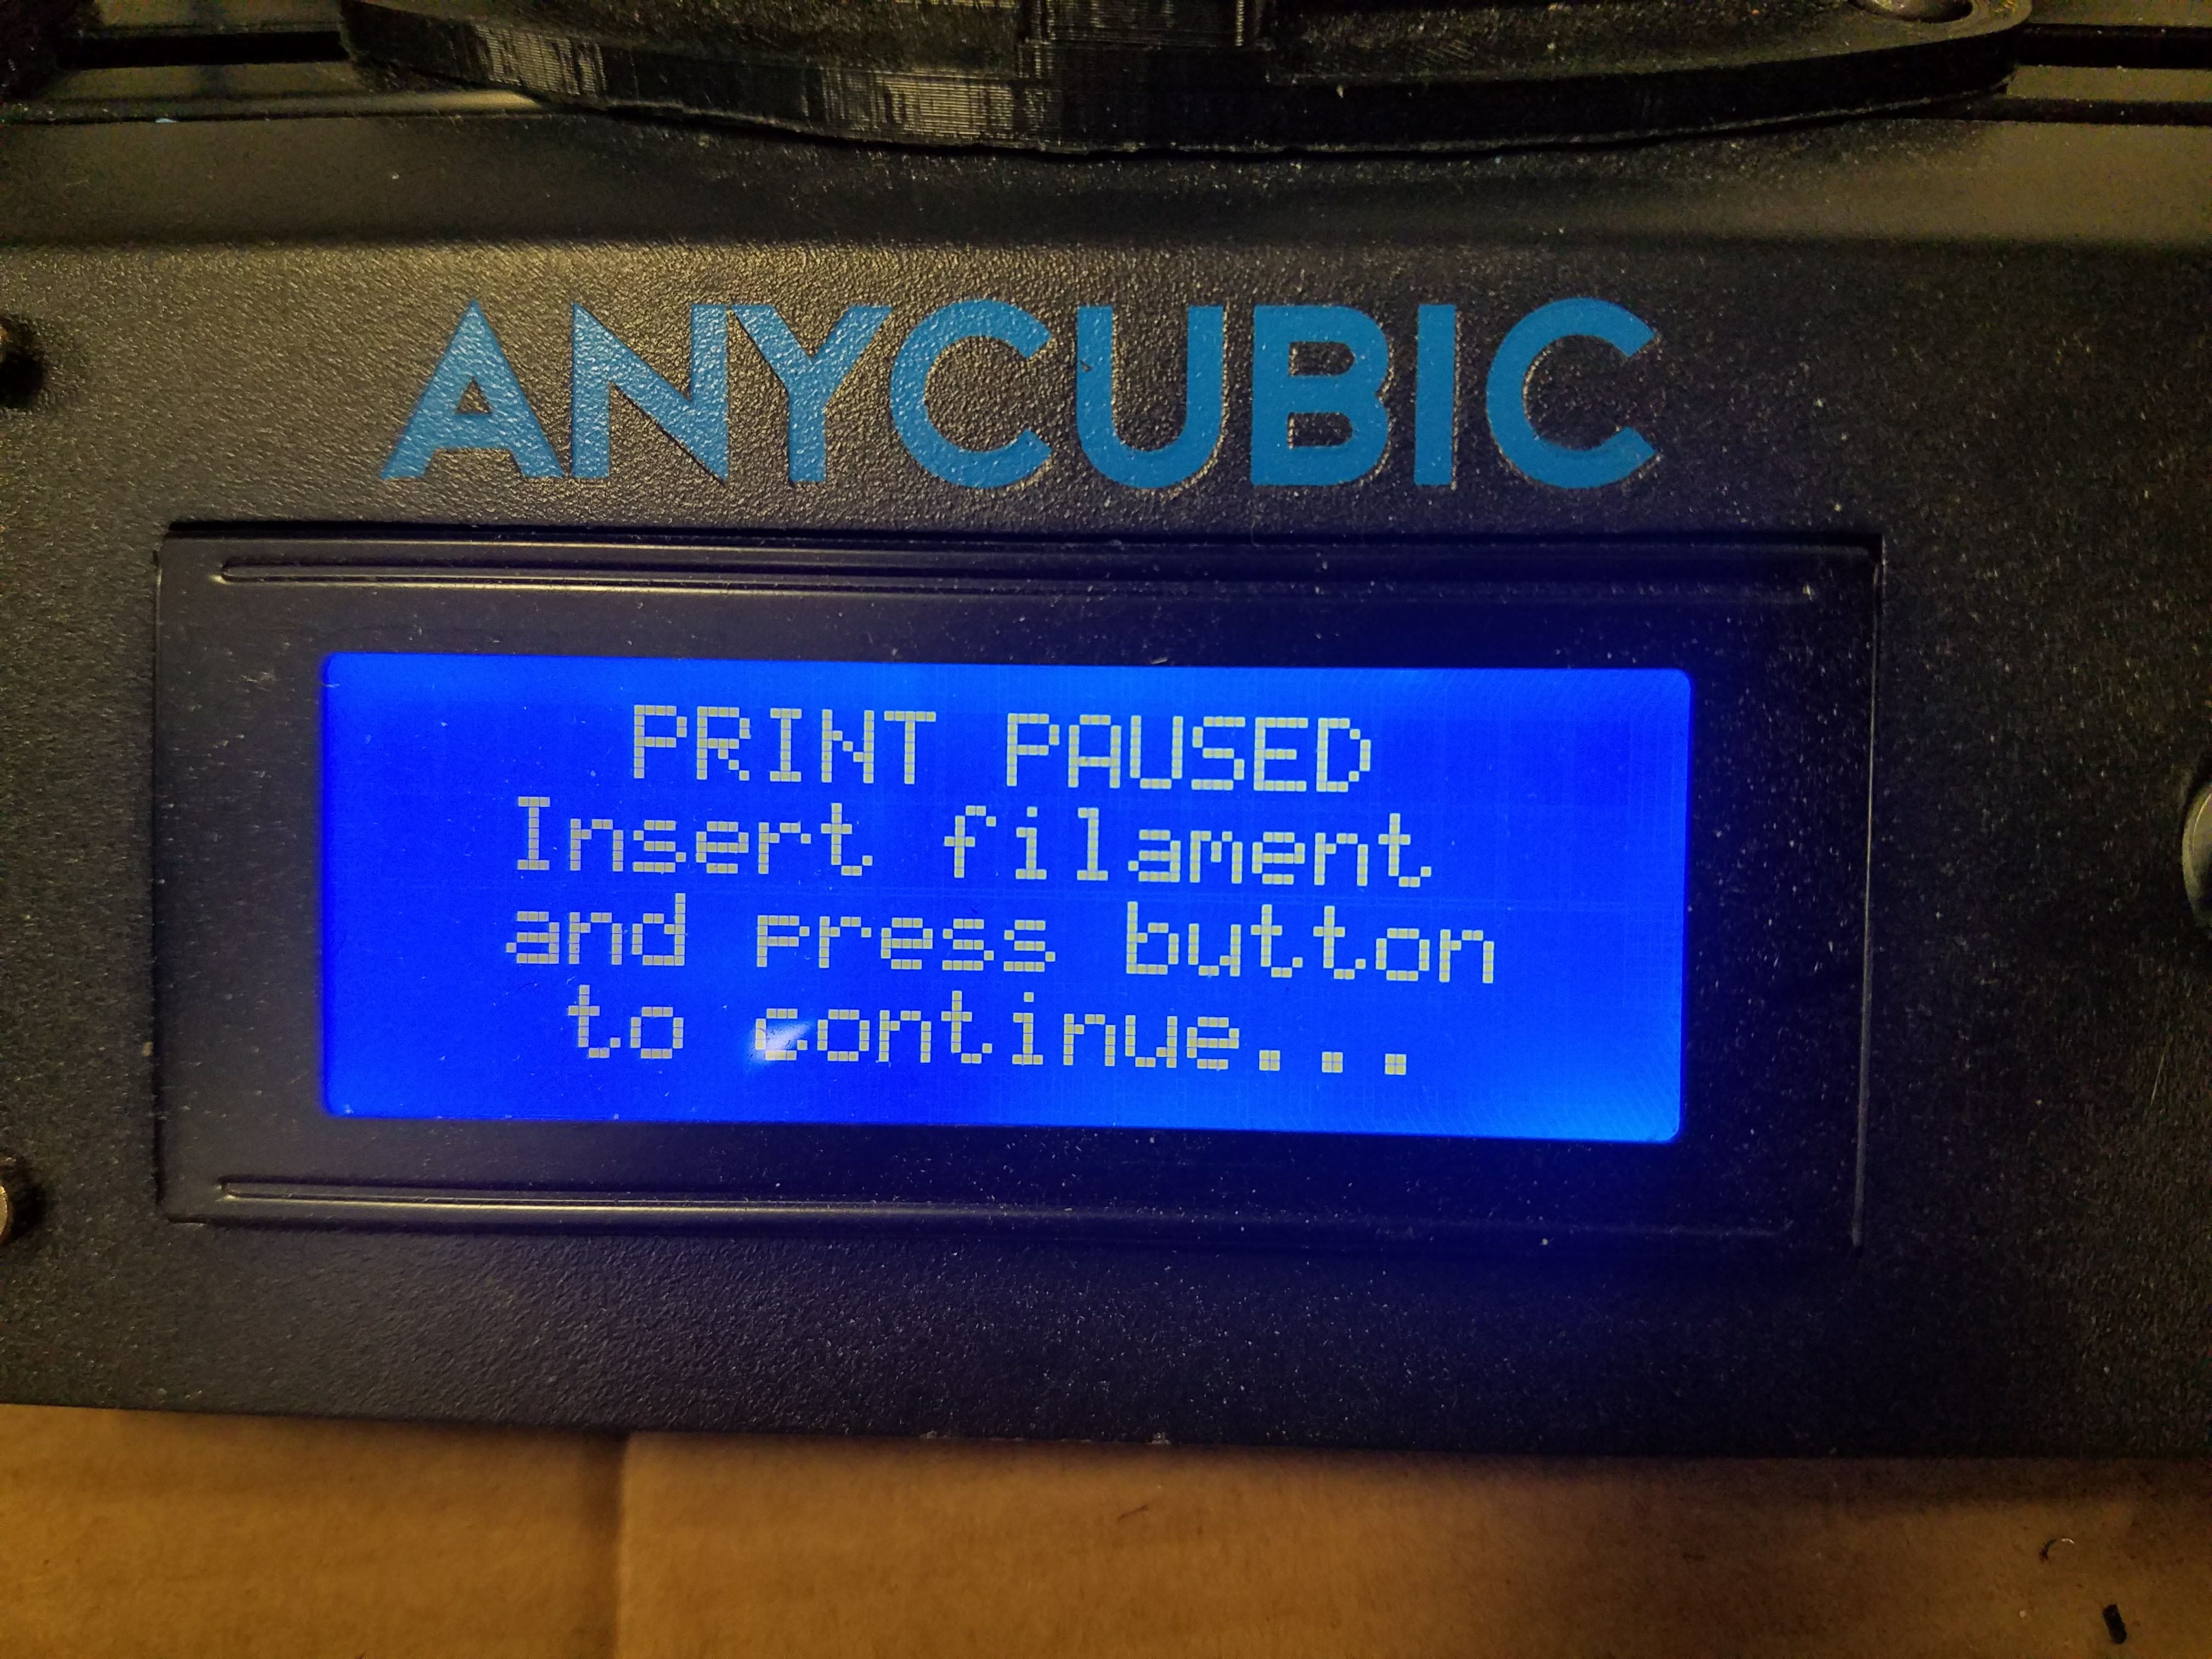
If all goes well, your 3D printer will reboot and should give you the option to change filament when the hot end heats up, and if the filament runs out mid-print will prompt you to change it!

Leave a Reply