Making a Rolling Bench with Soft Closing Drawers
A coworker works with students from a variety of classrooms in small groups. Sometimes it is more convenient for her to just sit on the ground with the students in the hall and I suggested that maybe a rolling bench for her to sit on would be more comfortable and if it had drawers she could keep some of her materials in it and save her from carrying them around during the day. This is the result:

Materials
- 3 inch Caster Wheels with Brakes On Polyurethane Wheels
- 4×8 sheet of 3/4″ birch plywood
- 4×8 sheet of 1/2″ birch plywood
- Kreg Mini DIY Jig
- Titebond II Wood Glue
- Iron on 3/4″ X 50′ Birch Wood Veneer Edge Banding
- Kreg SML-C125-100 1-1/4-Inch 8-Coarse Washer-Head Pocket Screws
- 16 in. Soft-Close Full Extension Ball Bearing Side Mount Drawer Slide Set
- 3 Piece 8″ Wood Rasp Set
- Dewalt 10-Inch Compact Job Site Table Saw
- Minwax 700484444 Wood Finish Penetrating Stain, quart, Classic Gray
- Minwax 61500444 Pre Stain Wood Conditioner, 1 Quart
- Minwax 63333444 Polycrylic Protective Finish Water Based,1 quart, Satin
Inspiration
I found several benches online and took some elements from them. My constraints were that it needed to be on castors so it could move around the school, sturdy enough for one or two adults to sit on, and have some storage space for often used items like books, paper, and pencils.


Case Build
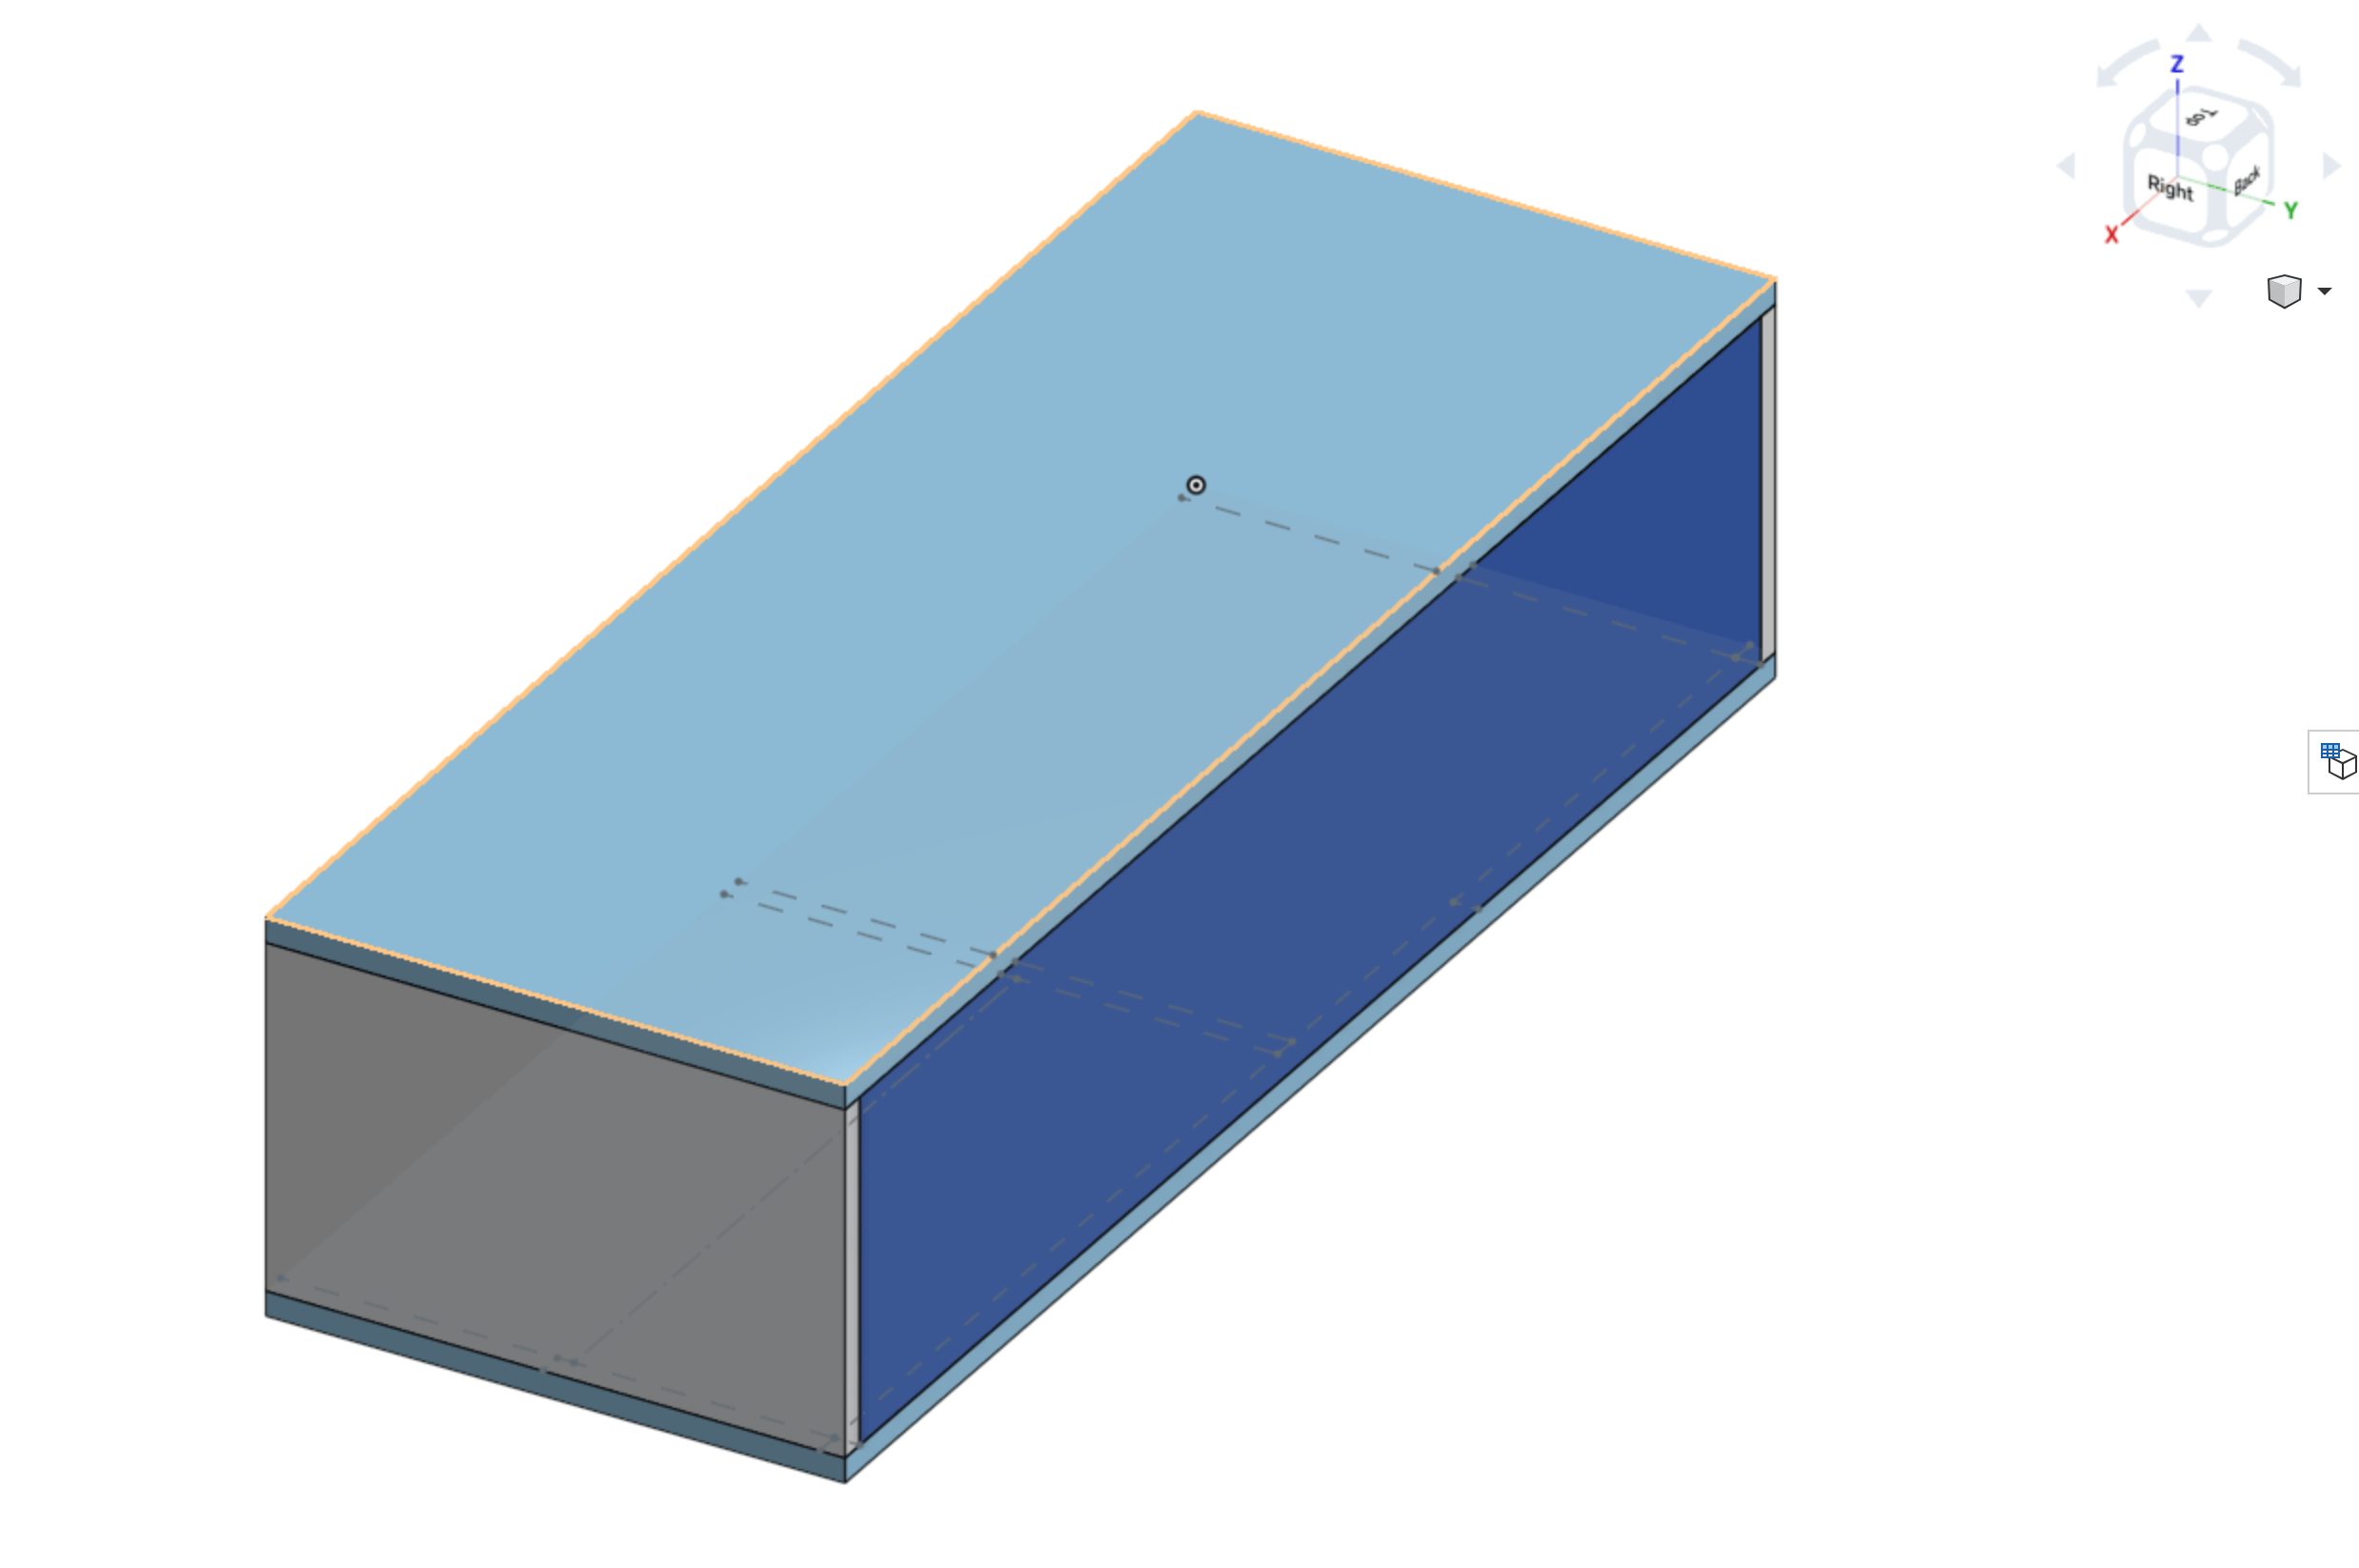
I used Onshape to create a sketch of the overall dimensions and made a cardboard prototype. With the help of a student I tested it out to see if the size worked. In the end the dimensions were:
- 3/4″ plywood
- 3″ casters with a height of 4.125″
- Case height of 11.875″
- Overall depth of 18″
- Overall width of 48″

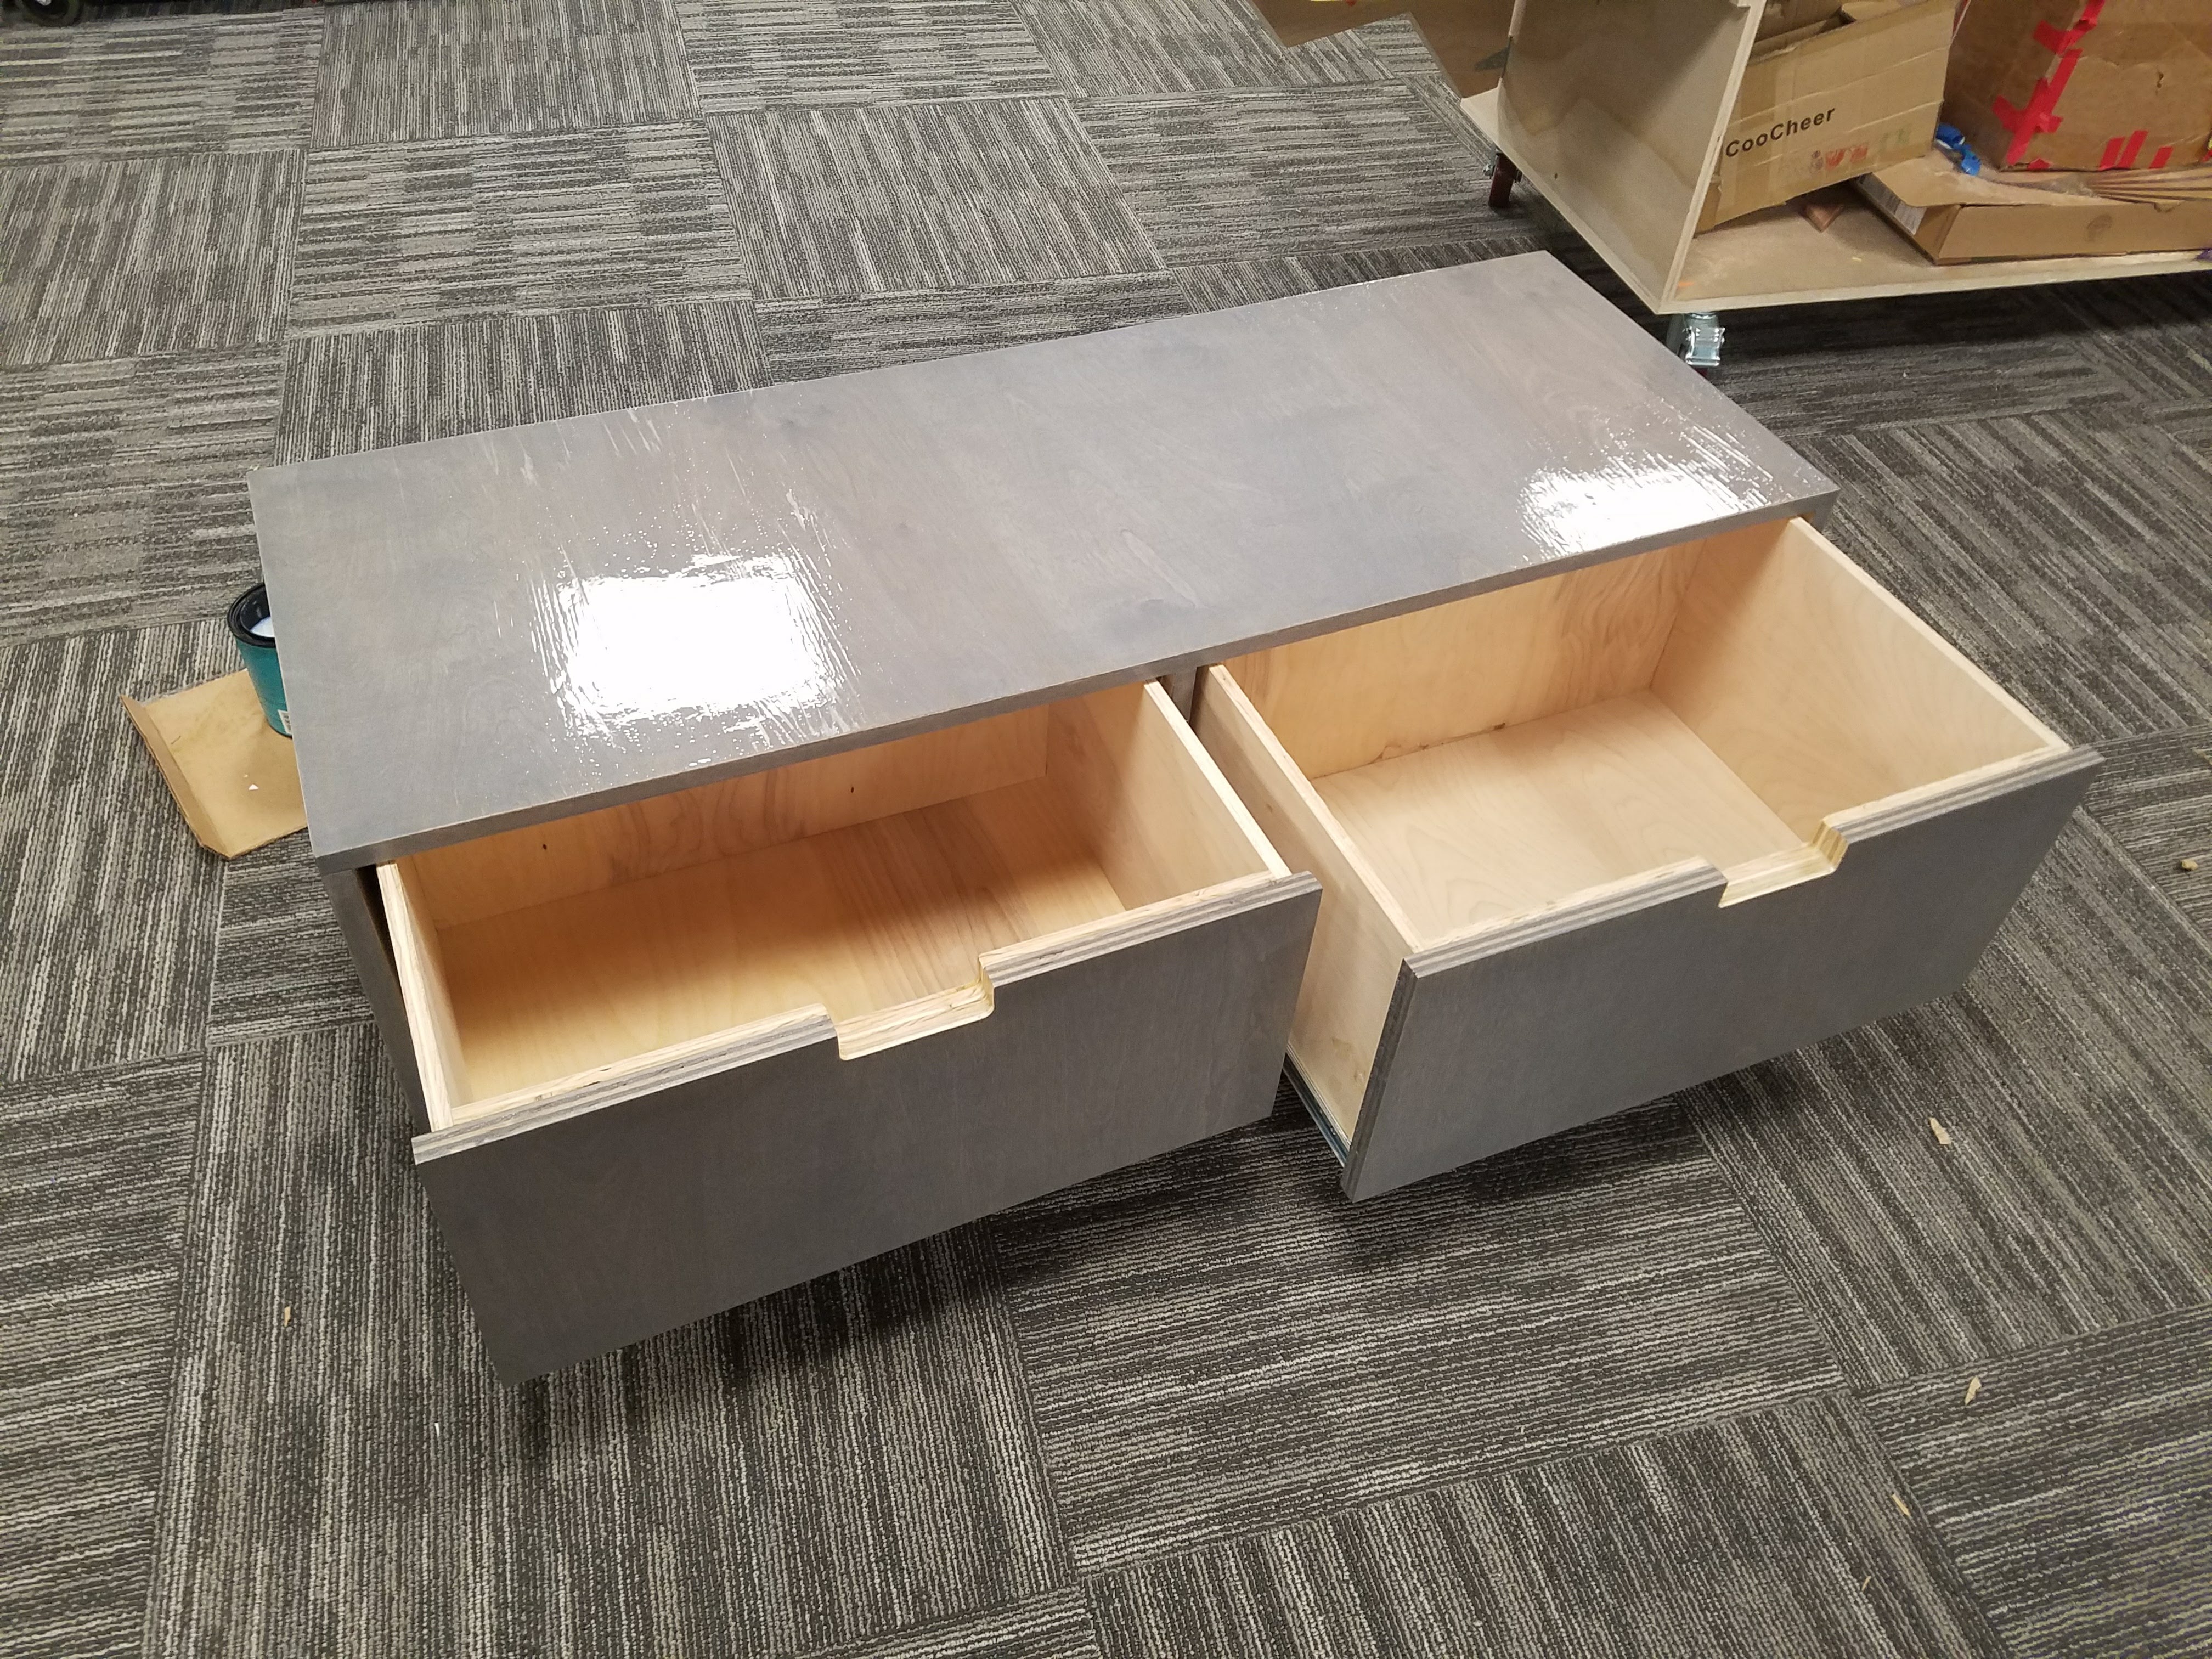
I forgot to take photos during this part of the build but the design is very simple: identical top and bottom, identical left and right sides, one piece across the back inside those four pieces and a center support. Most of the construction used pocket screws and Titebond 2 except the bottom that was attached last and used regular screws and glue since it would be hidden from view. Each exposed edge of plywood except the back was cut about 1/16″ short. Once the case was built I ironed on the birch edge banding to cover these exposed edges. A sharp knife cut the excess off and then got sanded down with 220 grit sandpaper to relieve the still sharp corners.
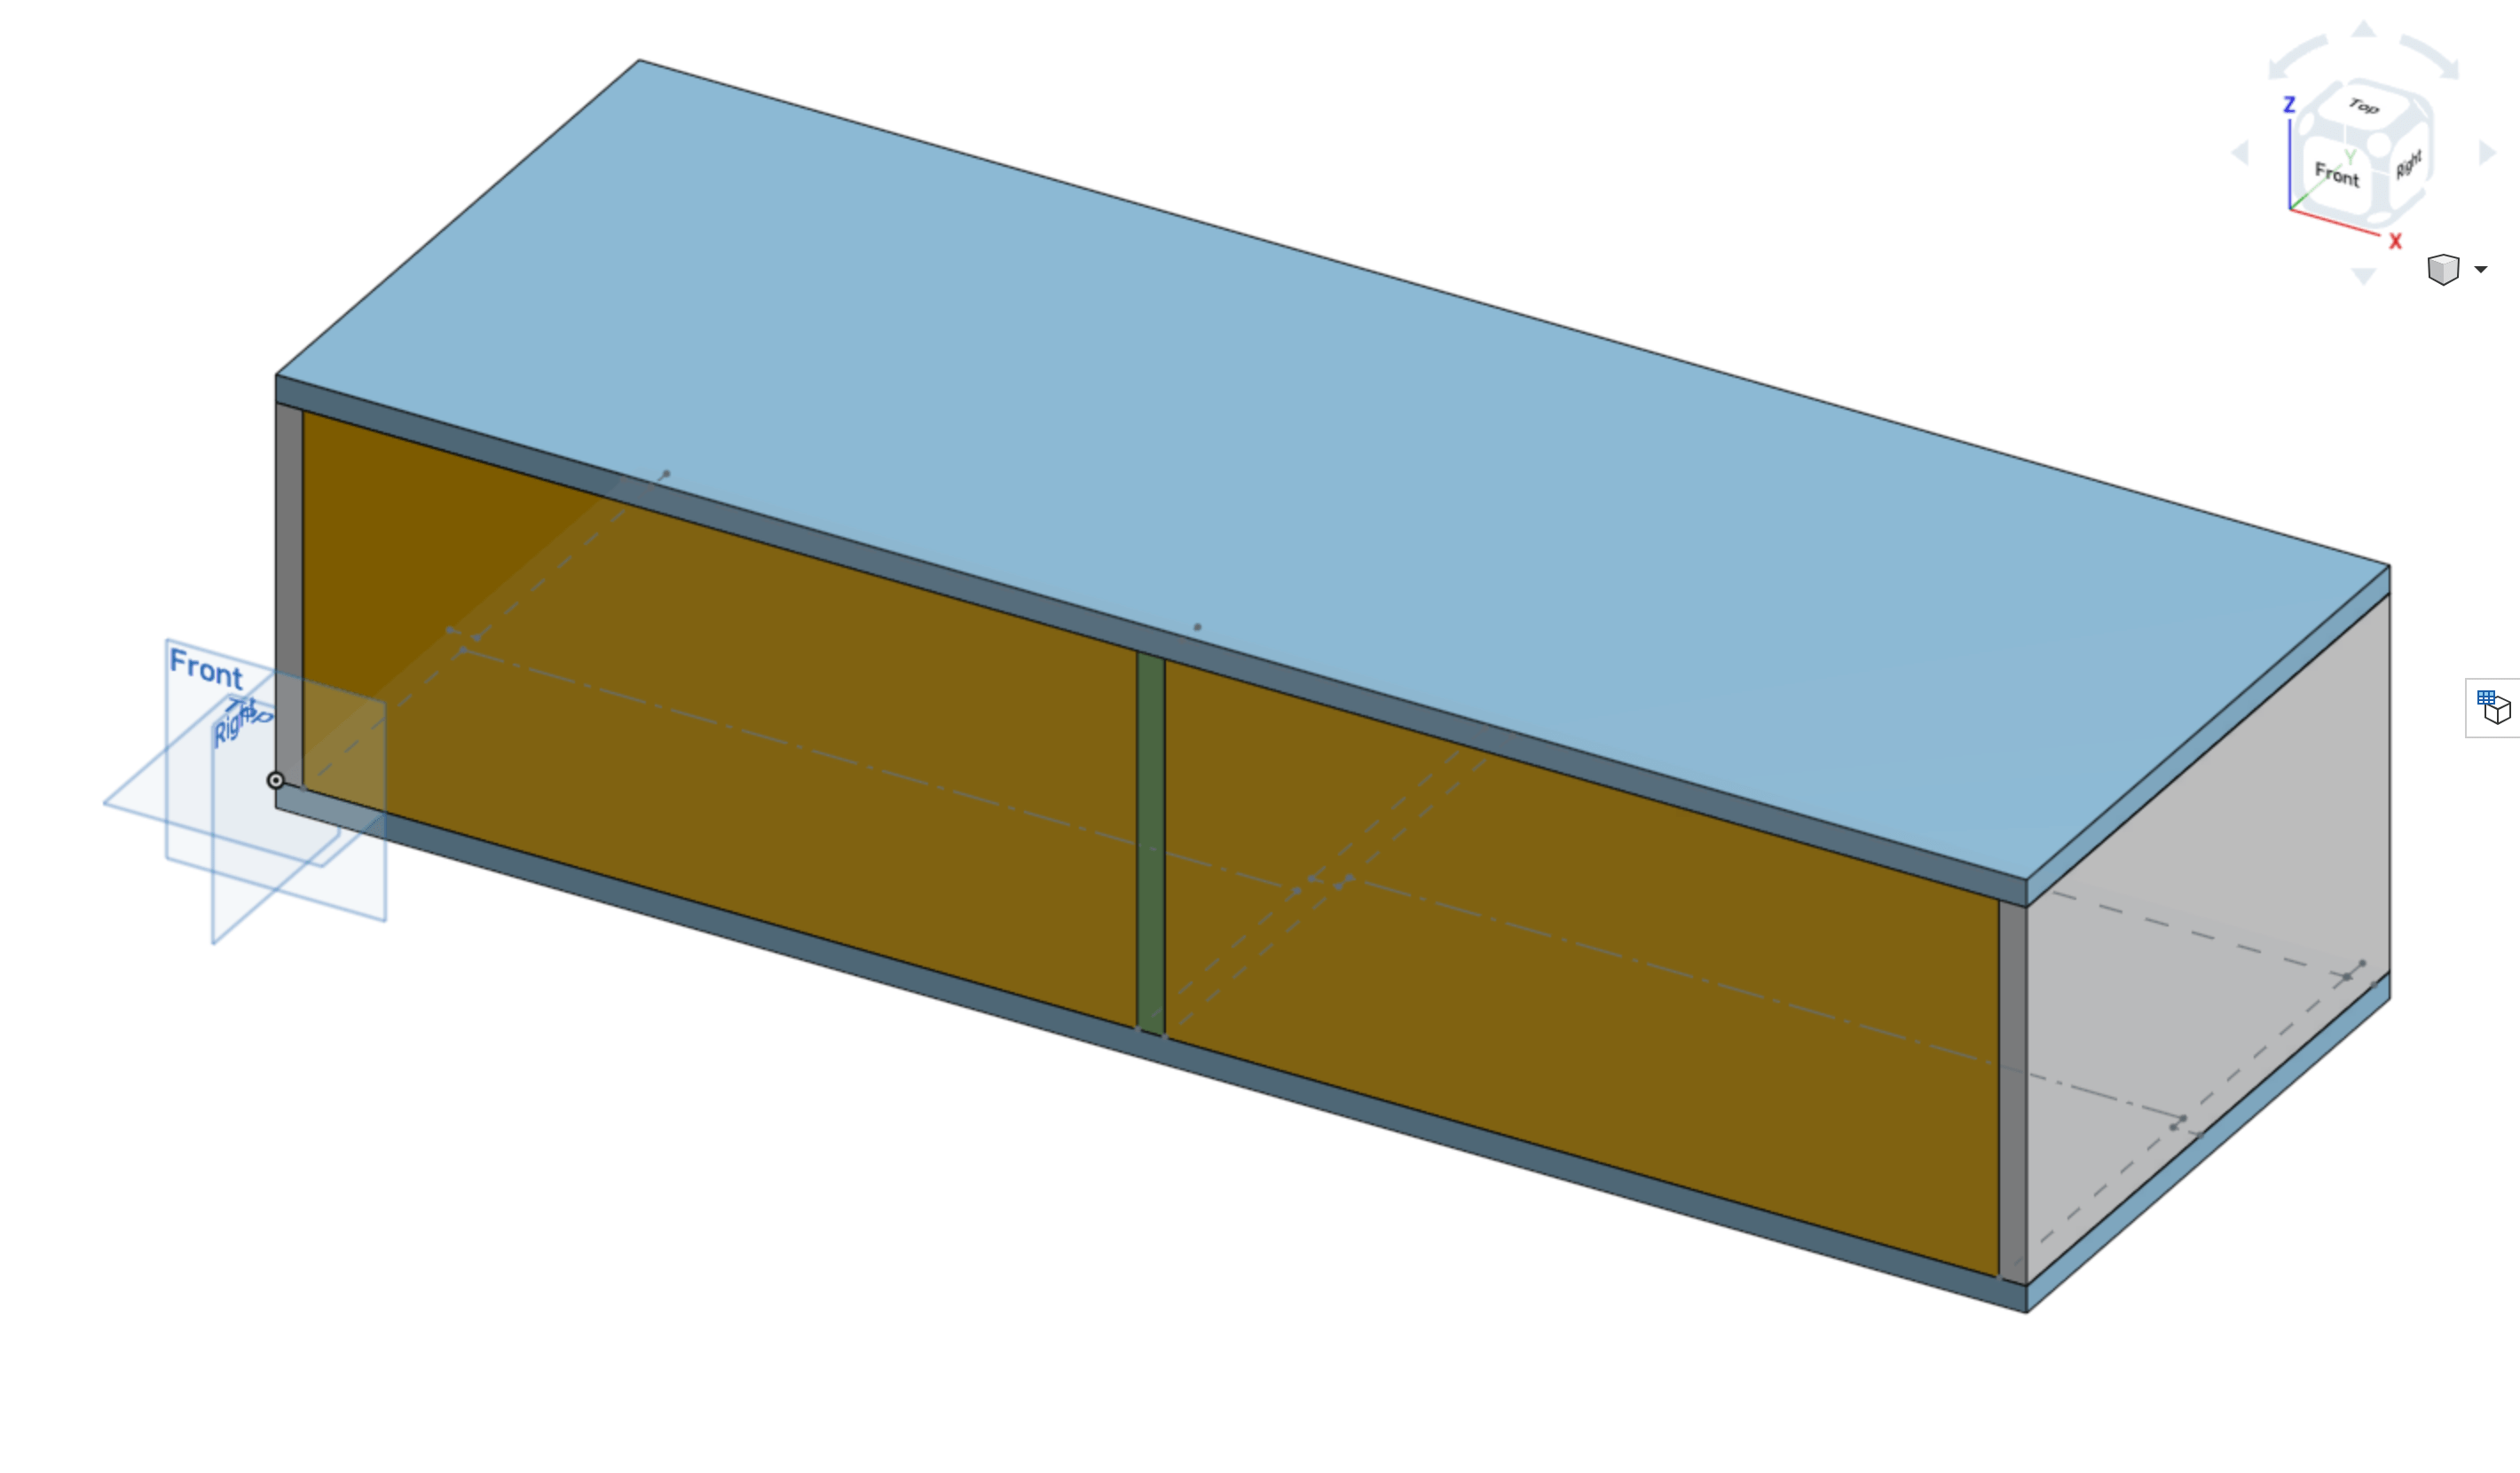
Following the directions on the soft-close drawer slides, I made the drawers out of 1/2″ birch plywood and made them 3/4″ shallower than I needed. After the drawers were installed I screwed 3/4″ drawer fronts on from the inside.

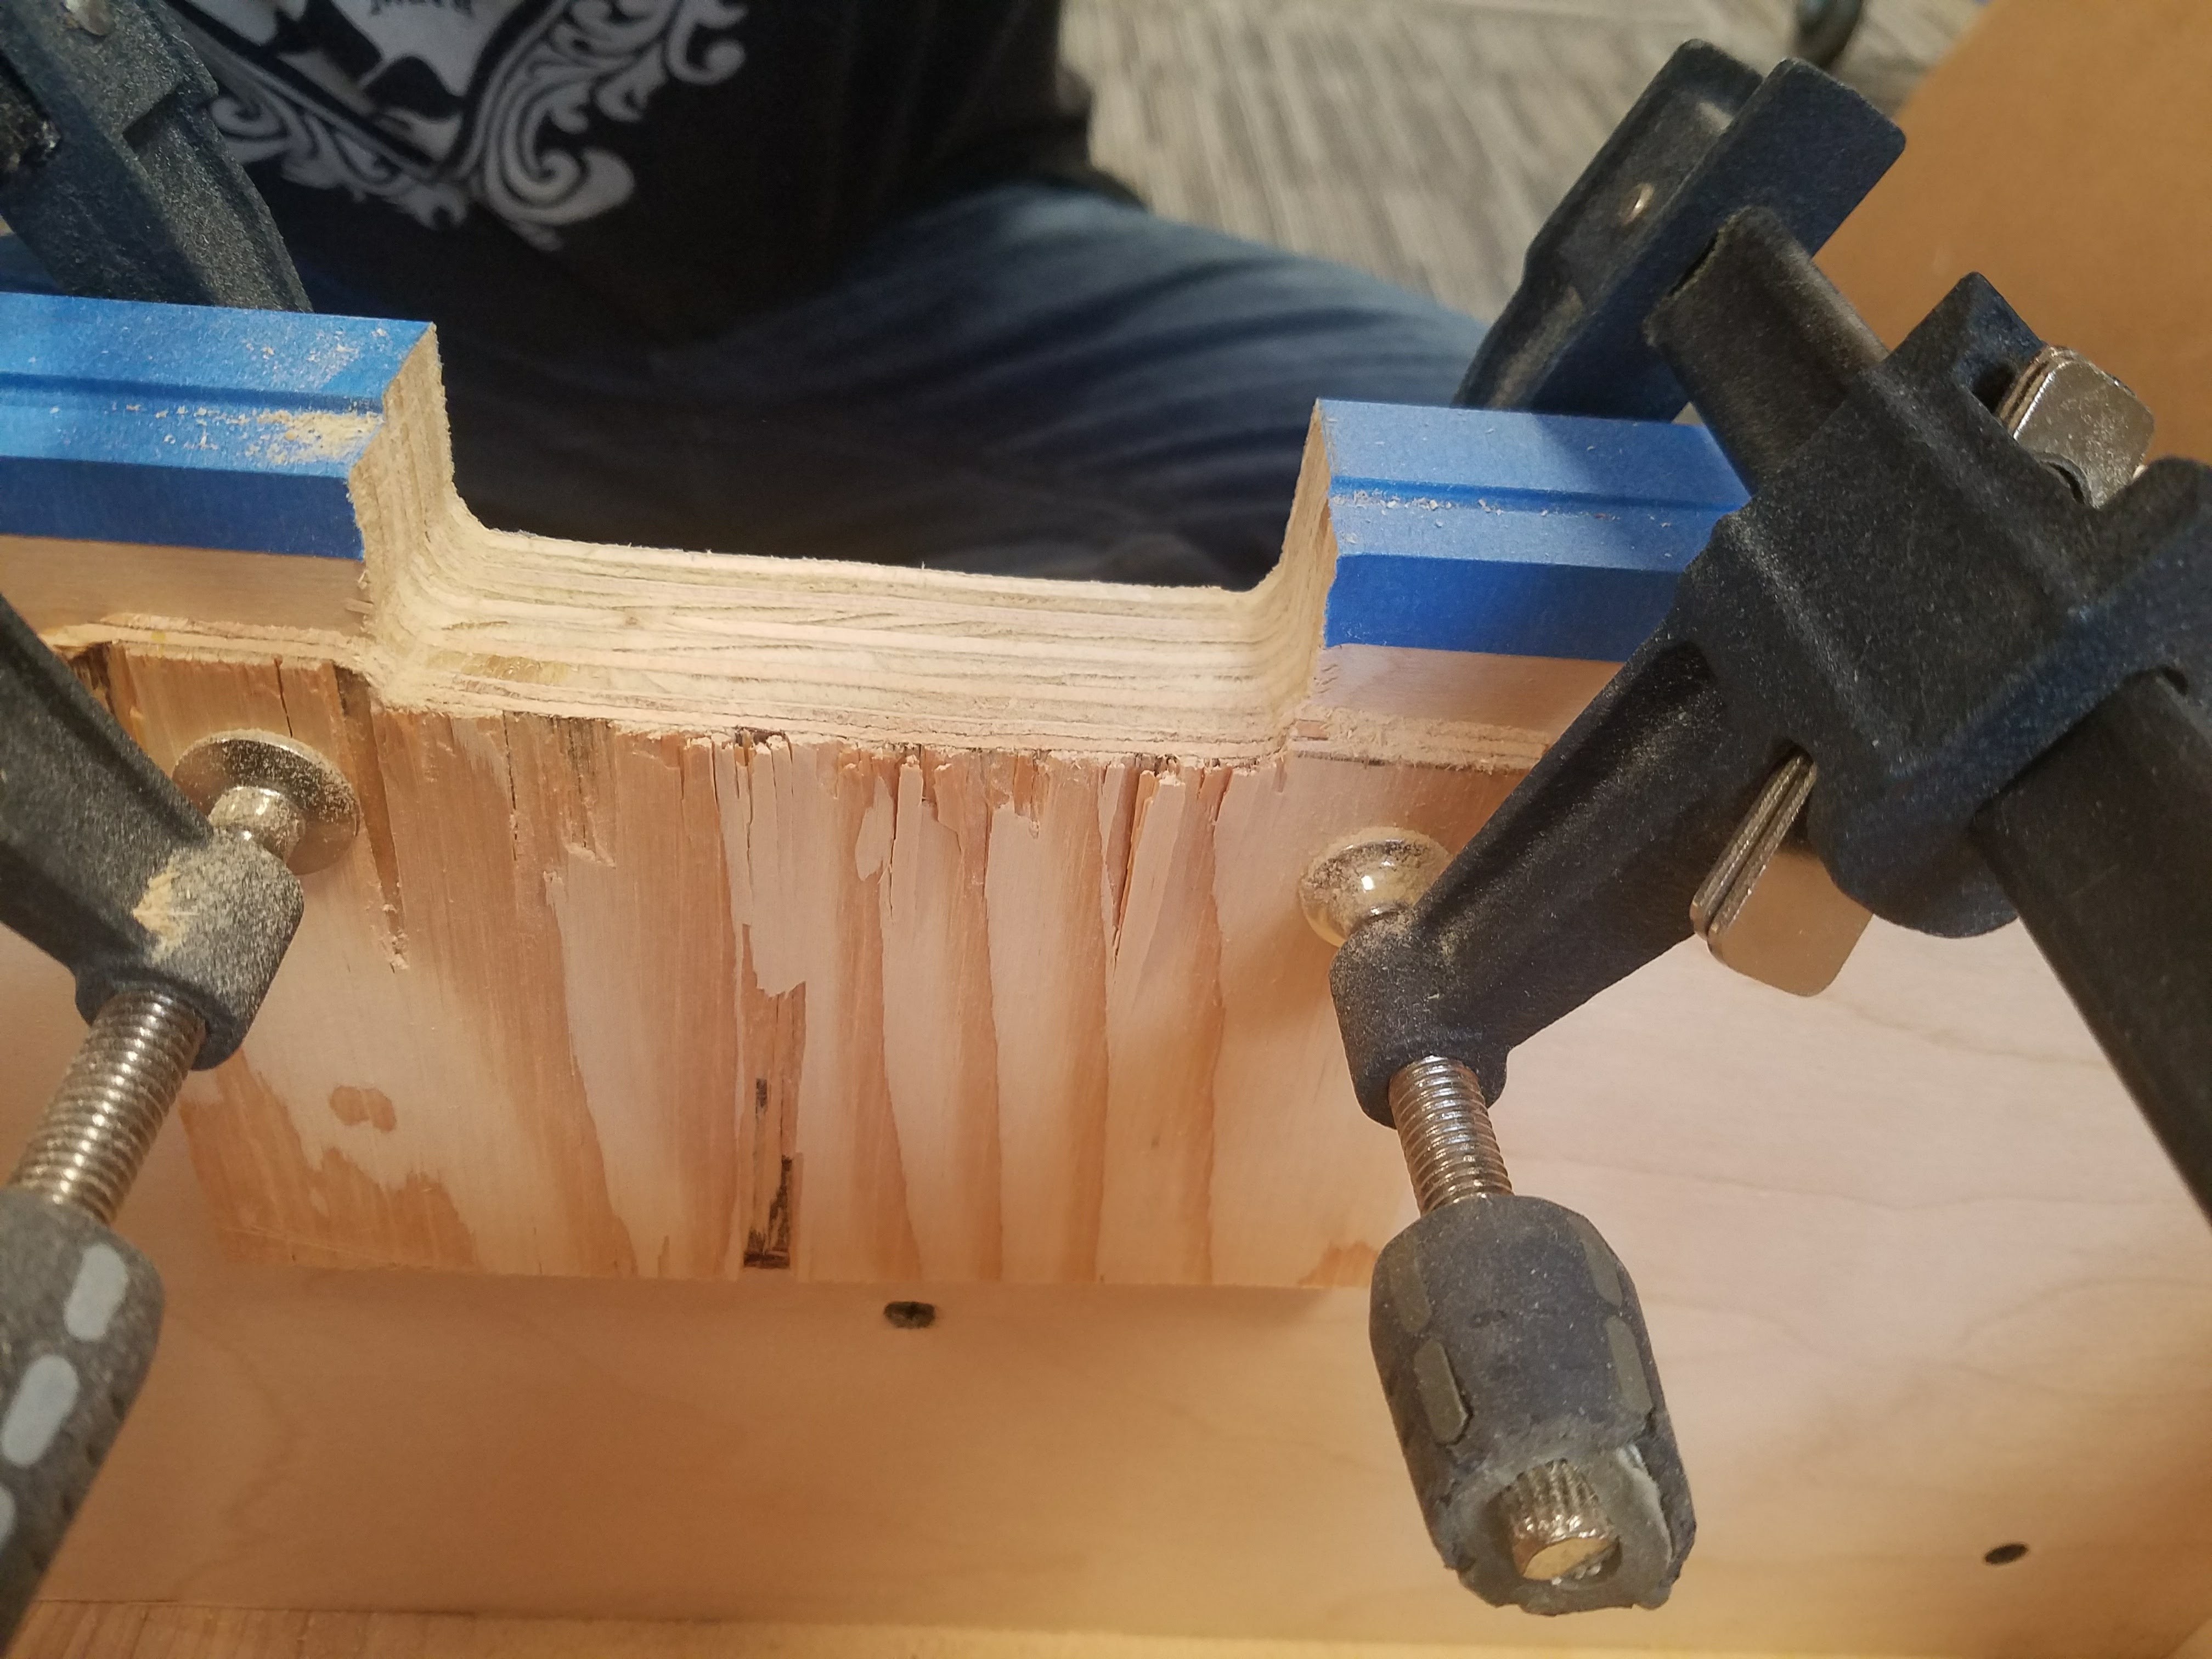
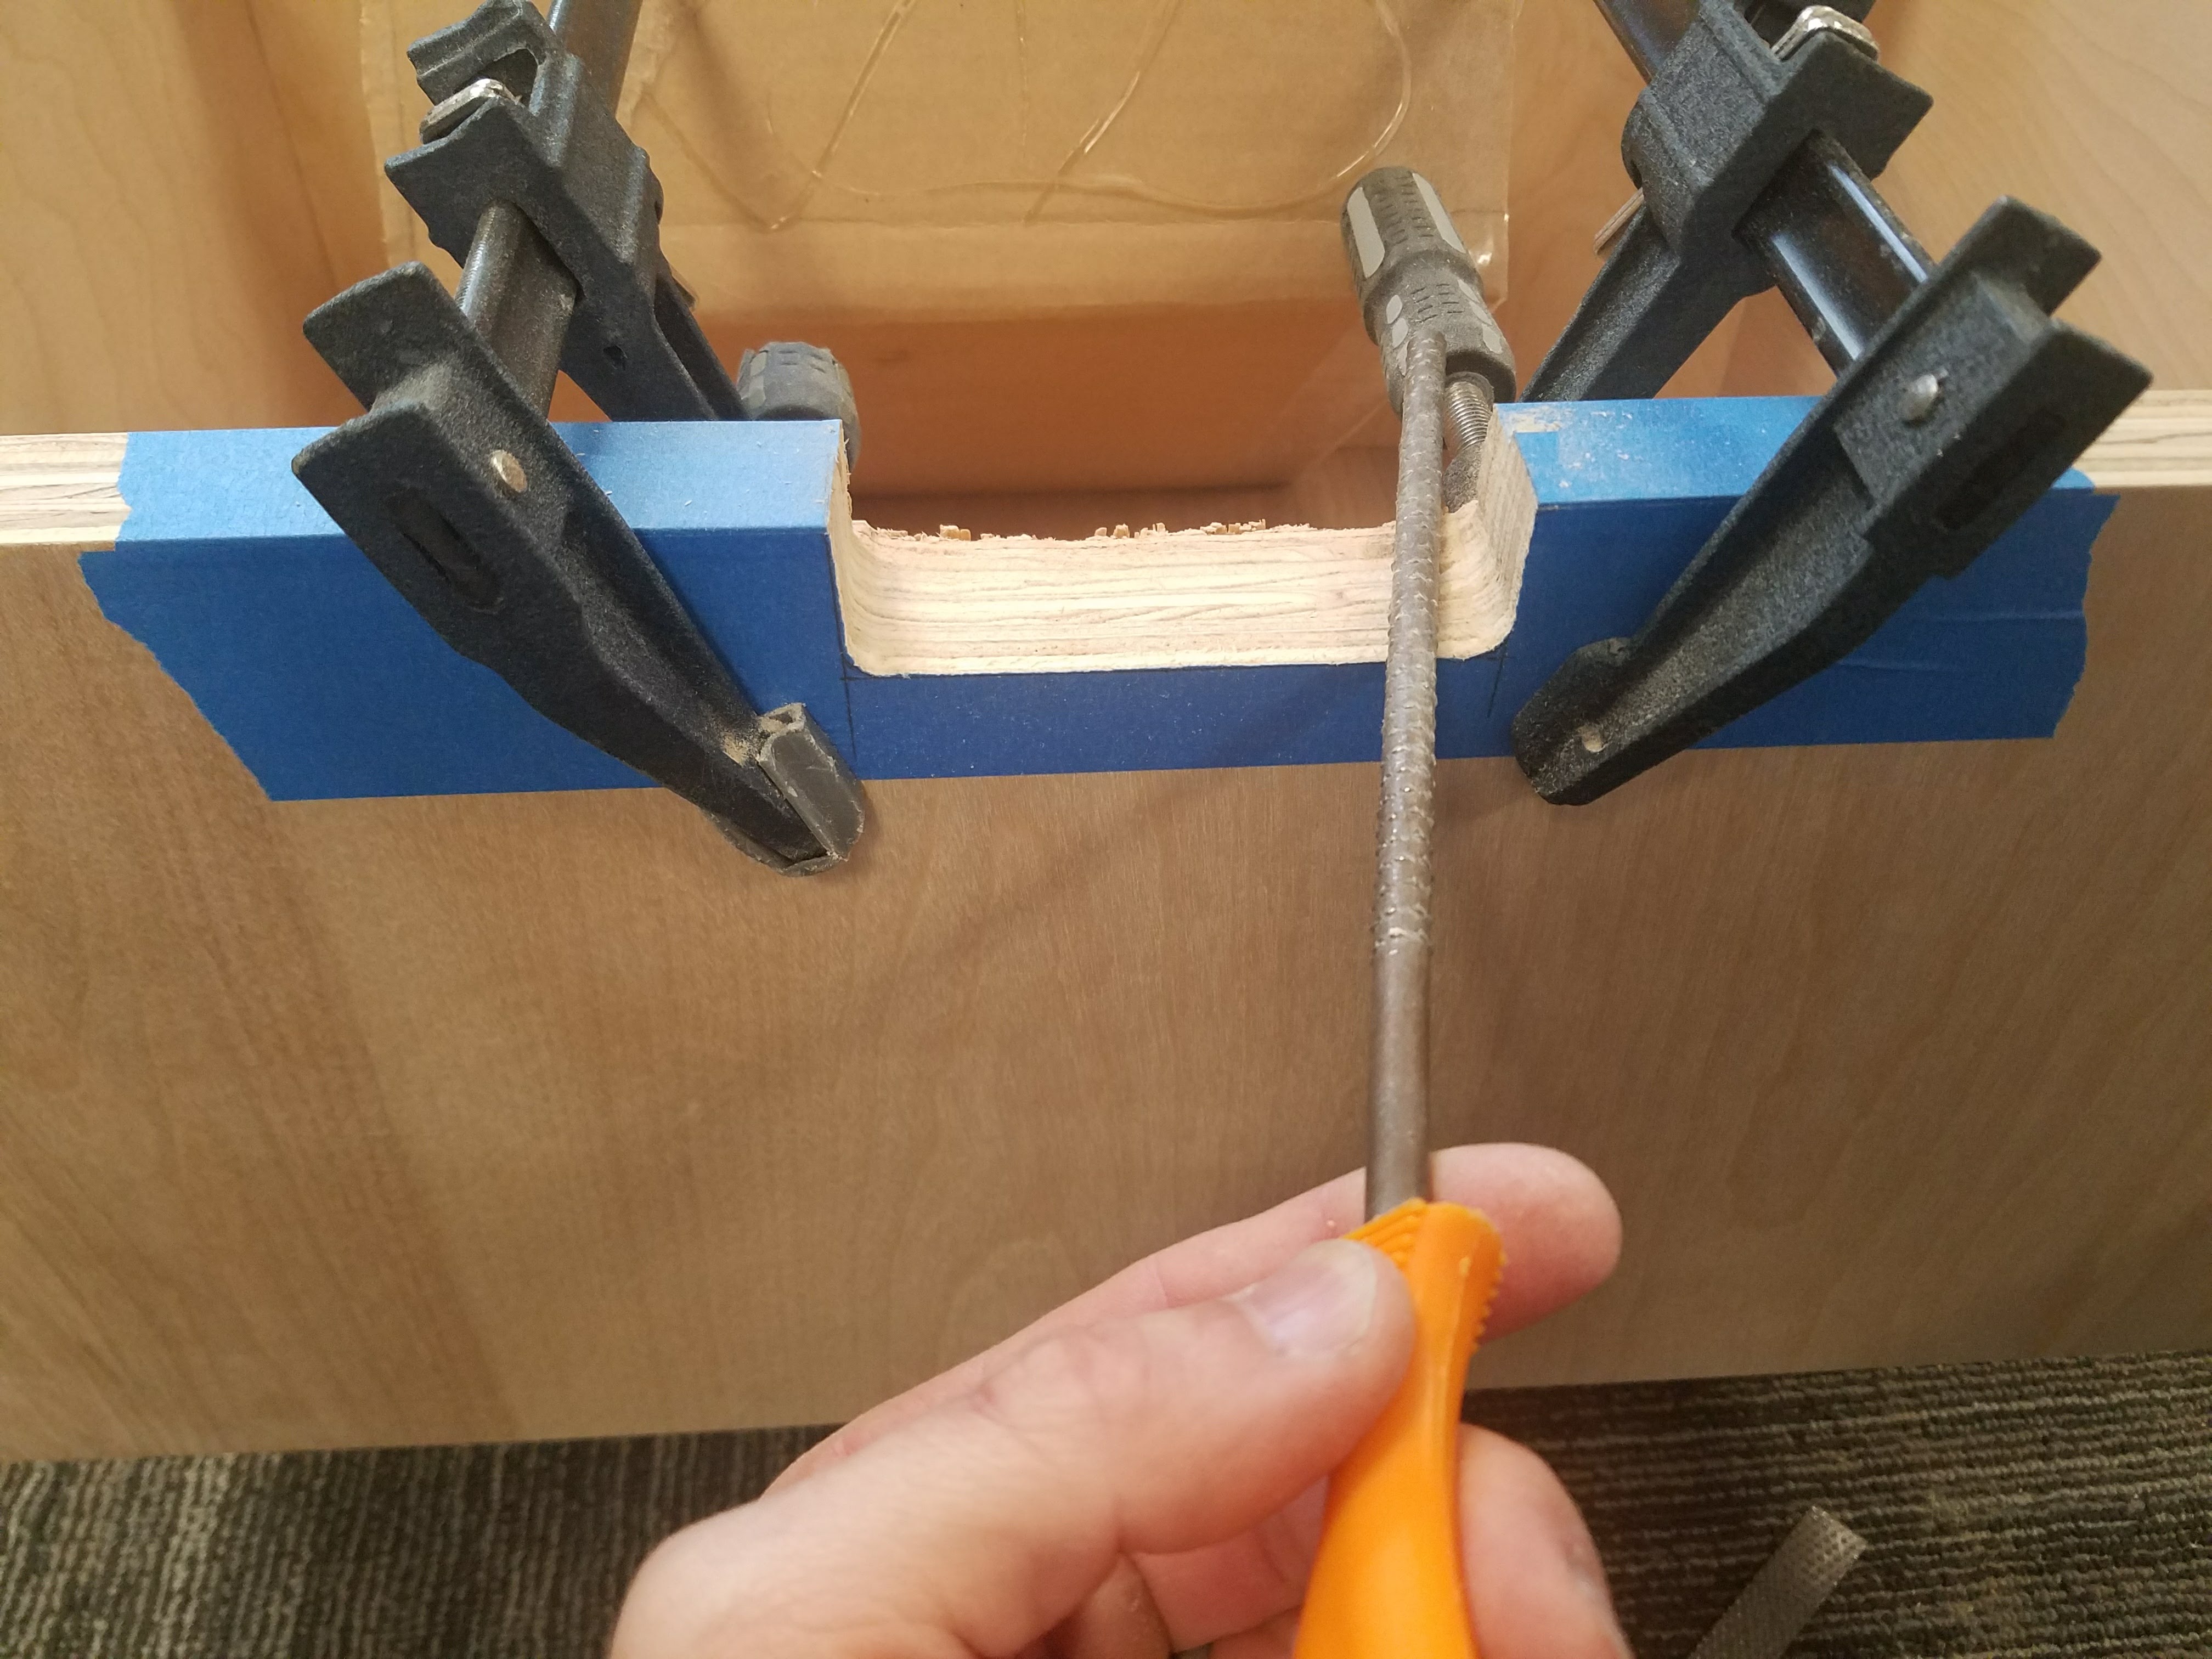
For the drawer handle cutouts I made a template out of a scrap piece of plywood, put blue painter’s tape where the cutout would go to prevent splintering, and clamped the template into place. For the cutting I used a miter saw for the initial vertical cuts and a coping saw to make the rounded corners and cut across the bottom. A round and flat rasp and some sandpaper cleaned up the edges.


Stain and Finish
To match the colors in the building where the bench would be used I picked a grey Minwax stain. To help the stain be more uniform I used Minwax Pre-Stain Wood Conditioner and since I would be applying the finish in the school I used Minwax Polycrylic Water Based Finish. Each got a single coat except the Polycrylic that took three coats with some light 220 grit sanding between each of them.


needs more sanding
You could always use more sanding when it comes to places your posterior rests.