Replacing 1991 Isuzu Trooper Shocks Without Removing the Tires
I have needed to replace my shocks on my 1991 Isuzu Trooper for several weeks now and didn’t get around to it. They have been making a hissing sound when I go over bumps and the ride has gotten noticeably worse. If you aren’t quite sure how shock absorbers affect your car’s ride, this video from the 1930’s does a really good job of breaking it down:
Then I helped a friend replace most of his suspension on his VW GTI and that gave me the boost to finally make it happen! Since I had just put my jack away, I decided to see if I could do the work with the tires still on.

Parts and Tools
All that is need are
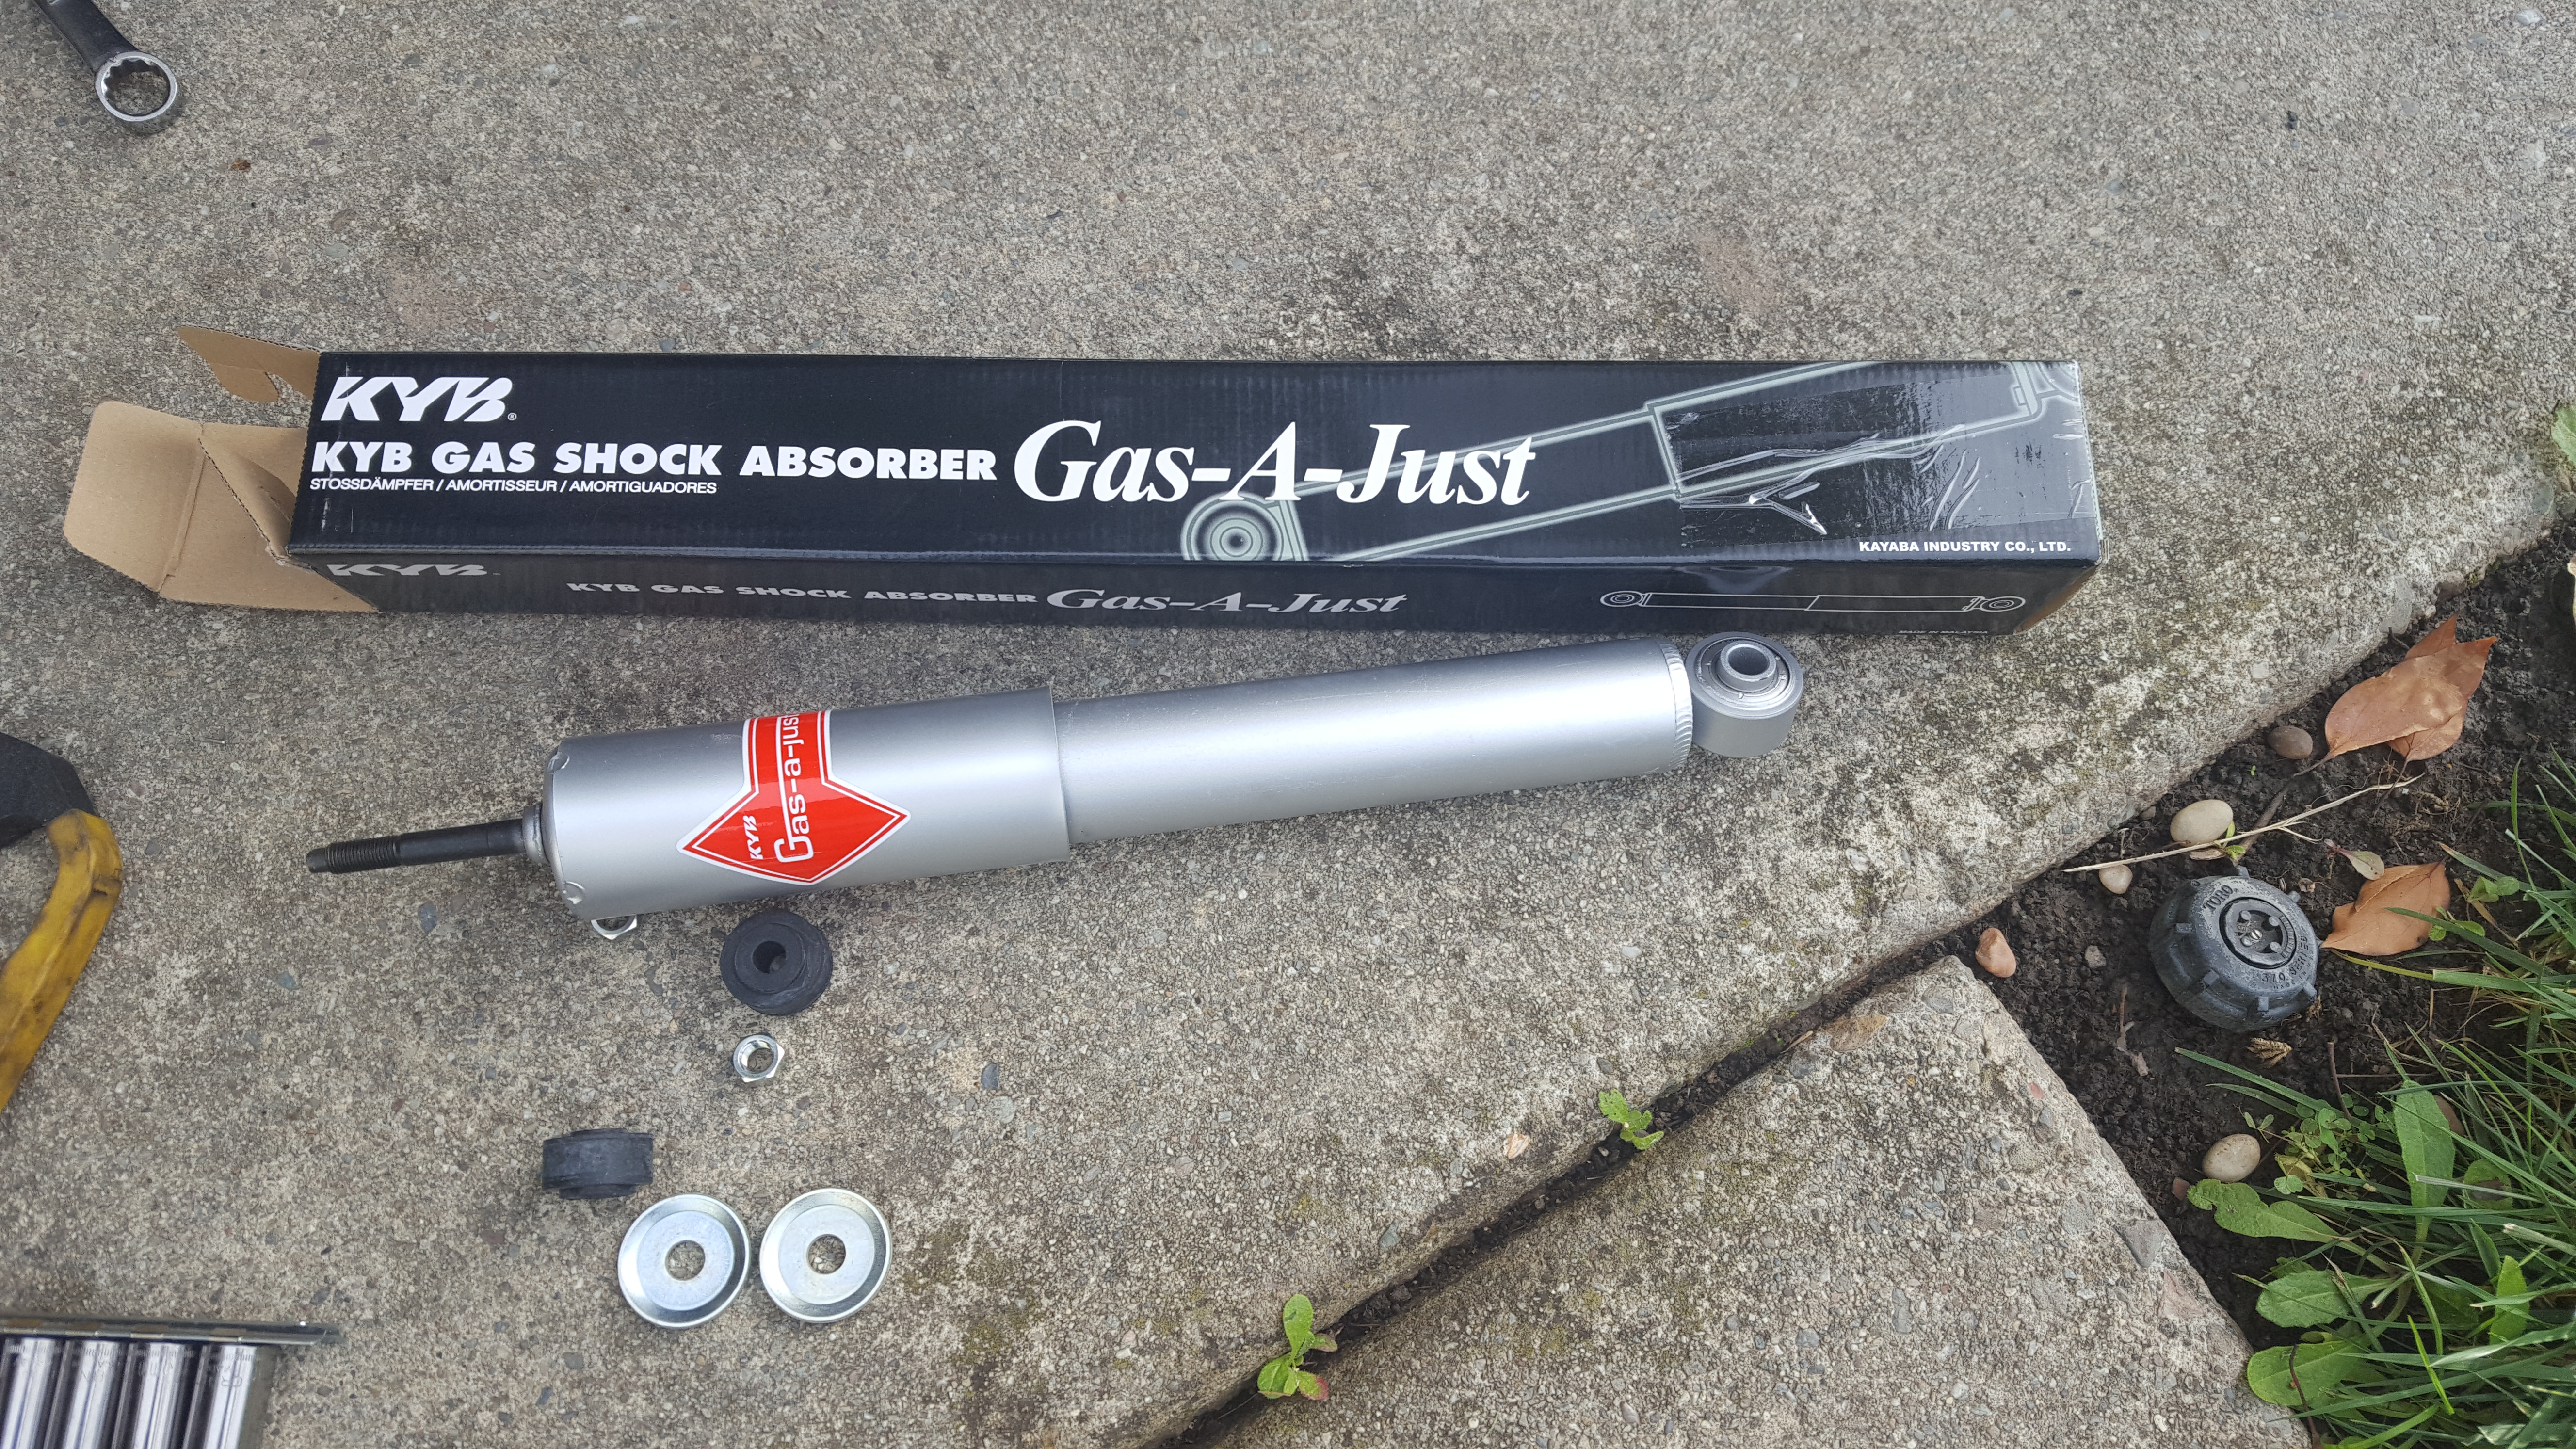
- New shocks ($65 shipped from Rockauto.com)
- Vise grips
- 14mm wrench (I used an open-ended ratchet, but that’s not needed)
- 17mm wrench
- 17mm socket

Removal
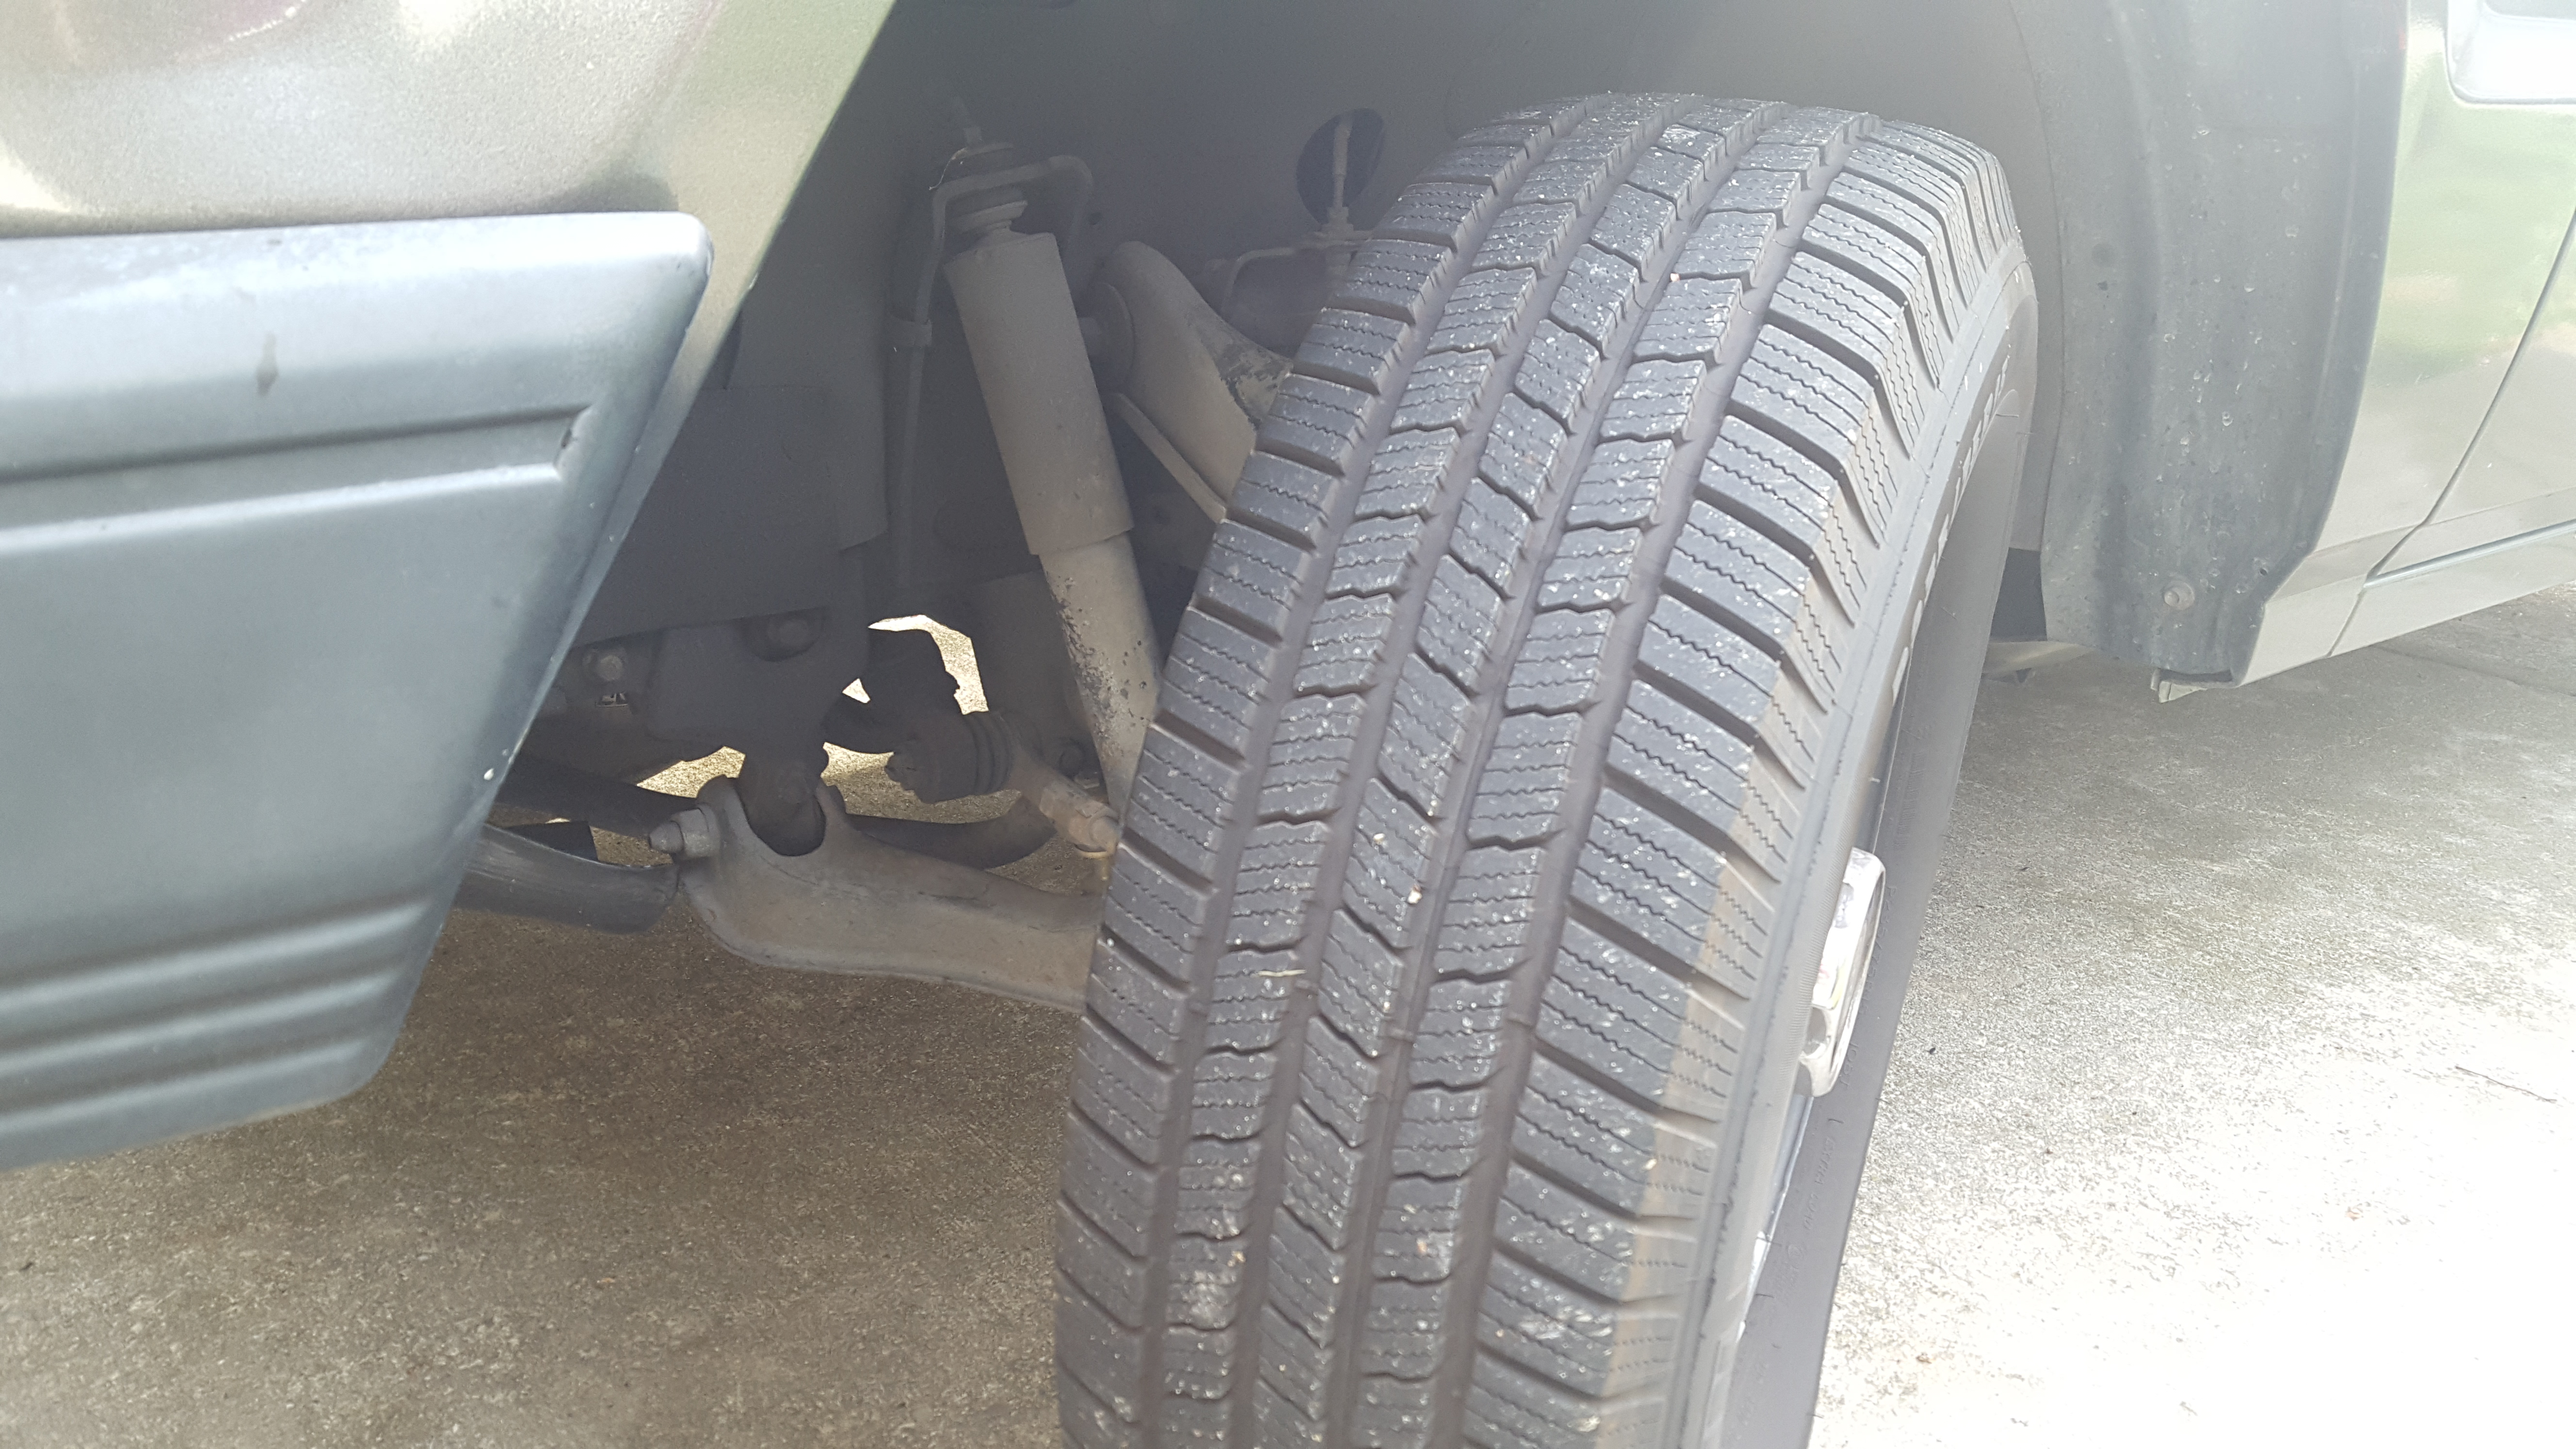
I found that I had to turn the wheel a few times during the removal and installation to get enough clear access to the shock absorber. Starting on the left side, I turned the wheel to the left:
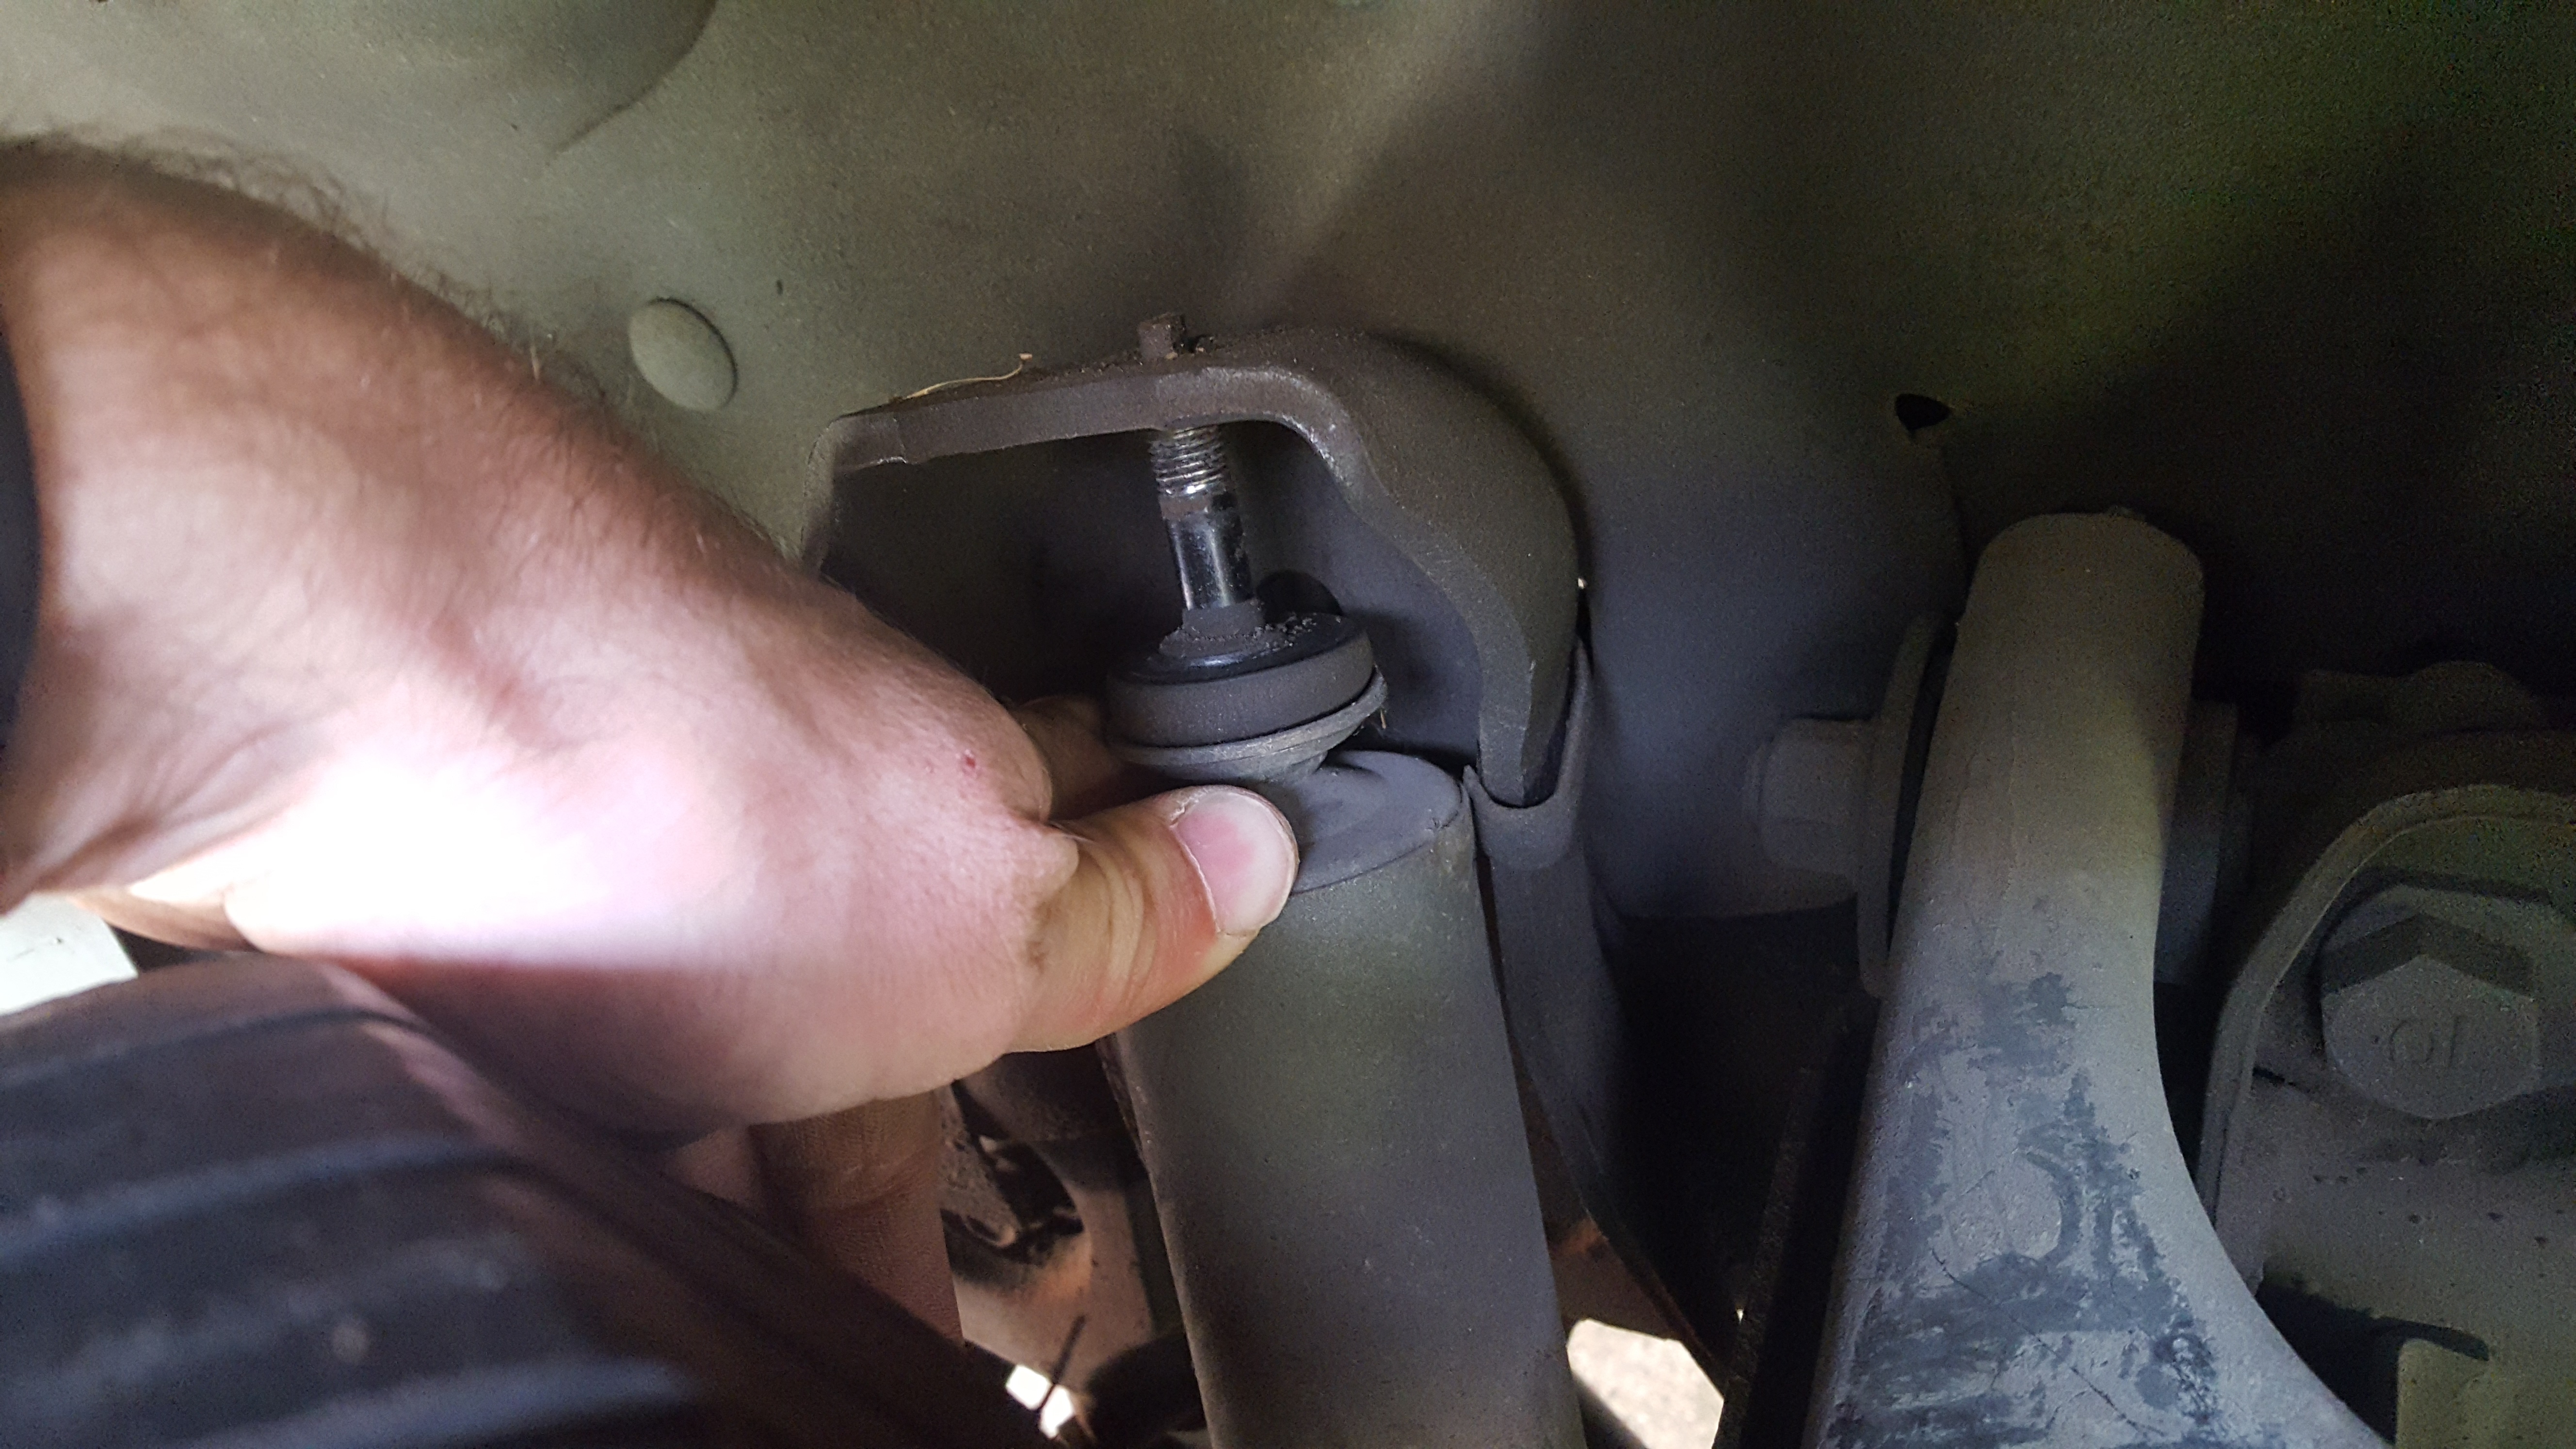
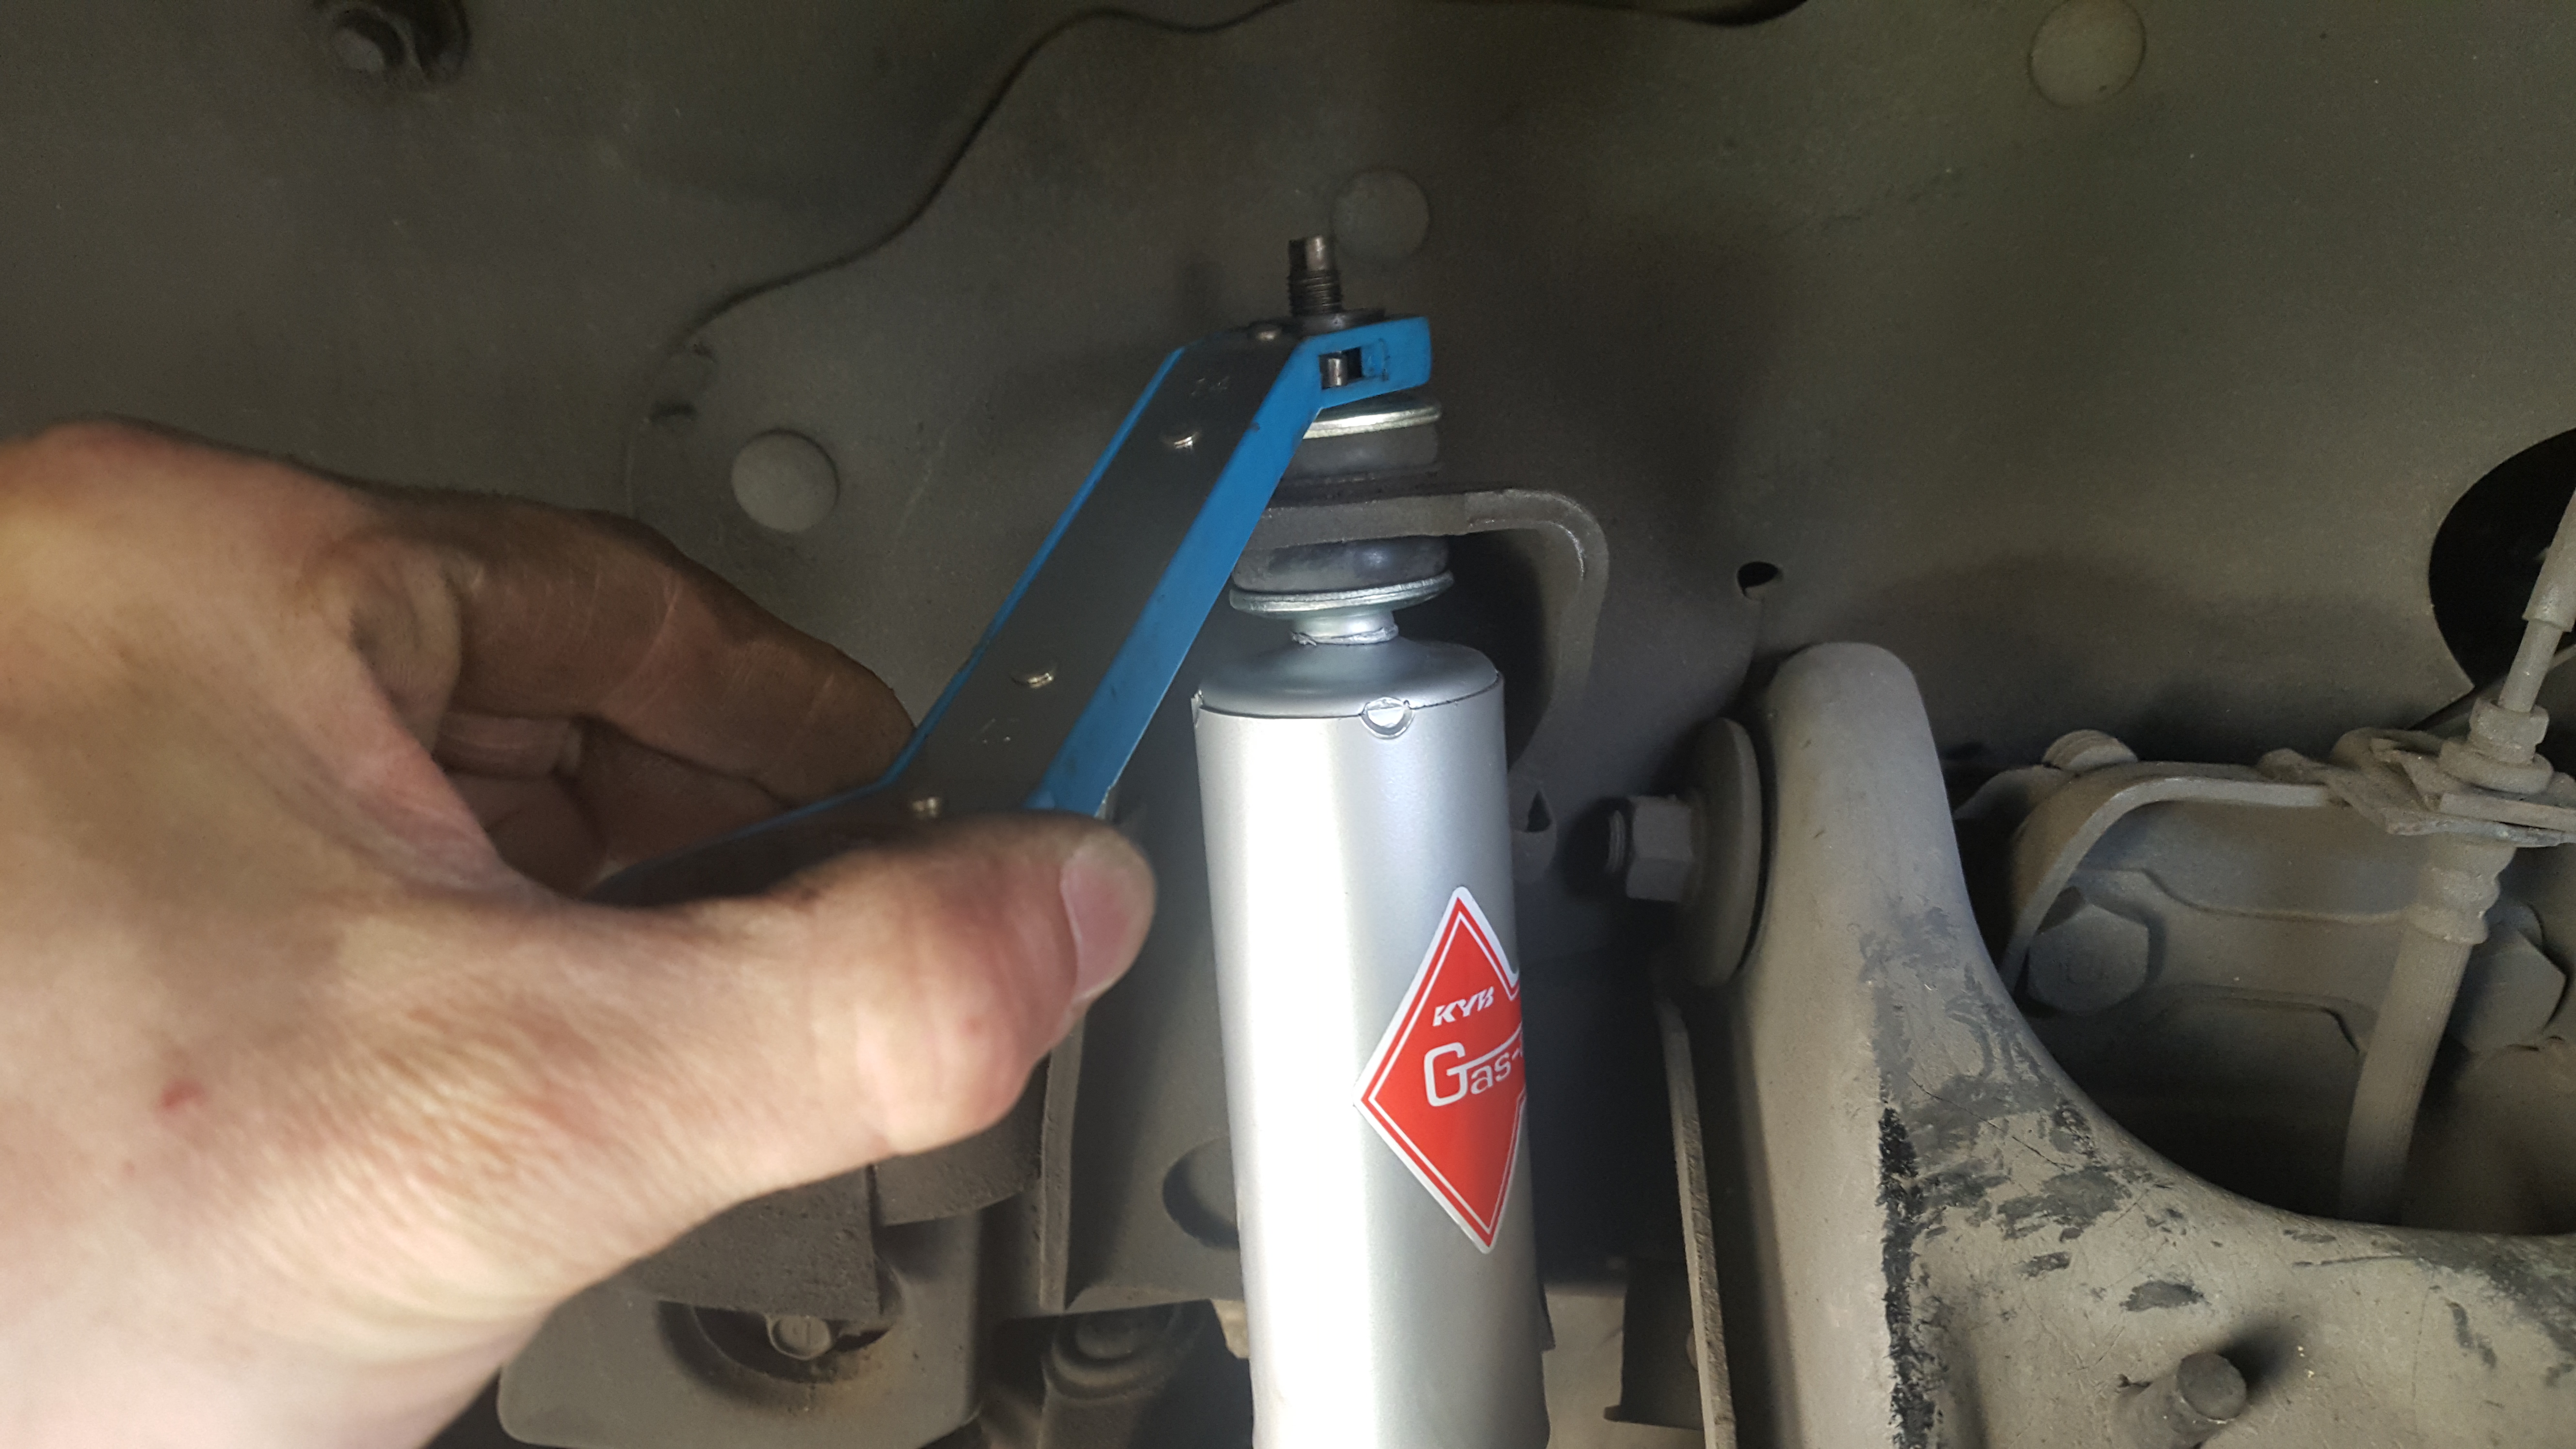
Then clamped the vise grips to the top of the stem to keep the shock’s upper body from rotating and used the 14mm wrench to remove the bolt holding it from the top:
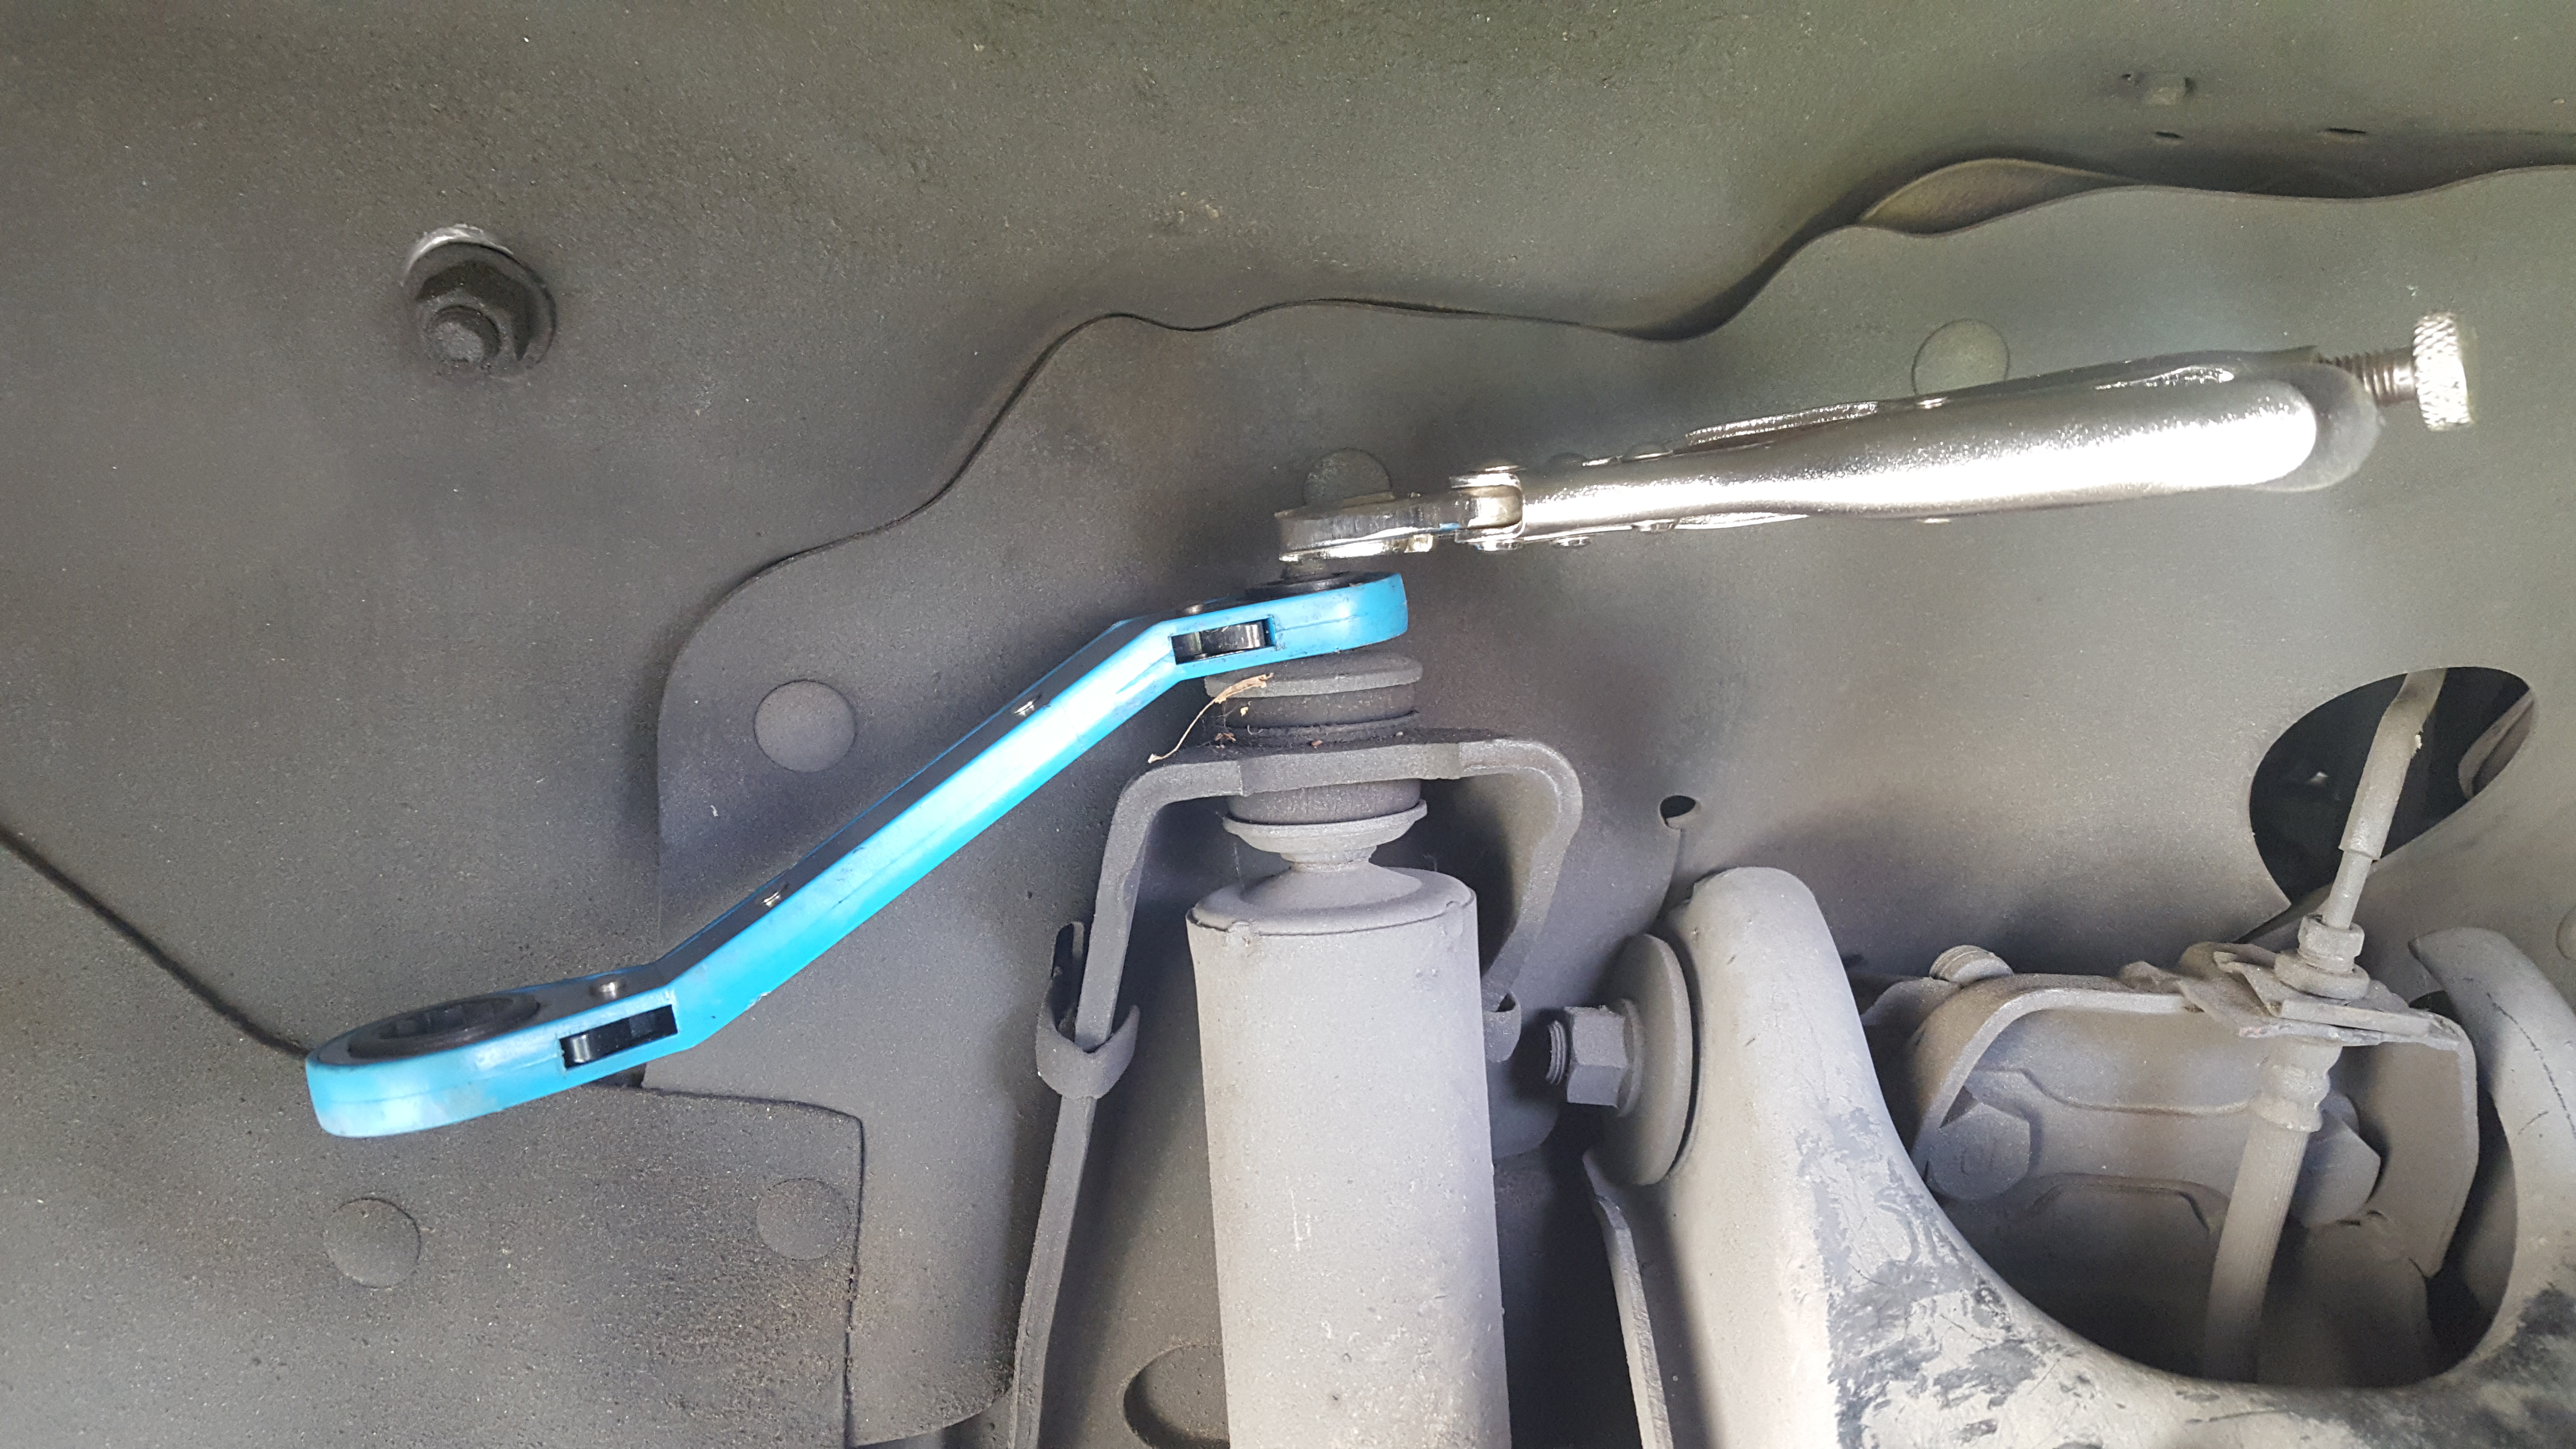
Towards the end of the threads, the vise grip gets in the way and needs to be taken off The upper body of the shock can be held with your hand now and the nut is fully removed:

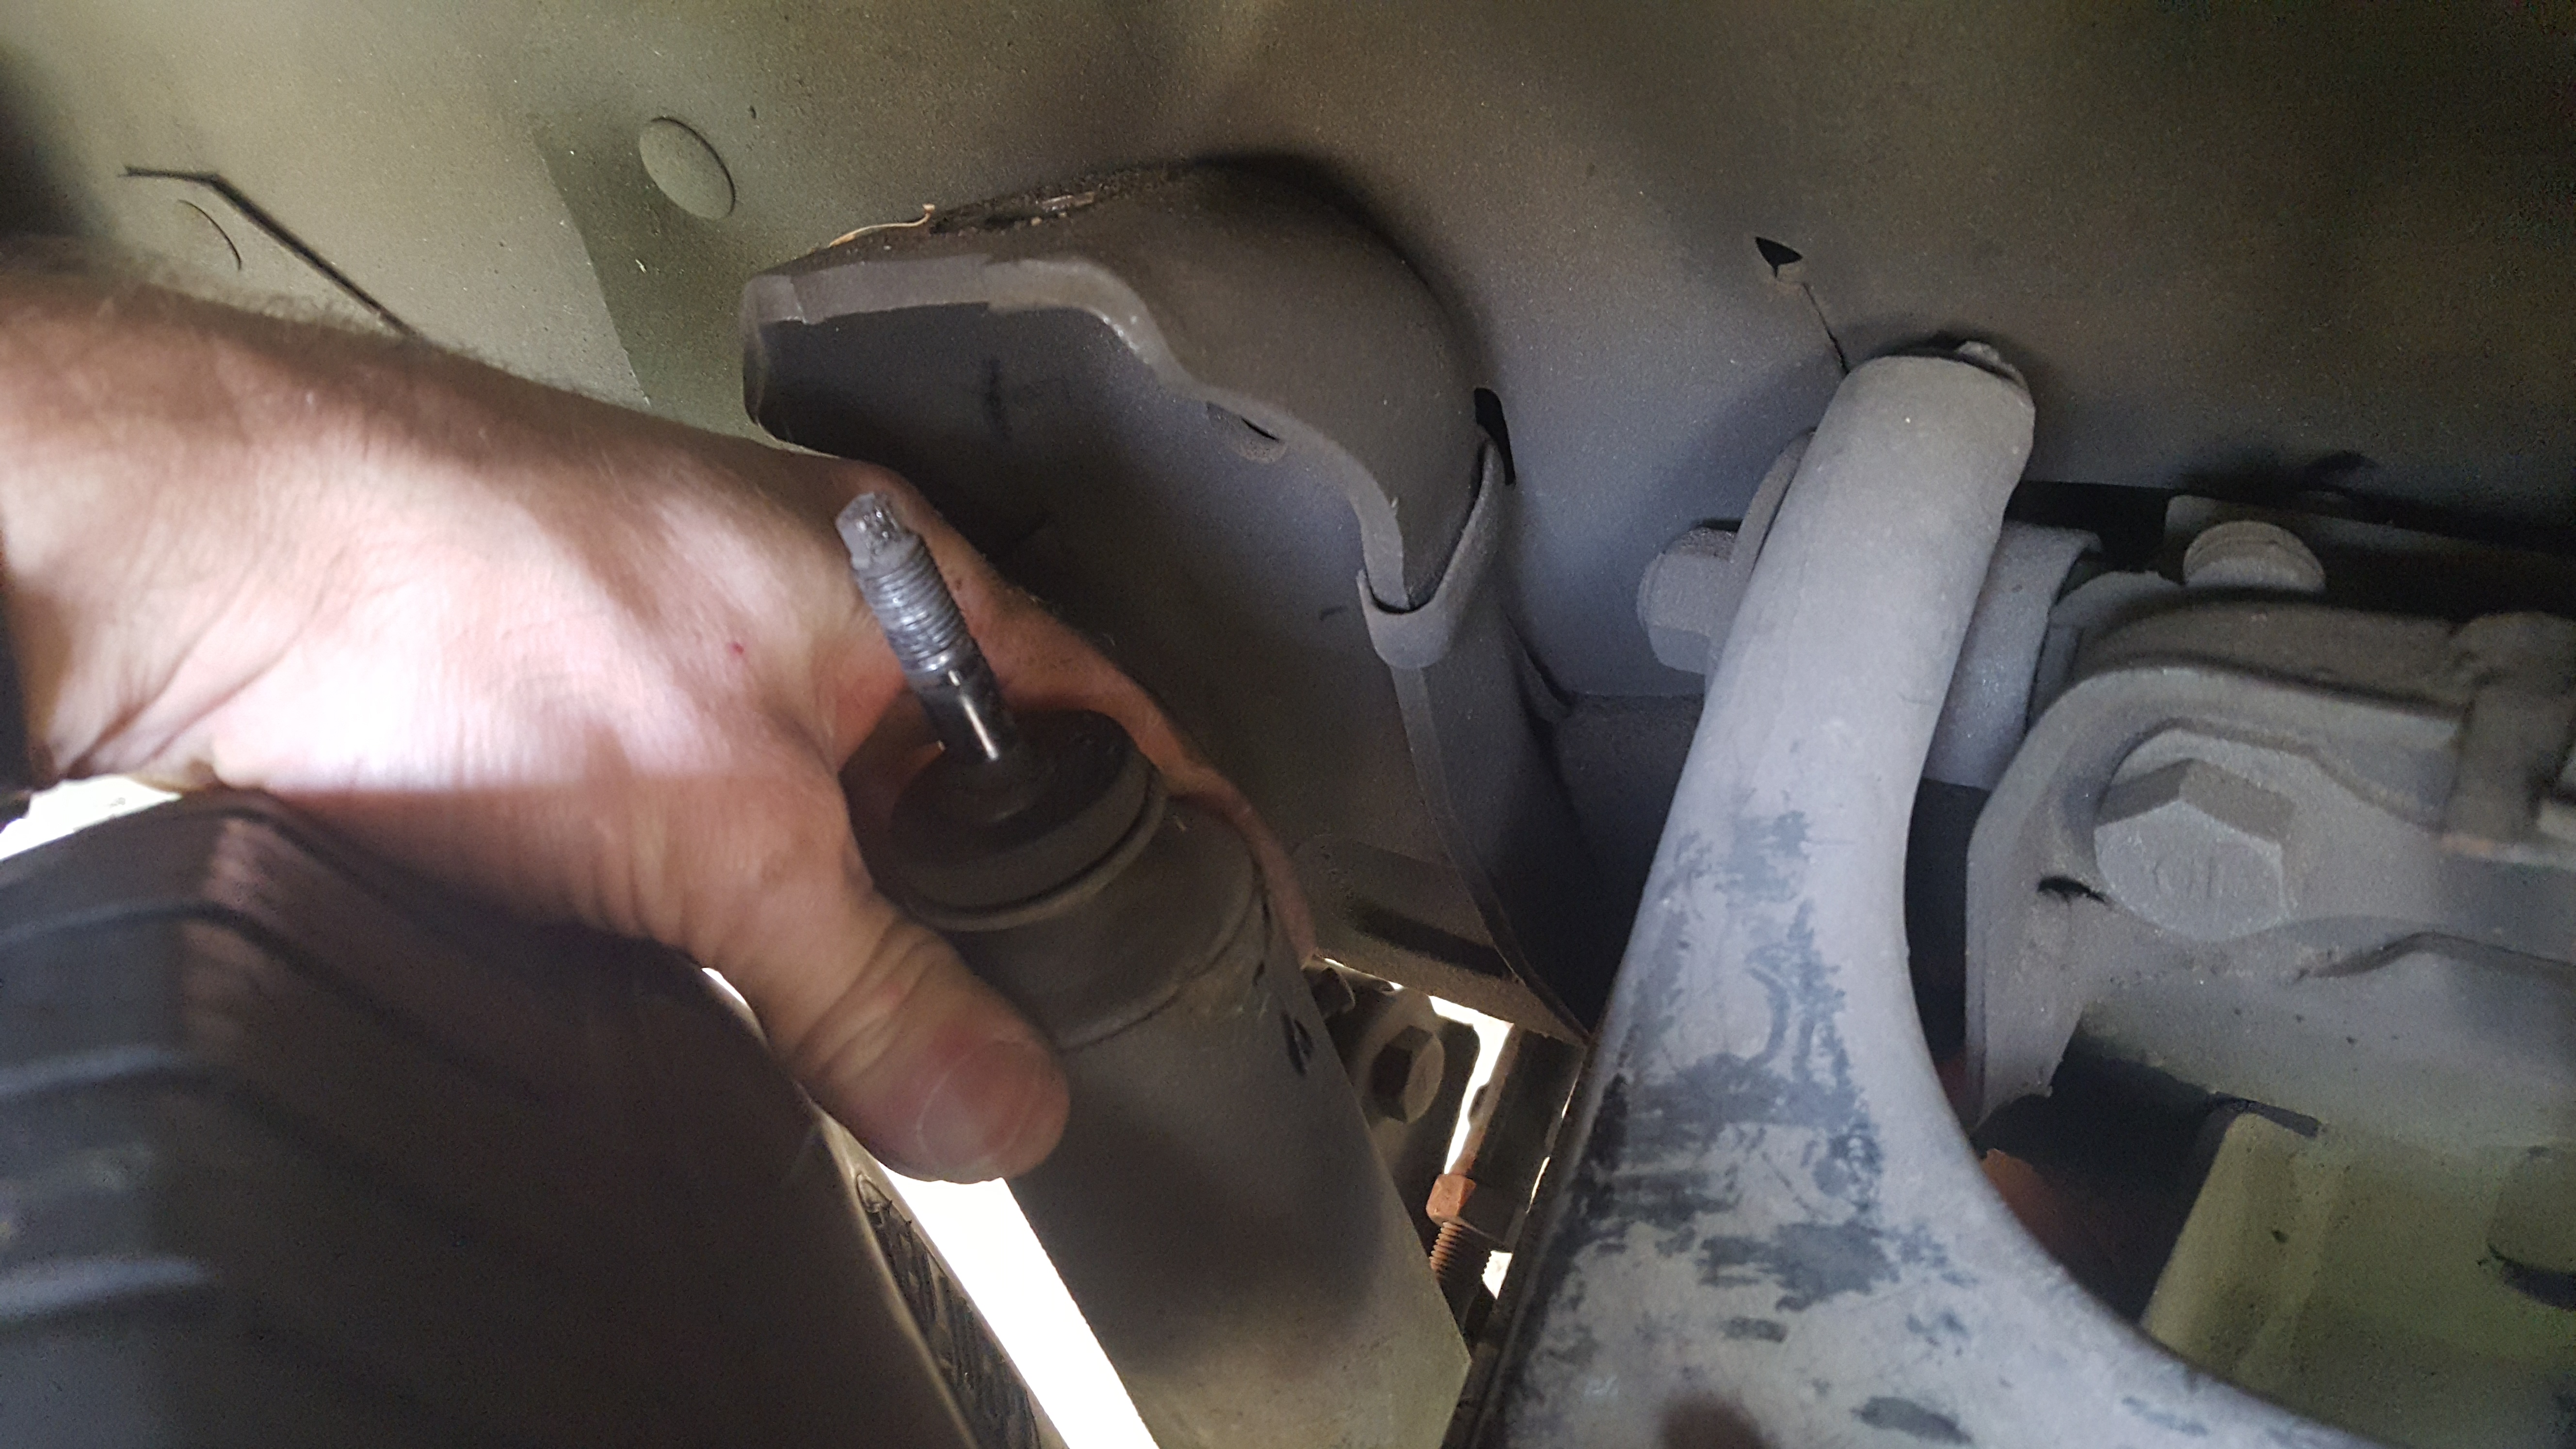
Make sure to grab the bushings and washers since you’ll need one or more of them depending on the hardware that comes with the new shock:

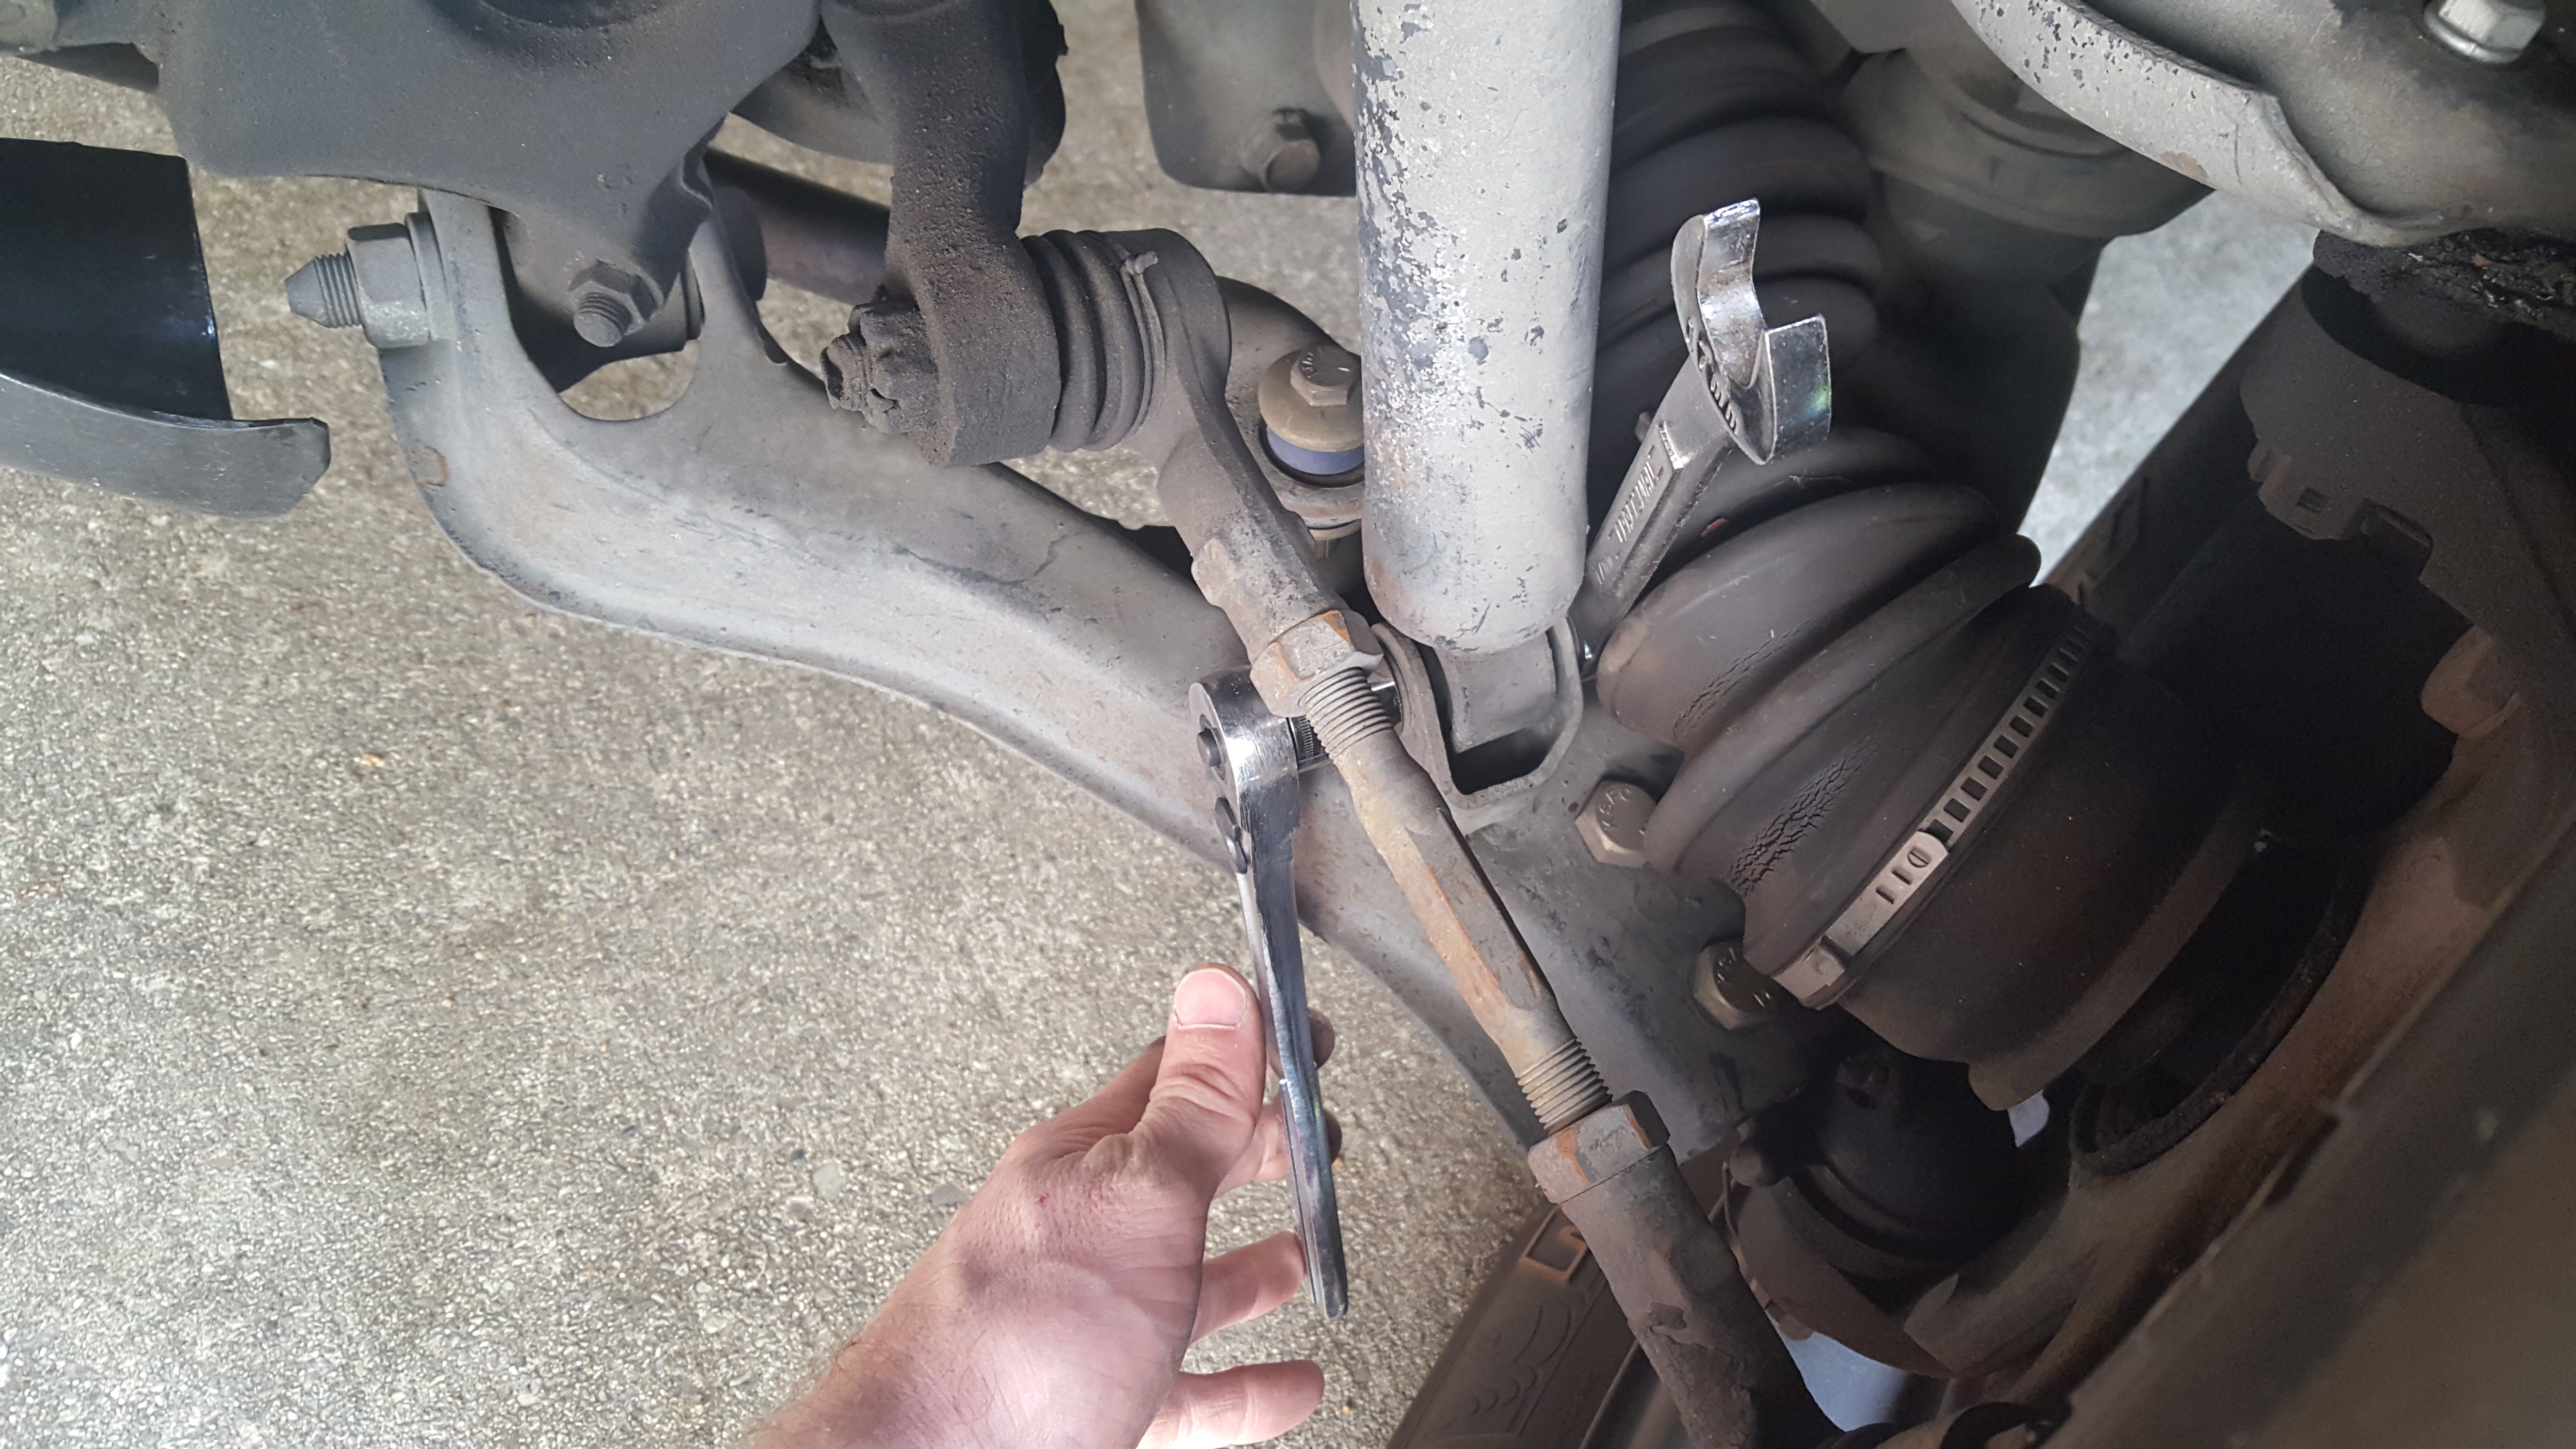
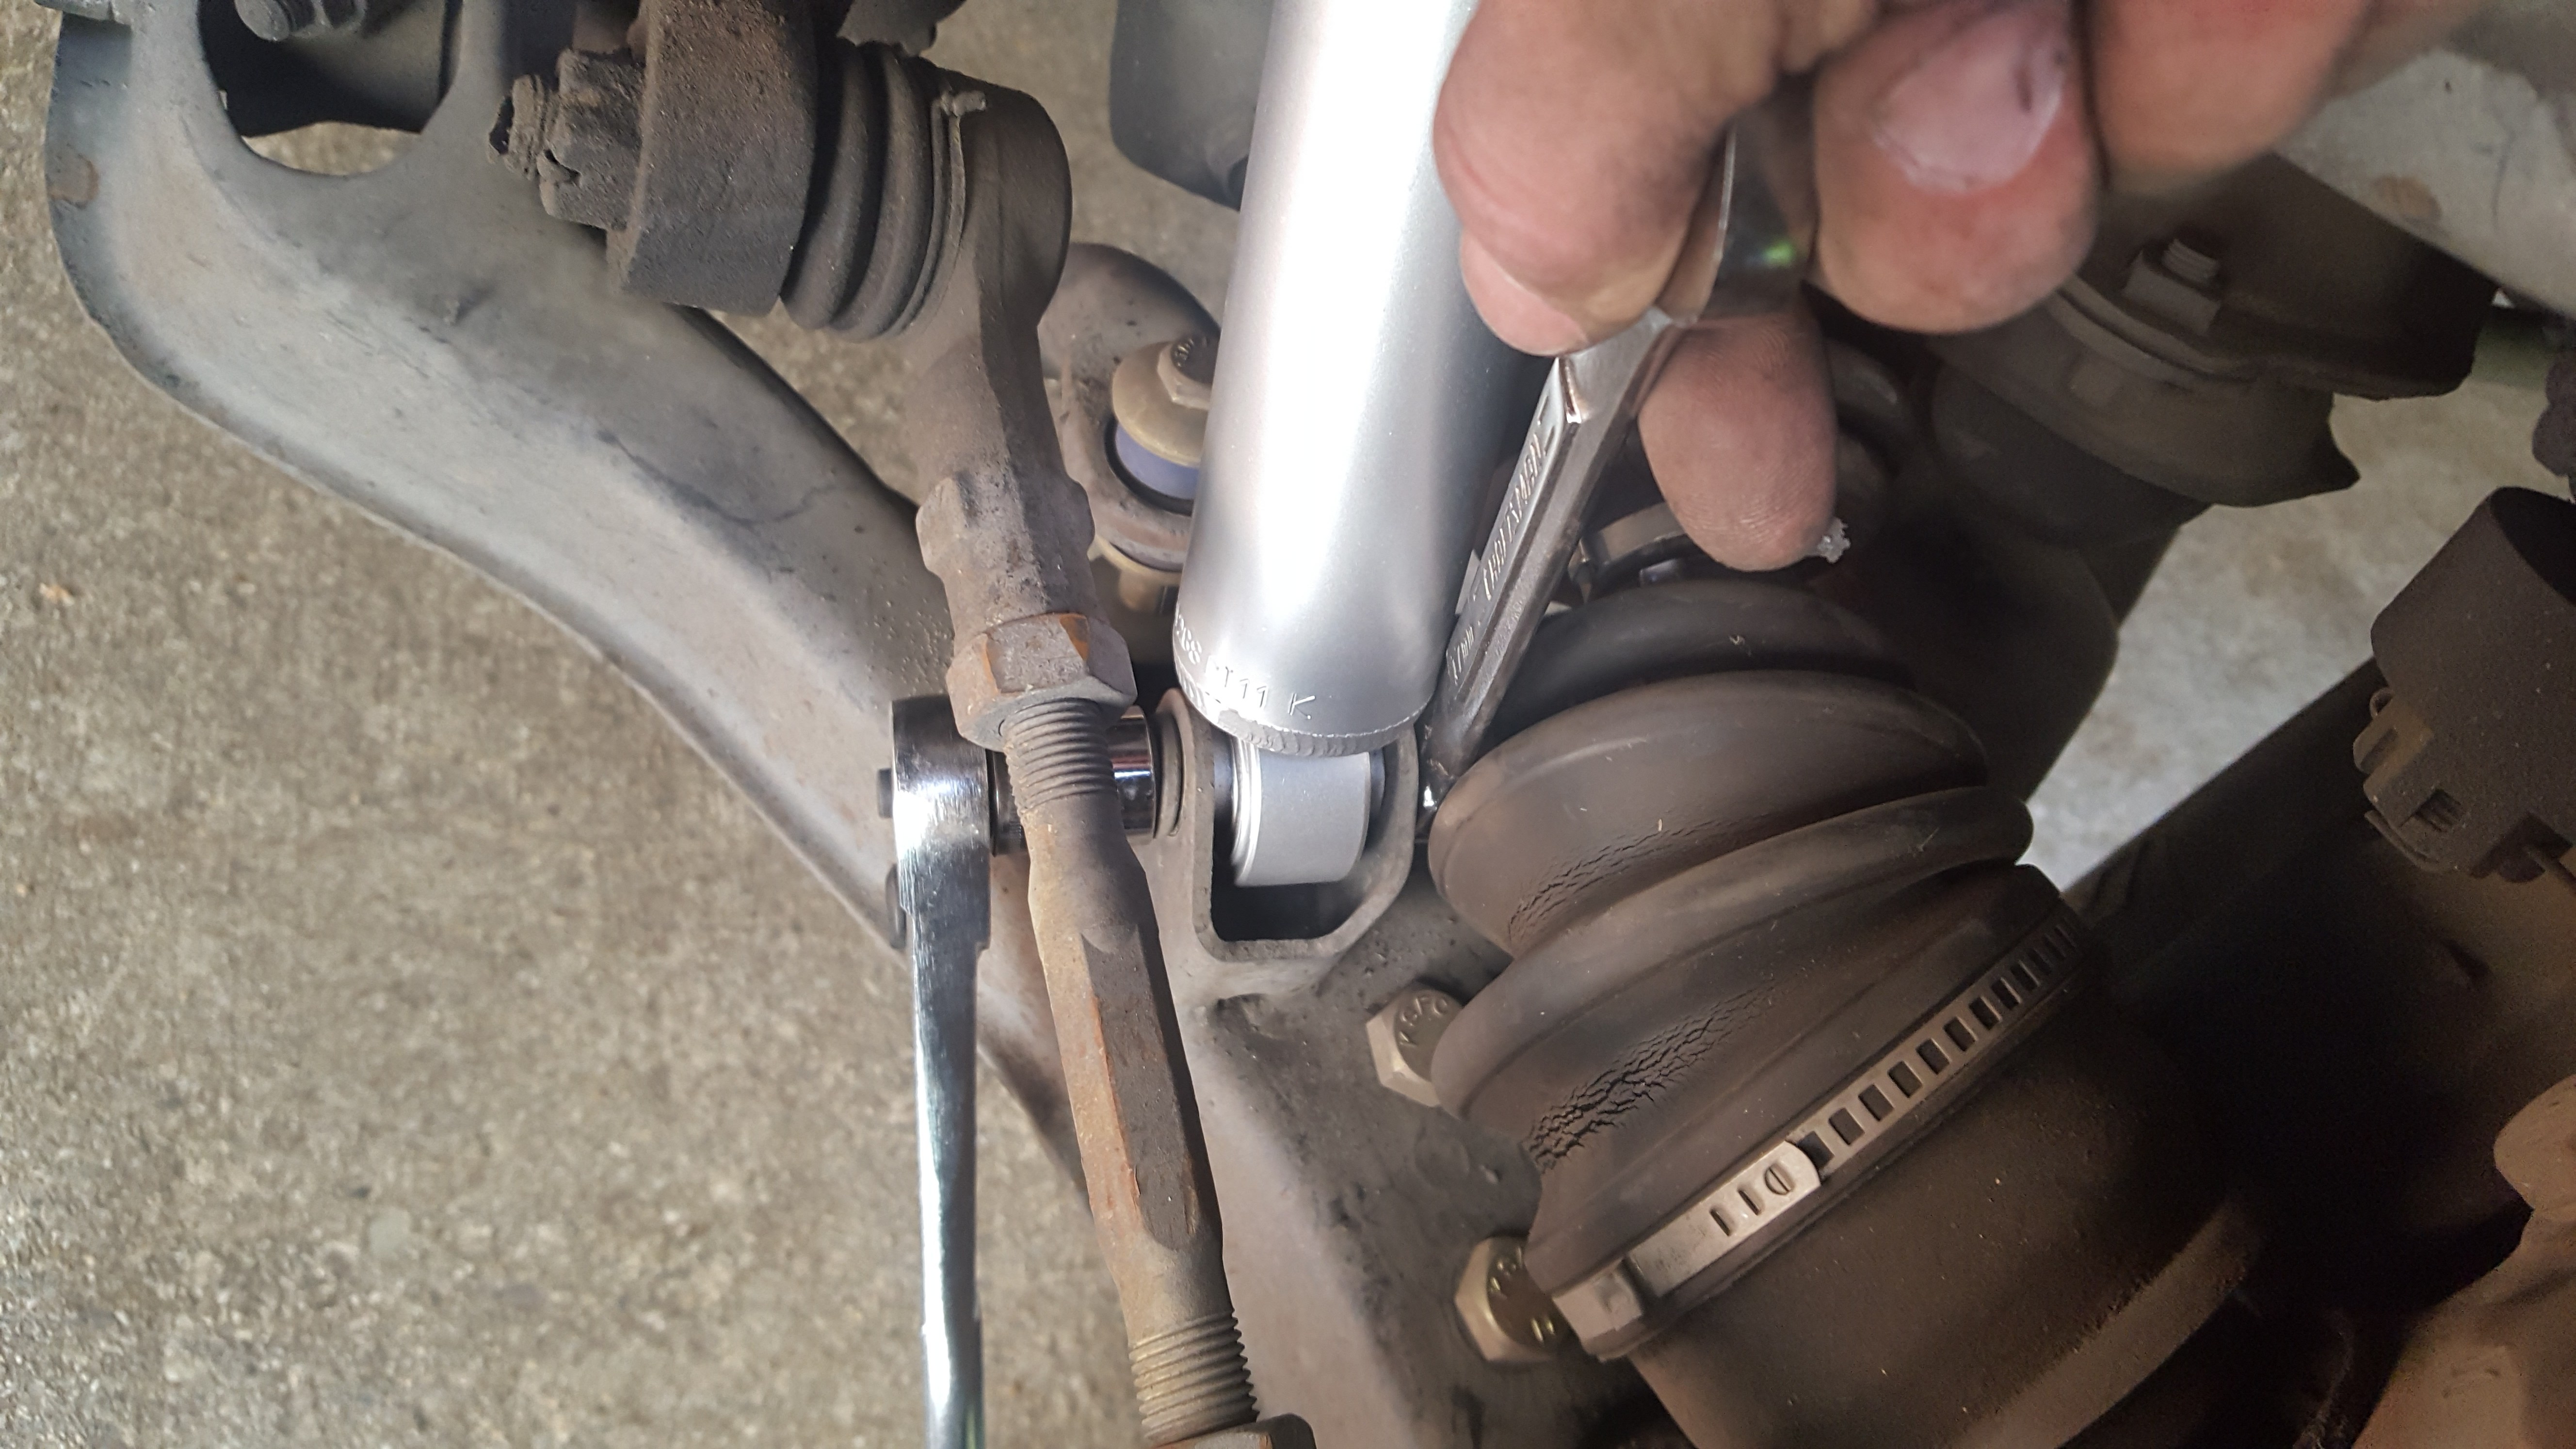
Next, hold the lower bolt with the 17mm wrench and remove the nut with the 17mm socket:
To pull the bolt out all the way, I had to turn the wheel to the right since it was running into the half shaft boot:


With the bolt out, compress the shock to pull the stem out and then remove the whole assembly:

Installation
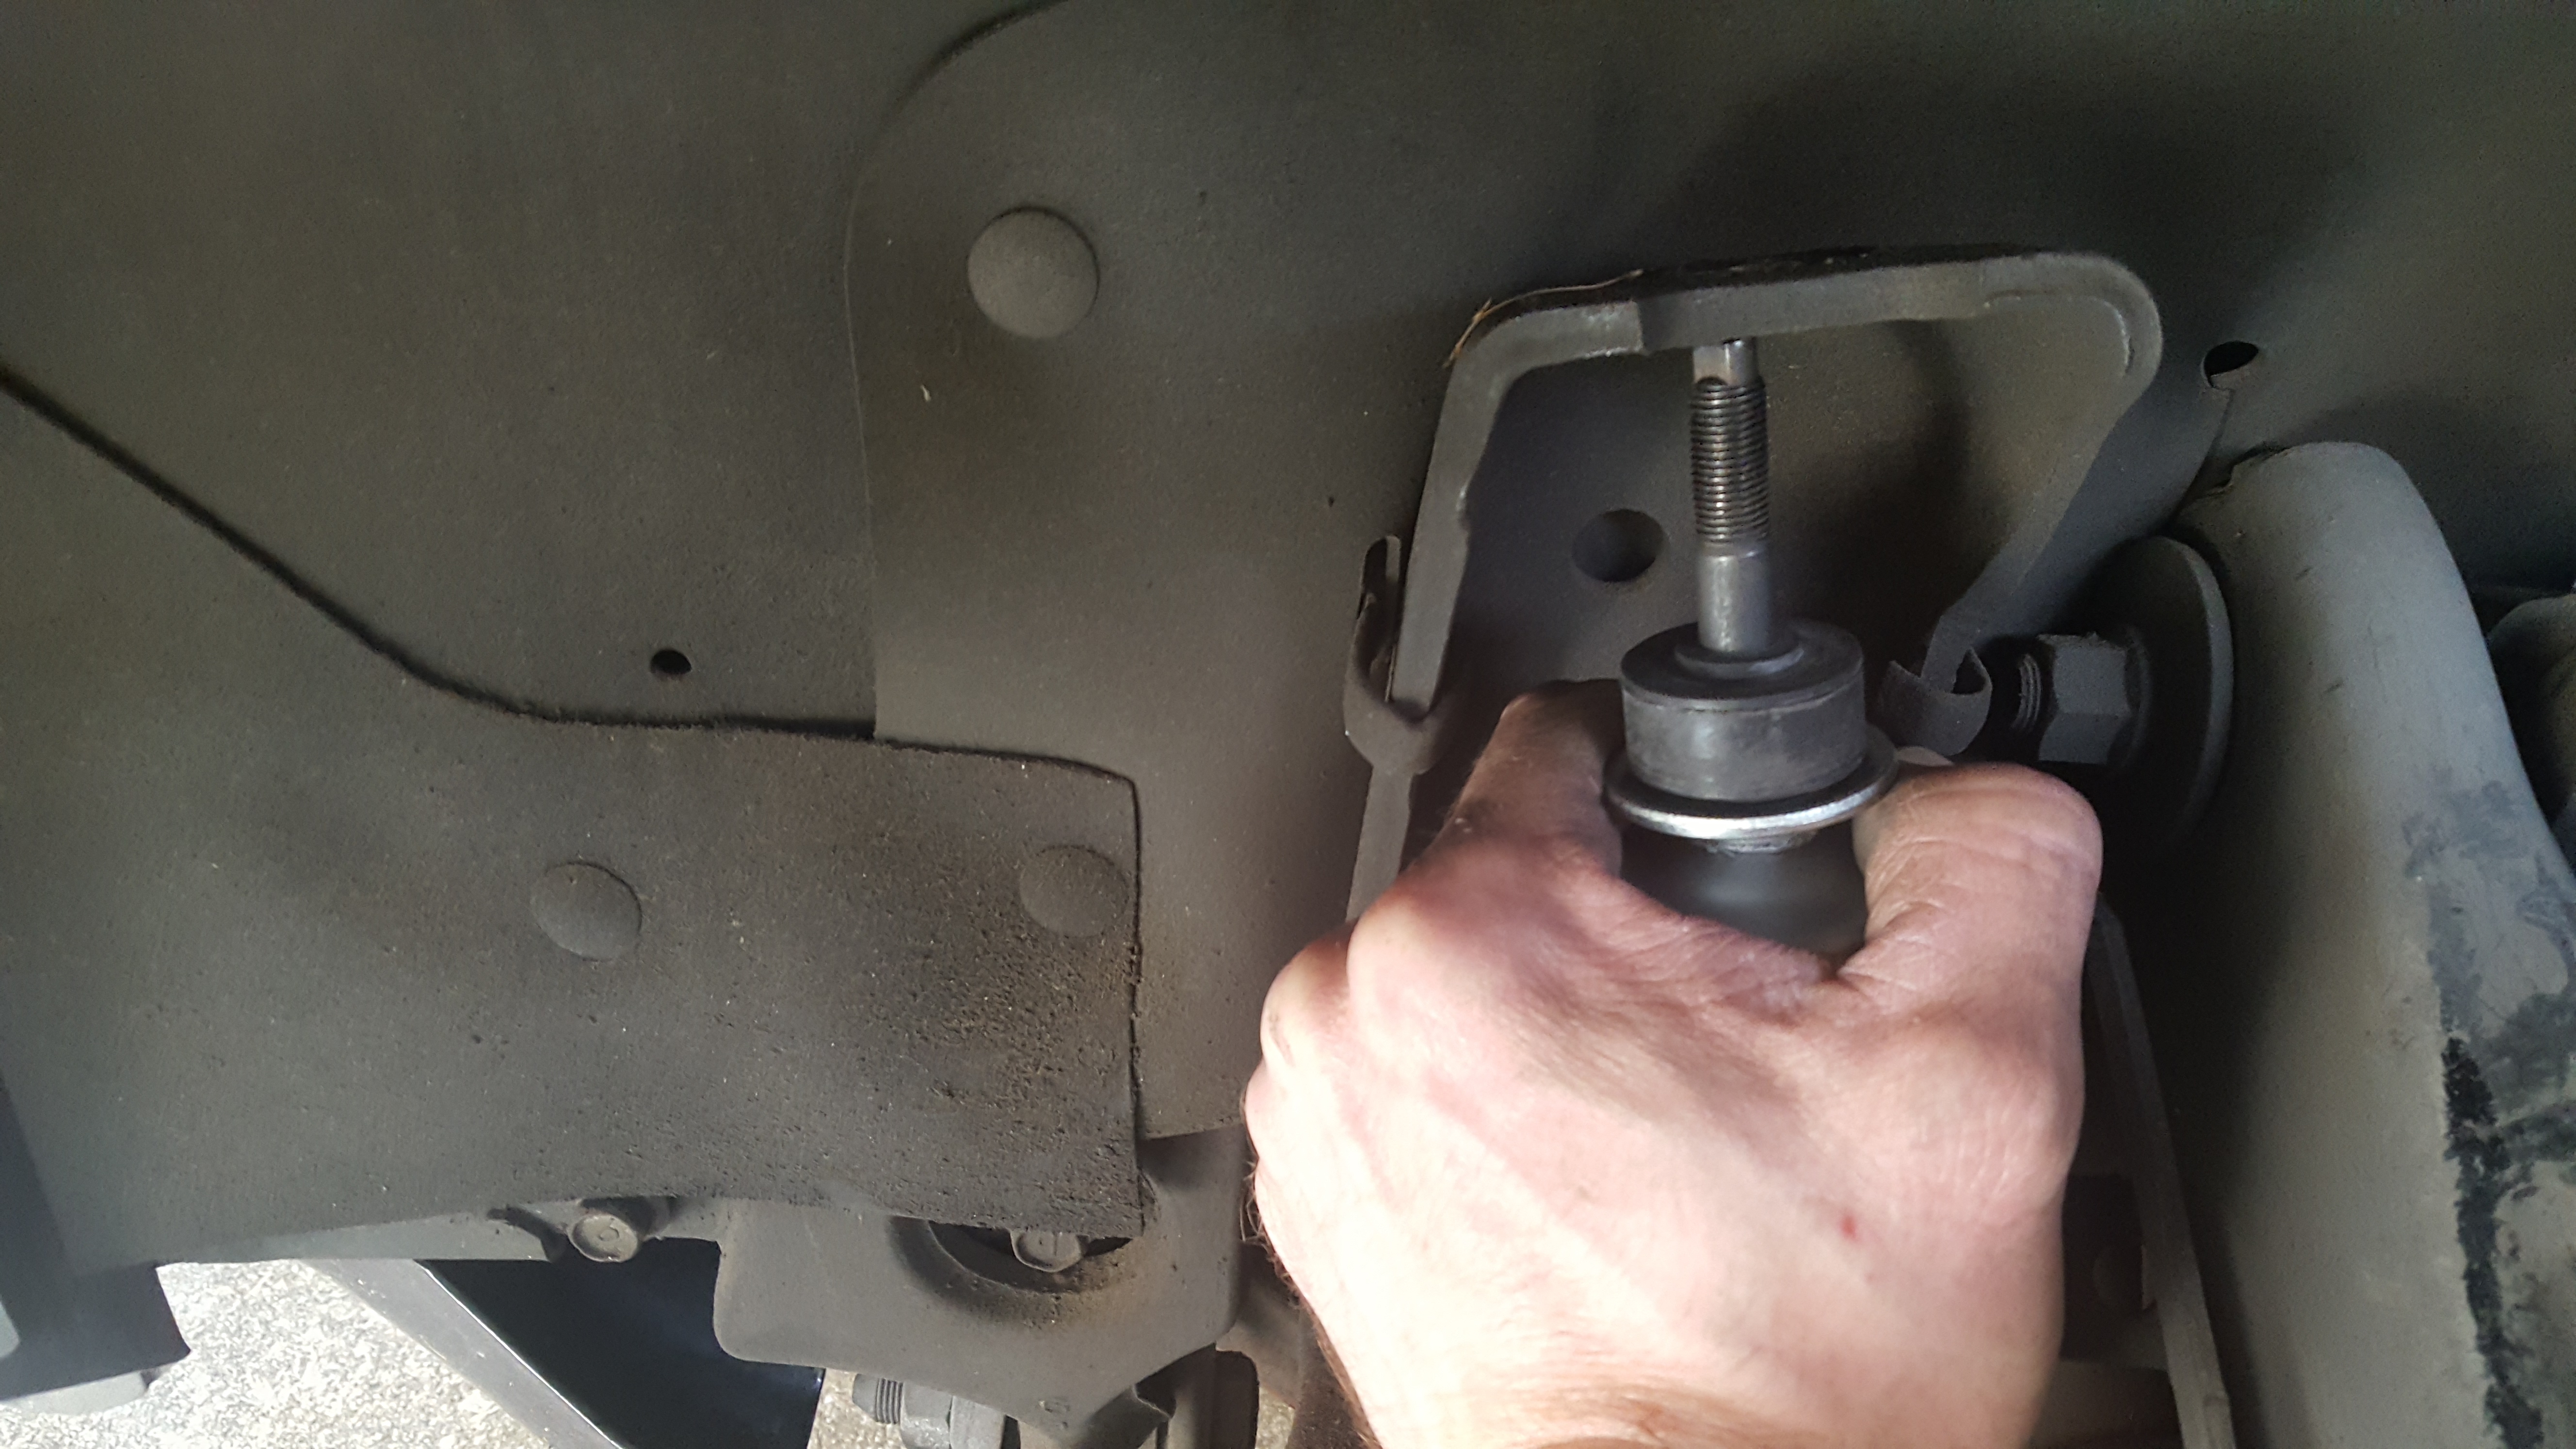
My new shocks came with all new hardware for the top except it was missing one of the spacers that was thinner than the rest. Some in the past has come with only some of the lower mounting hardware too, so it seems really hit-or-miss as to what you get from each manufacturer. I put the new stuff in the correct order and slipped the first spacer and bushing over the stem since it fits underneath the upper shock mount:


Then the new shock can be inserted into the lower mount, the bolt pushed through it, and the nut and washer hand tightened to hold it in place:


This set of shocks didn’t come with straps hold them compressed and so I had to push it down with my hands. The angle is odd and you can really tell the difference between the new and old parts since I only needed one hand to get the old ones out. The new ones needed my whole body contorted to get it down:
Once the stem is in place, the spacers and bushings are put on and held down with the new nut. I checked the manual and it lists 14 foot pounds for the torque setting. Since the torque wrench wouldn’t fit in the small space, I tightened it with the normal wrench. When the bushings were tight enough that it needed holding to keep it in place, I gave it another 1/2 turn. That felt like 14 ft-lbs:


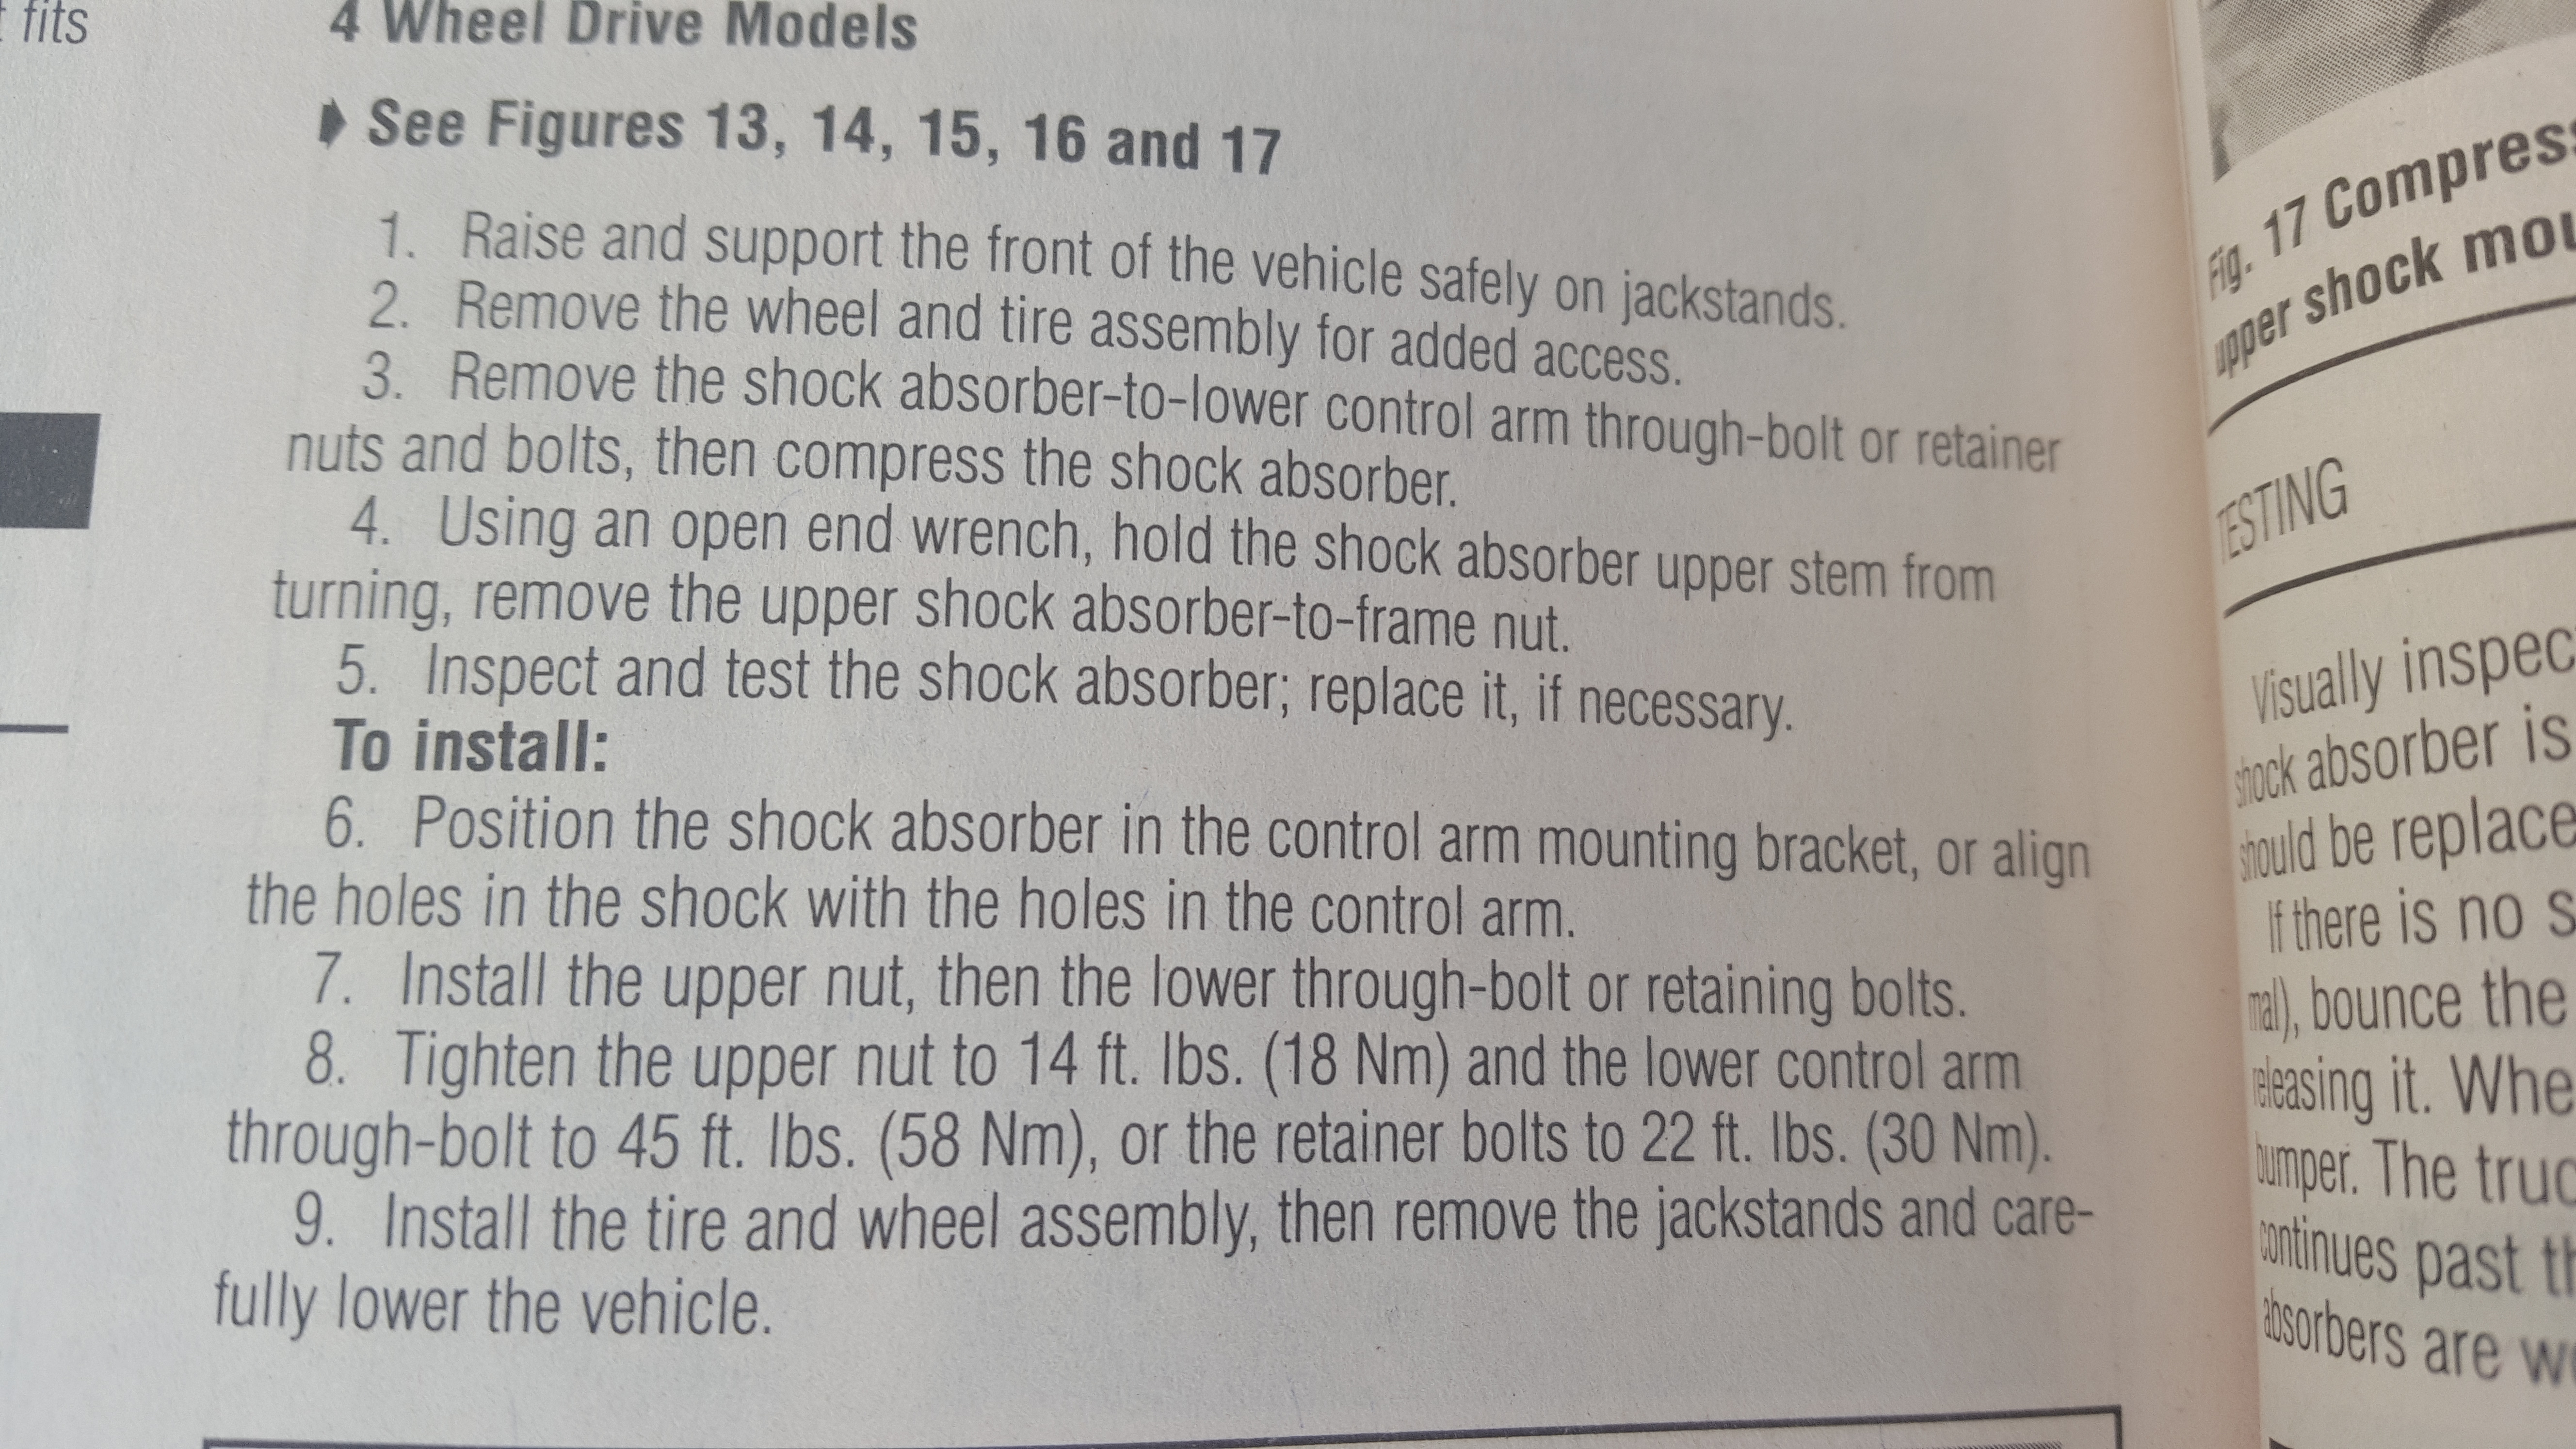
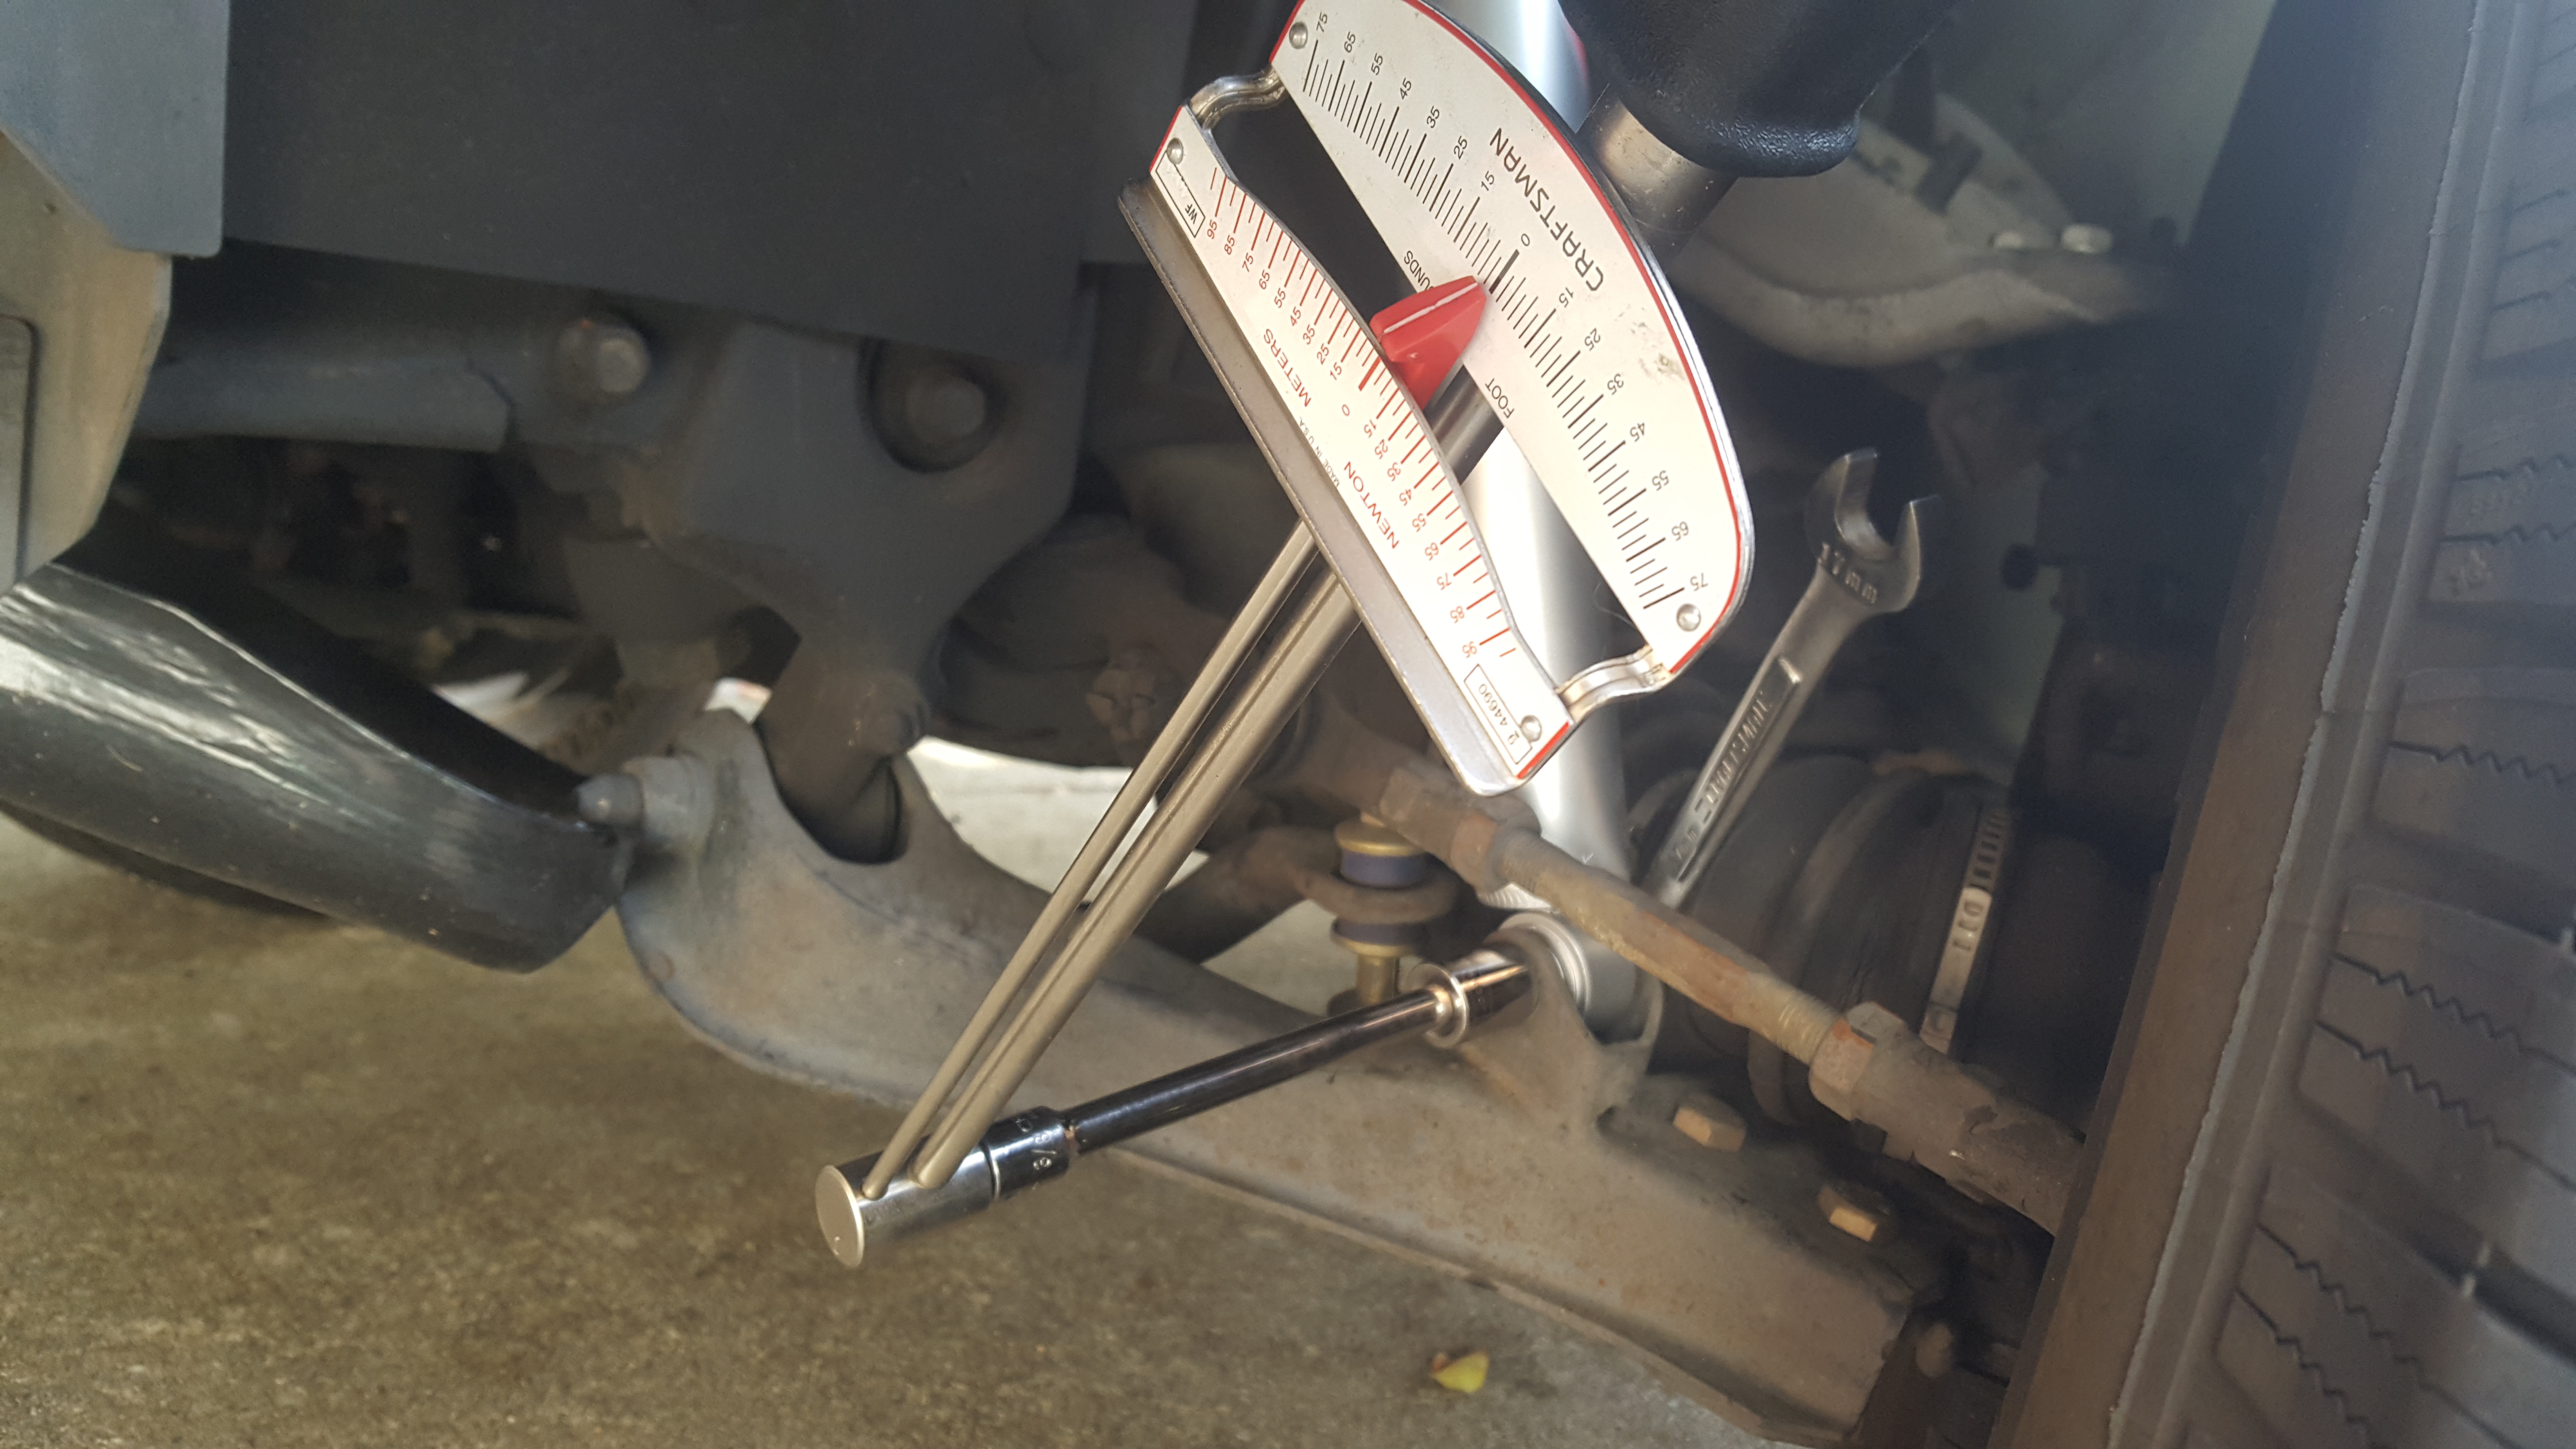
The bottom nut had enough space to get a torque wrench with an extension in, so I tightened it to the prescribed 45 foot pounds:
Aftermath
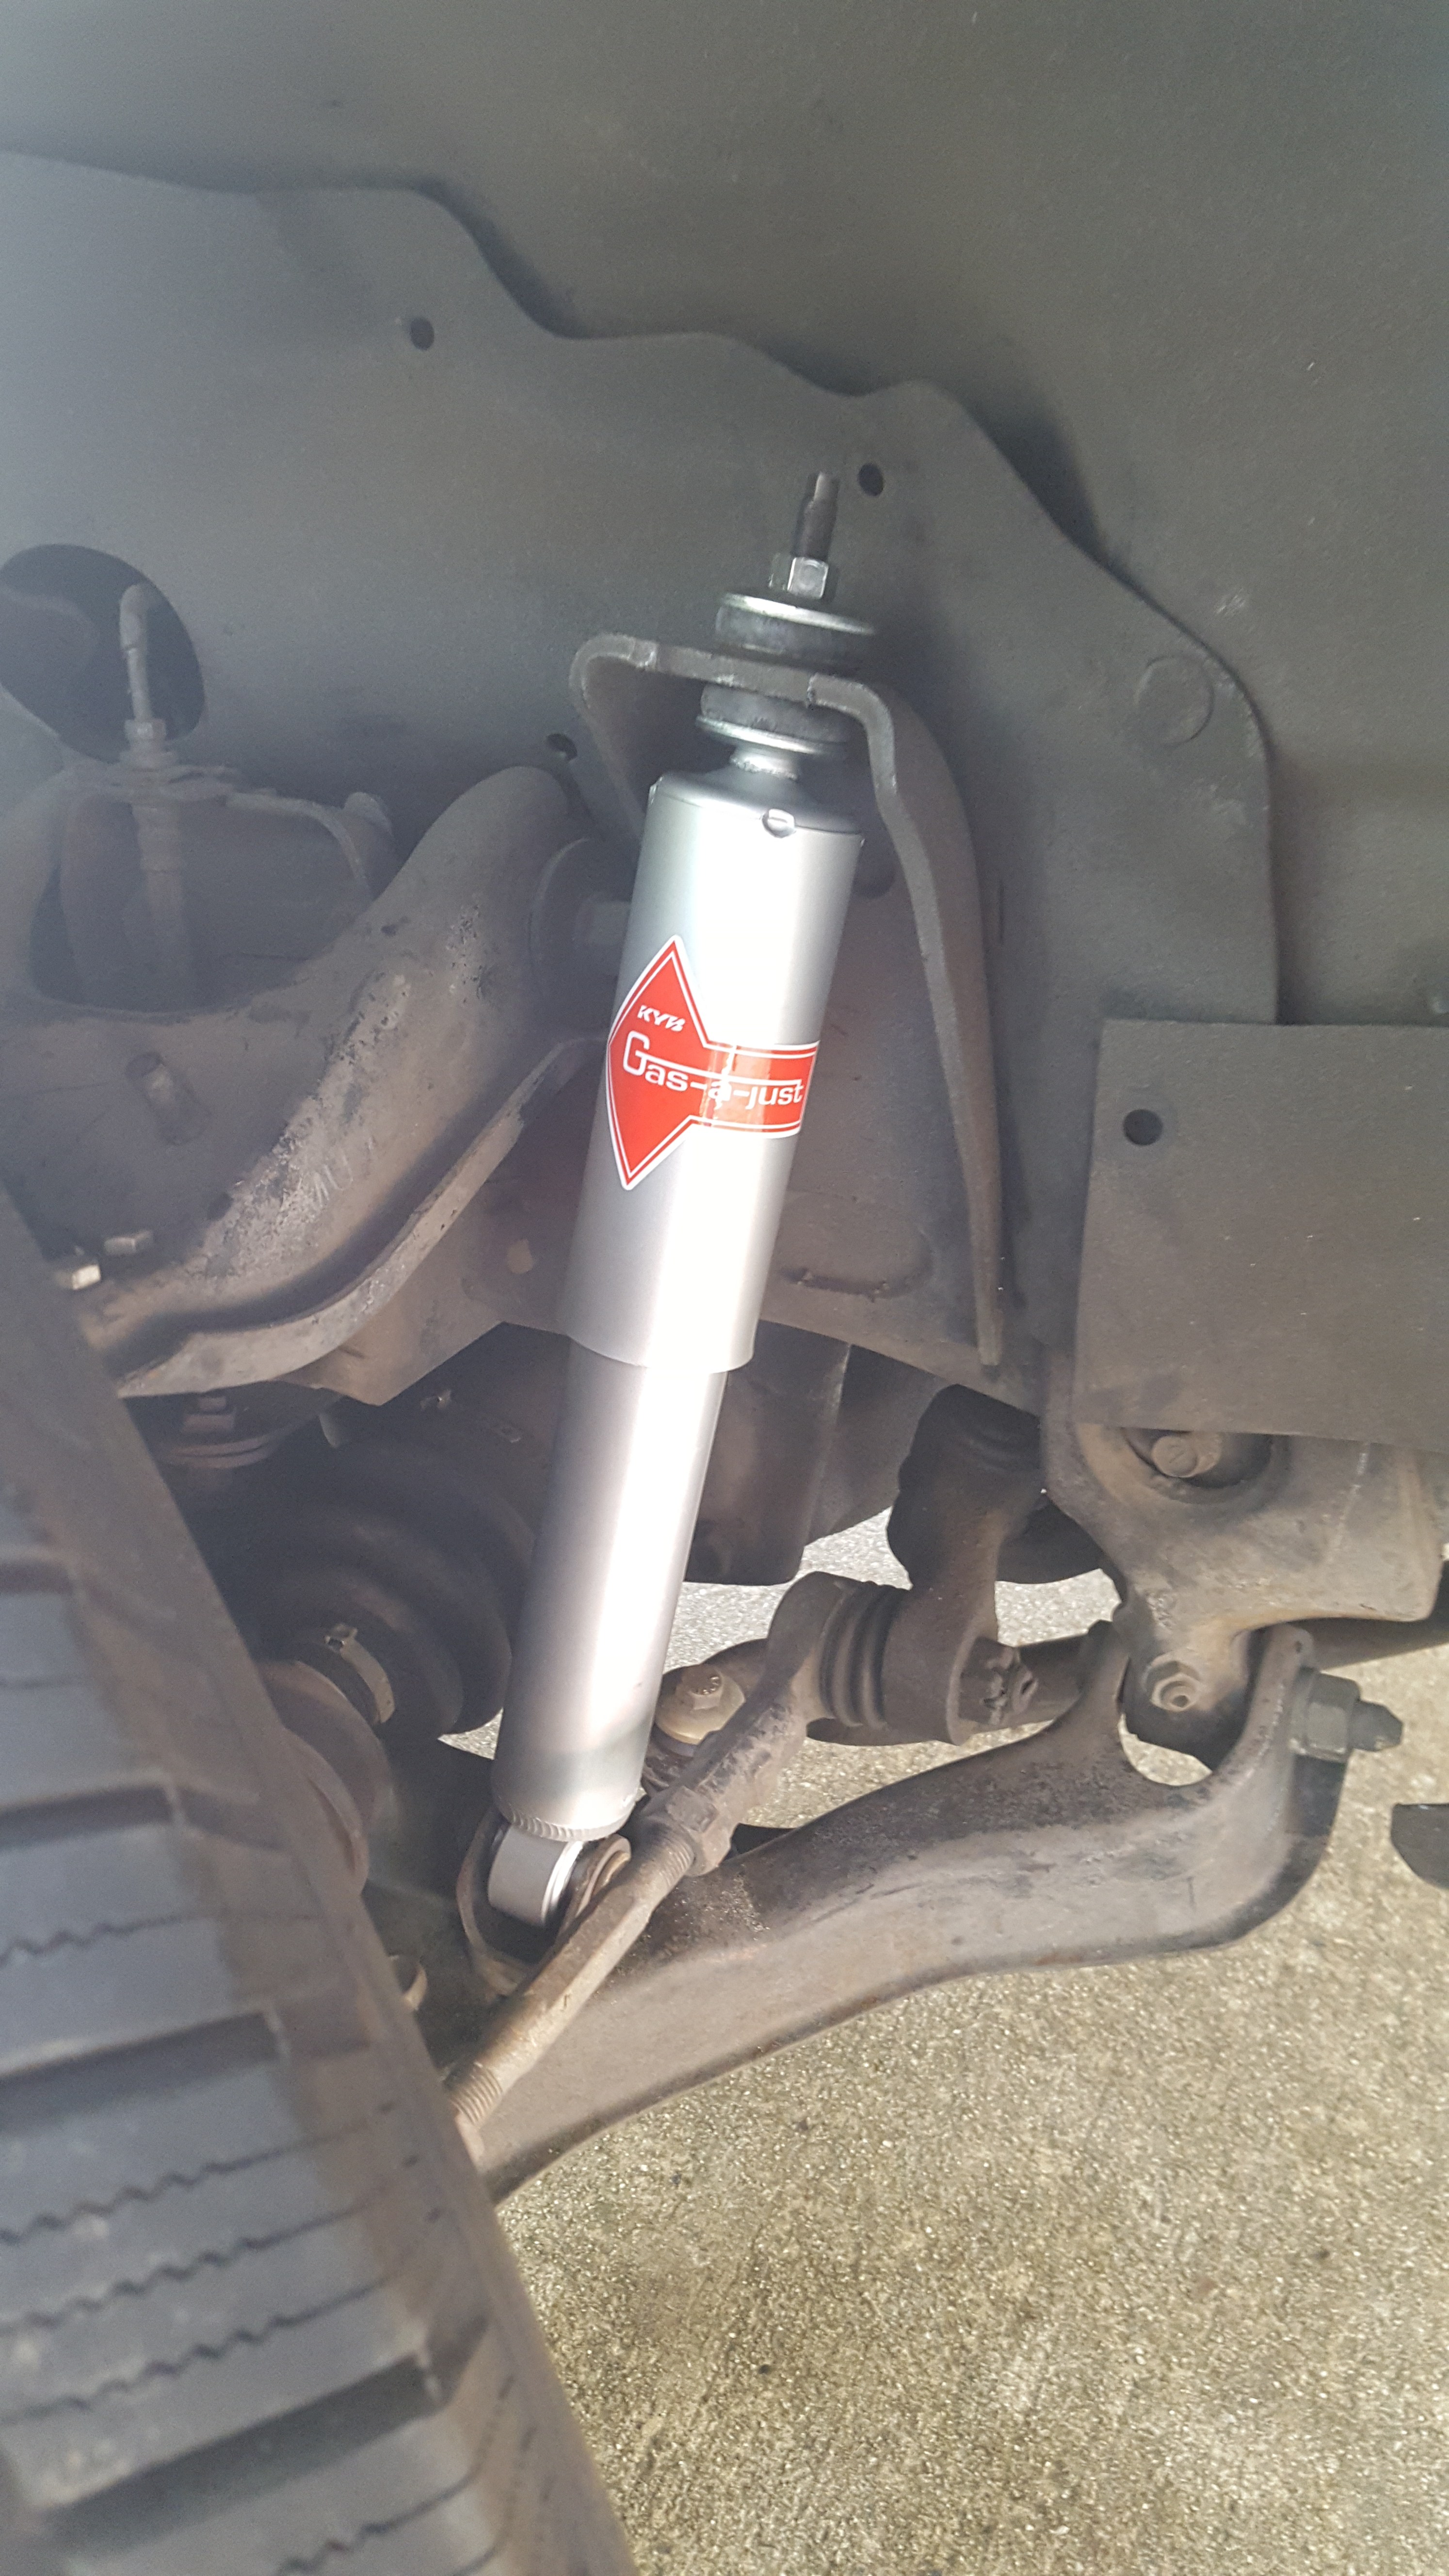
Sometimes I think that it will be easier to take shortcuts like not jacking up my car and removing the tires. Sometimes I’m right, but usually not. From start to finish this took 49 minutes doing it this way. I think it might have gone slightly faster to just take the wheels off next time, but who knows! It worked out just fine in the end and the ride is noticeably improved. Plus they look great!
Leave a Reply