Floating Nightstands with Box Miters
My sister called me and told me that their new bed had pull-out drawers built into the bottom. To not block the drawers, she wanted some kind of nightstand that floated above them and sent me three pictures of ideas she had found:


We chatted and decided that the last option would be easiest and cheapest if it was made out of plywood and used an inset french cleat to attach to the wall. The dimensions needed to be 7″ tall x 14″ wide on the inside and 12″ deep. I chose to go with 1/2″ Birch plywood since I had some on hand and it should be plenty strong.
Sources
Some quick Googling led me to this Instructable on cutting miter joints on the table saw:
http://www.instructables.com/id/Cutting-Precision-Miters-in-Ten-Minutes-or-Less/?ALLSTEPS
And two more pages on different ways to connect the joint besides just gluing the mating surface:
http://techtalk.parts-express.com/forum/tech-talk-forum/49033-cutting-plywood-to-hide-plies
https://woodworksbyjohn.com/2013/12/03/dyed-plywood-box-cutting-the-sides/

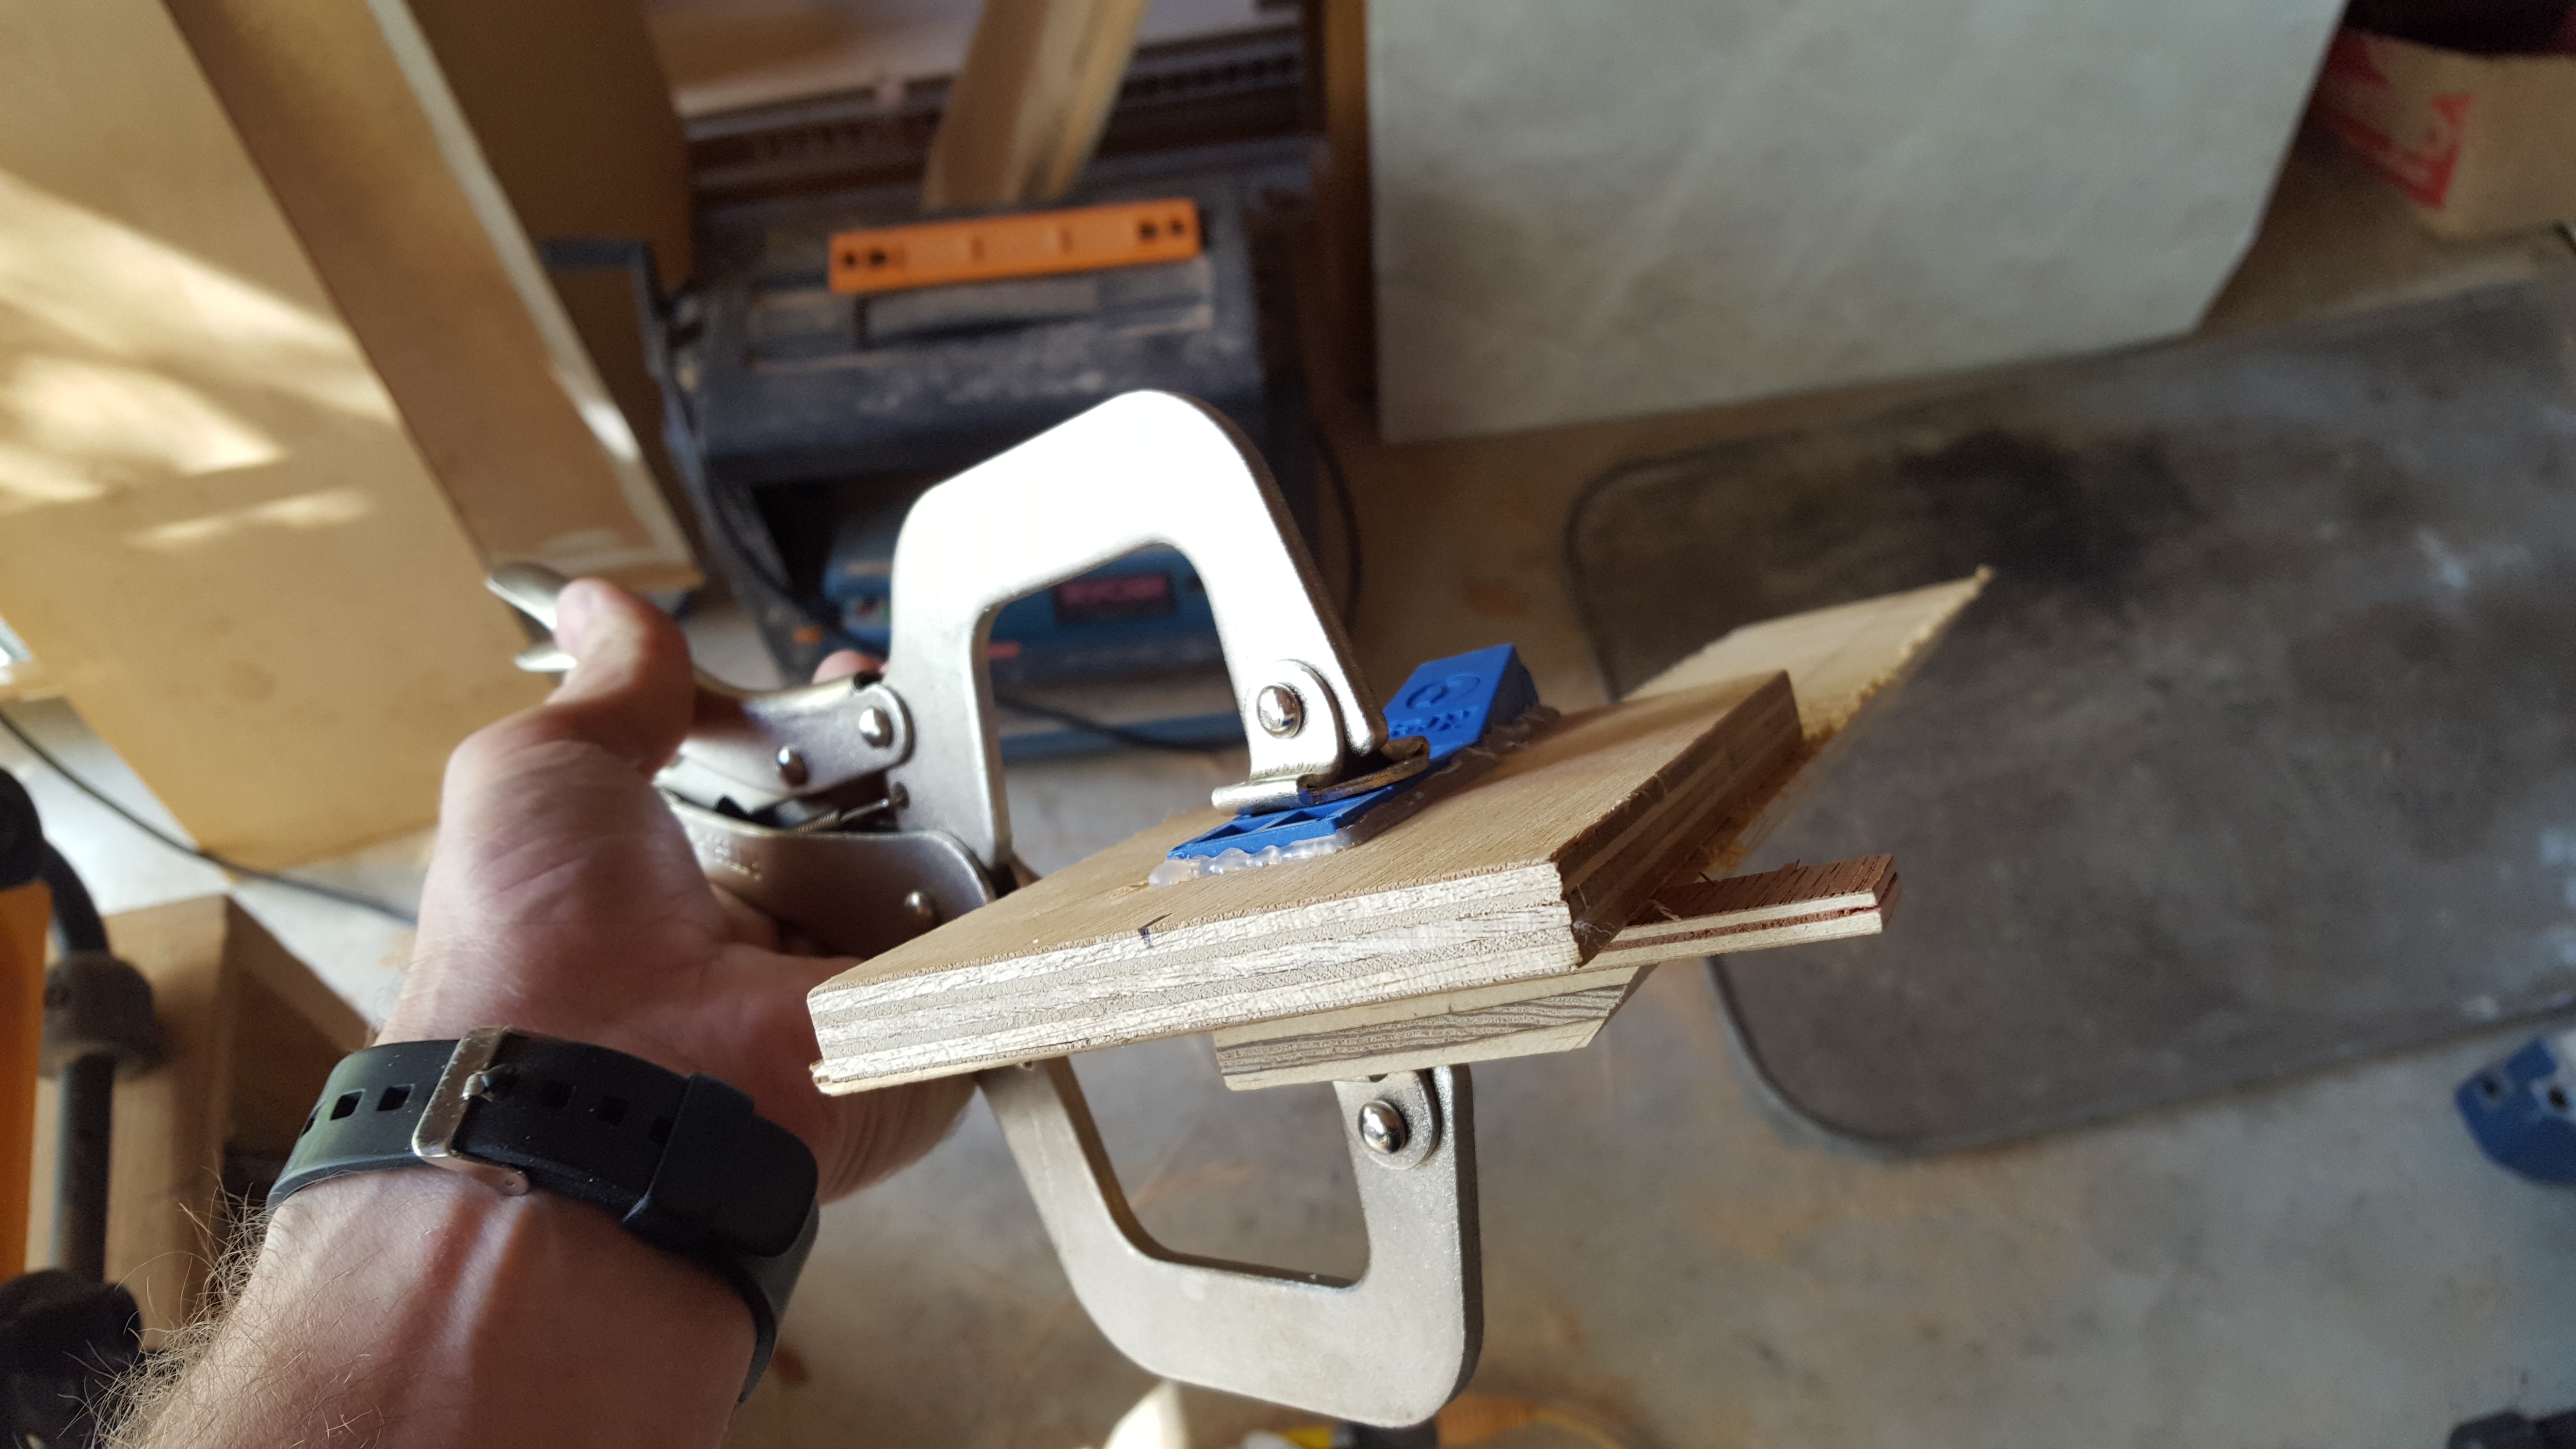
I looked through the options and the easiest and strongest seemed to be the spline method. I used some leftover 1/8″ plywood strips and it has the added benefit of helping to align and support the pieces during glue up. Nobody enjoys dropping a perfectly cut piece with wet glue onto the floor.
Box Cutting
I had a piece of 2′ x 4′ Birch plywood and since I’ll be covering the front of the box to hide the exposed edge, I ripped it lengthwise into two pieces just under 12″ each. Then I crosscut the top and bottom 15″ and the sides at 8″. That left me with inside dimensions of 7″ tall and 14″ wide.


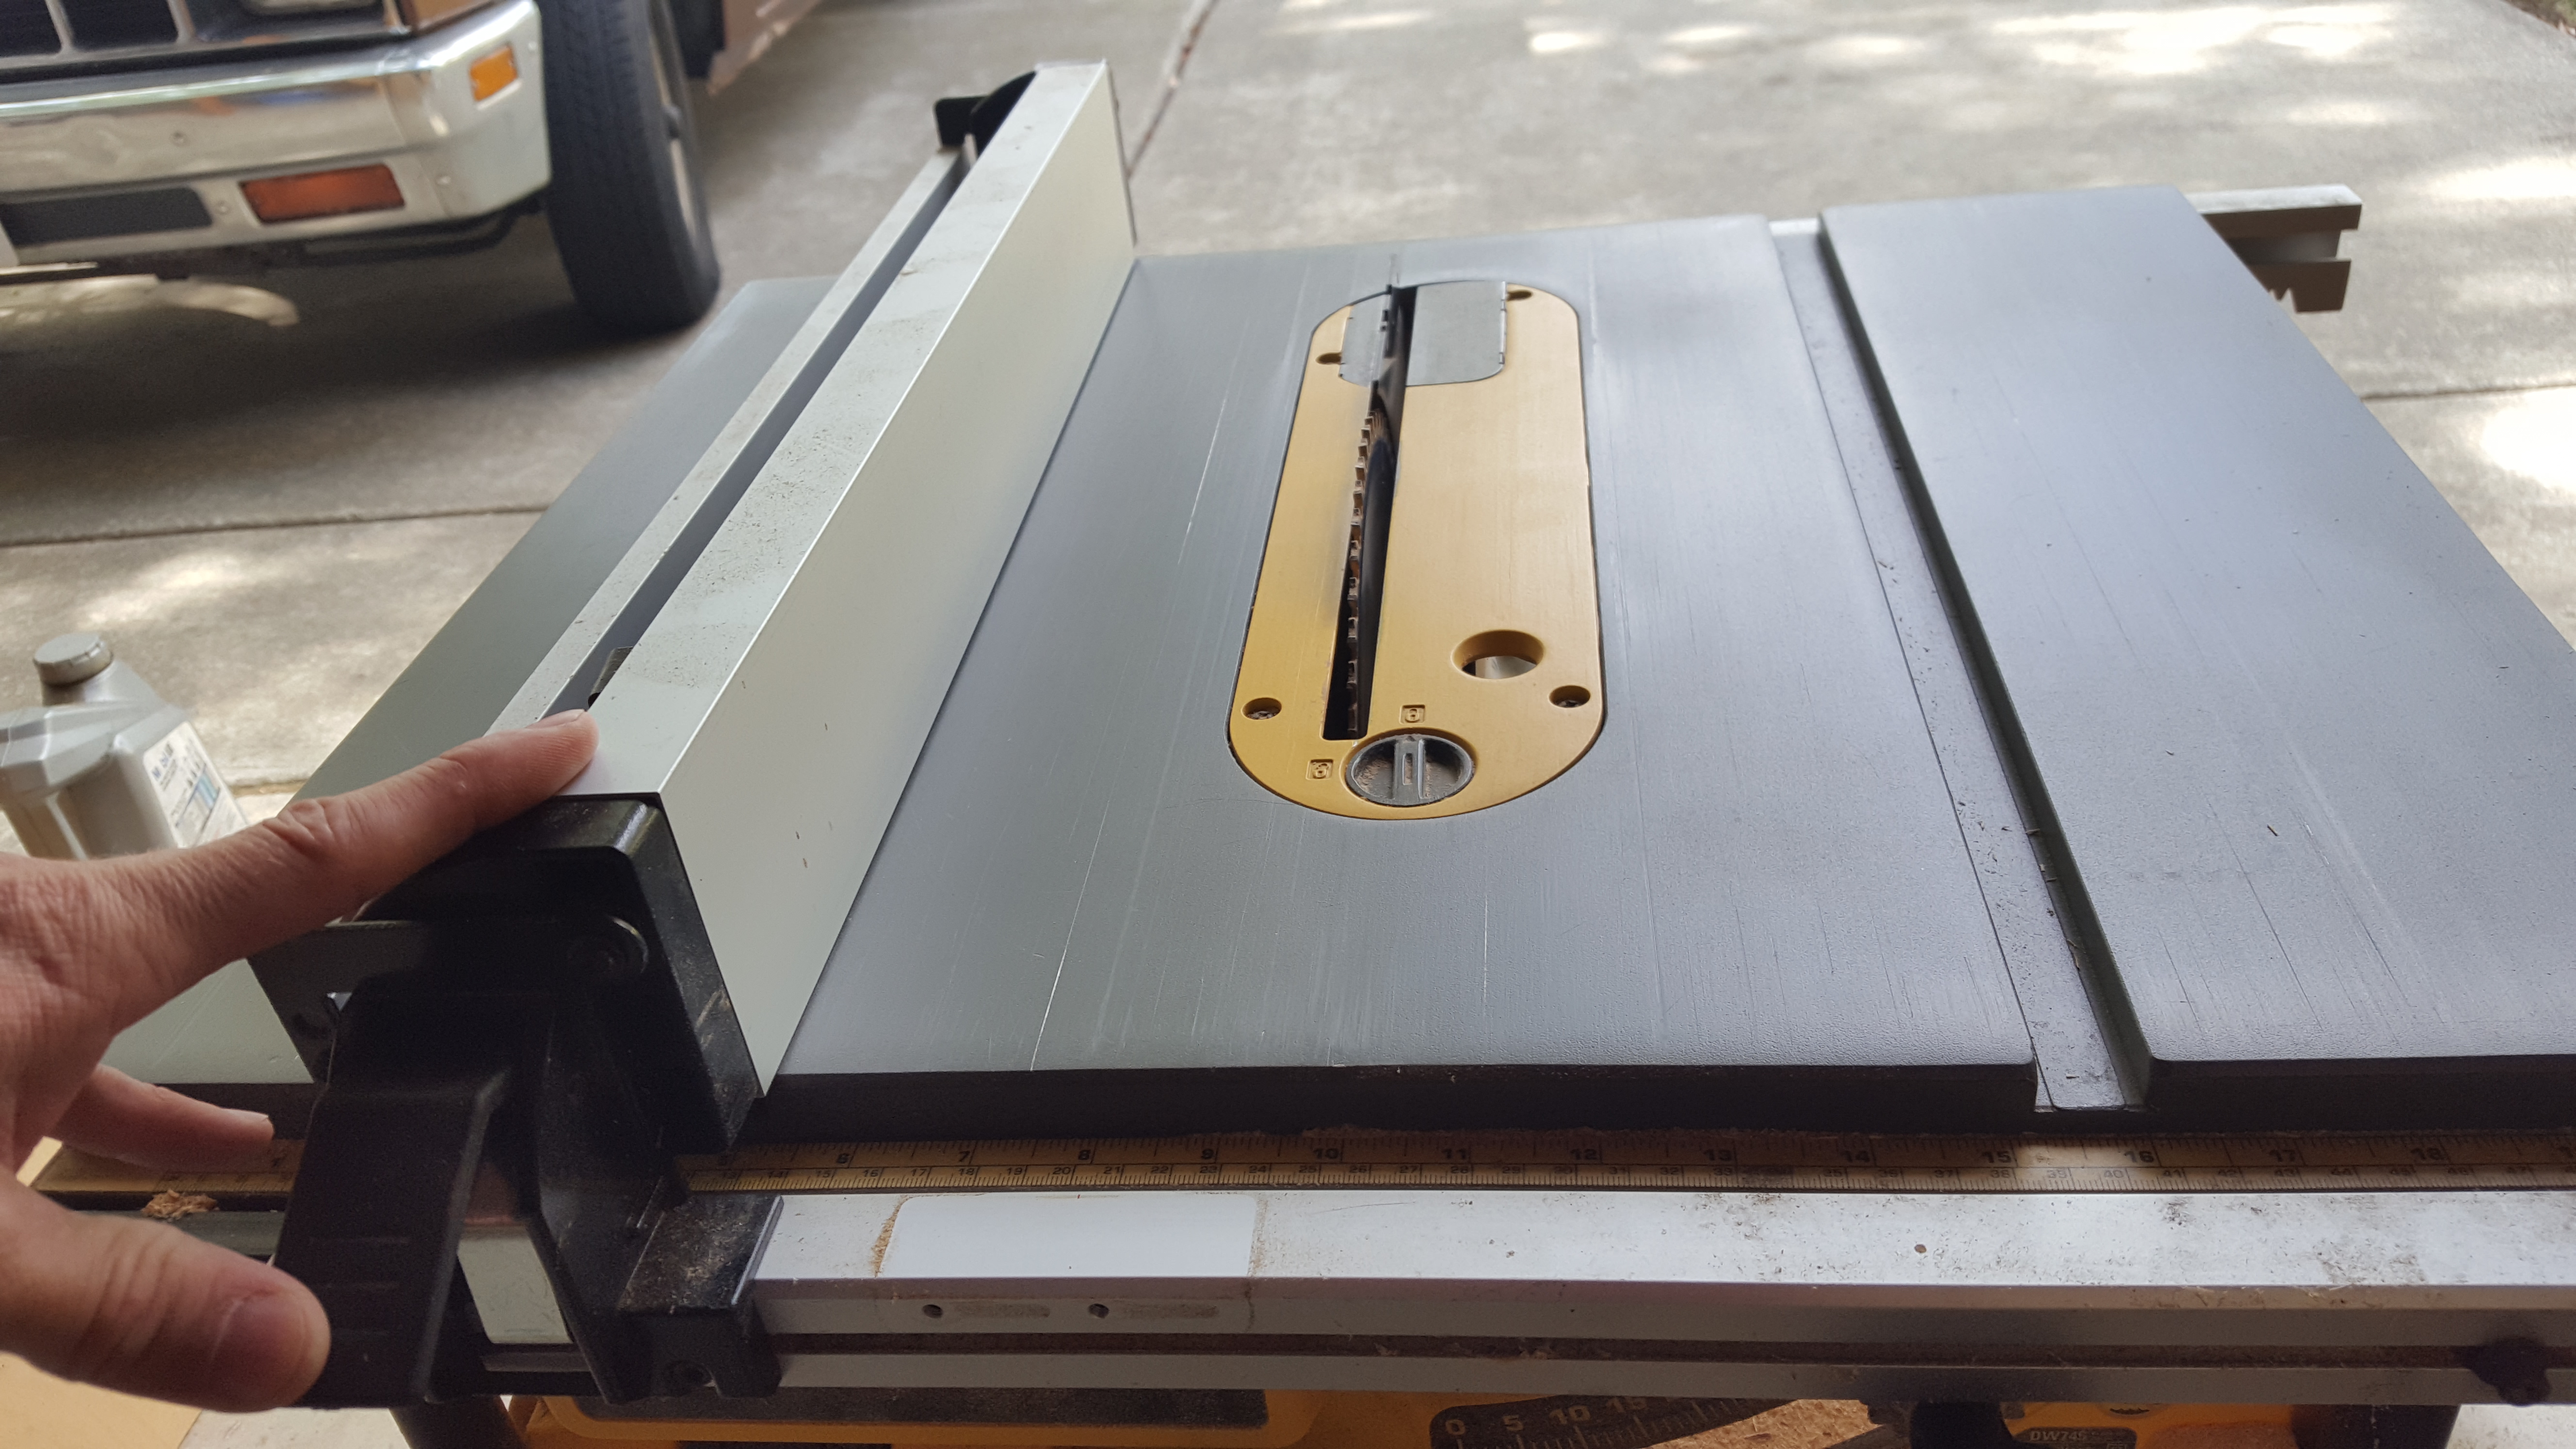
Miter Joint Cutting
The fence needed to be moved over to the left side since the blade tilts that way, and a piece of MDF clamped to the face for the saw blade to bury itself in slightly. Then a line is traced onto the MDF at the height of the piece of wood and the blade lowed until the top edge is just at the line. Finally, turn the saw on and move the fence over slowly until the top corner of the blade teeth are just in the MDF. When cutting, the MDF will support the wood and prevent burn marks or distorted cutting, and the top edge won’t be splintered and should stay nice and sharp.


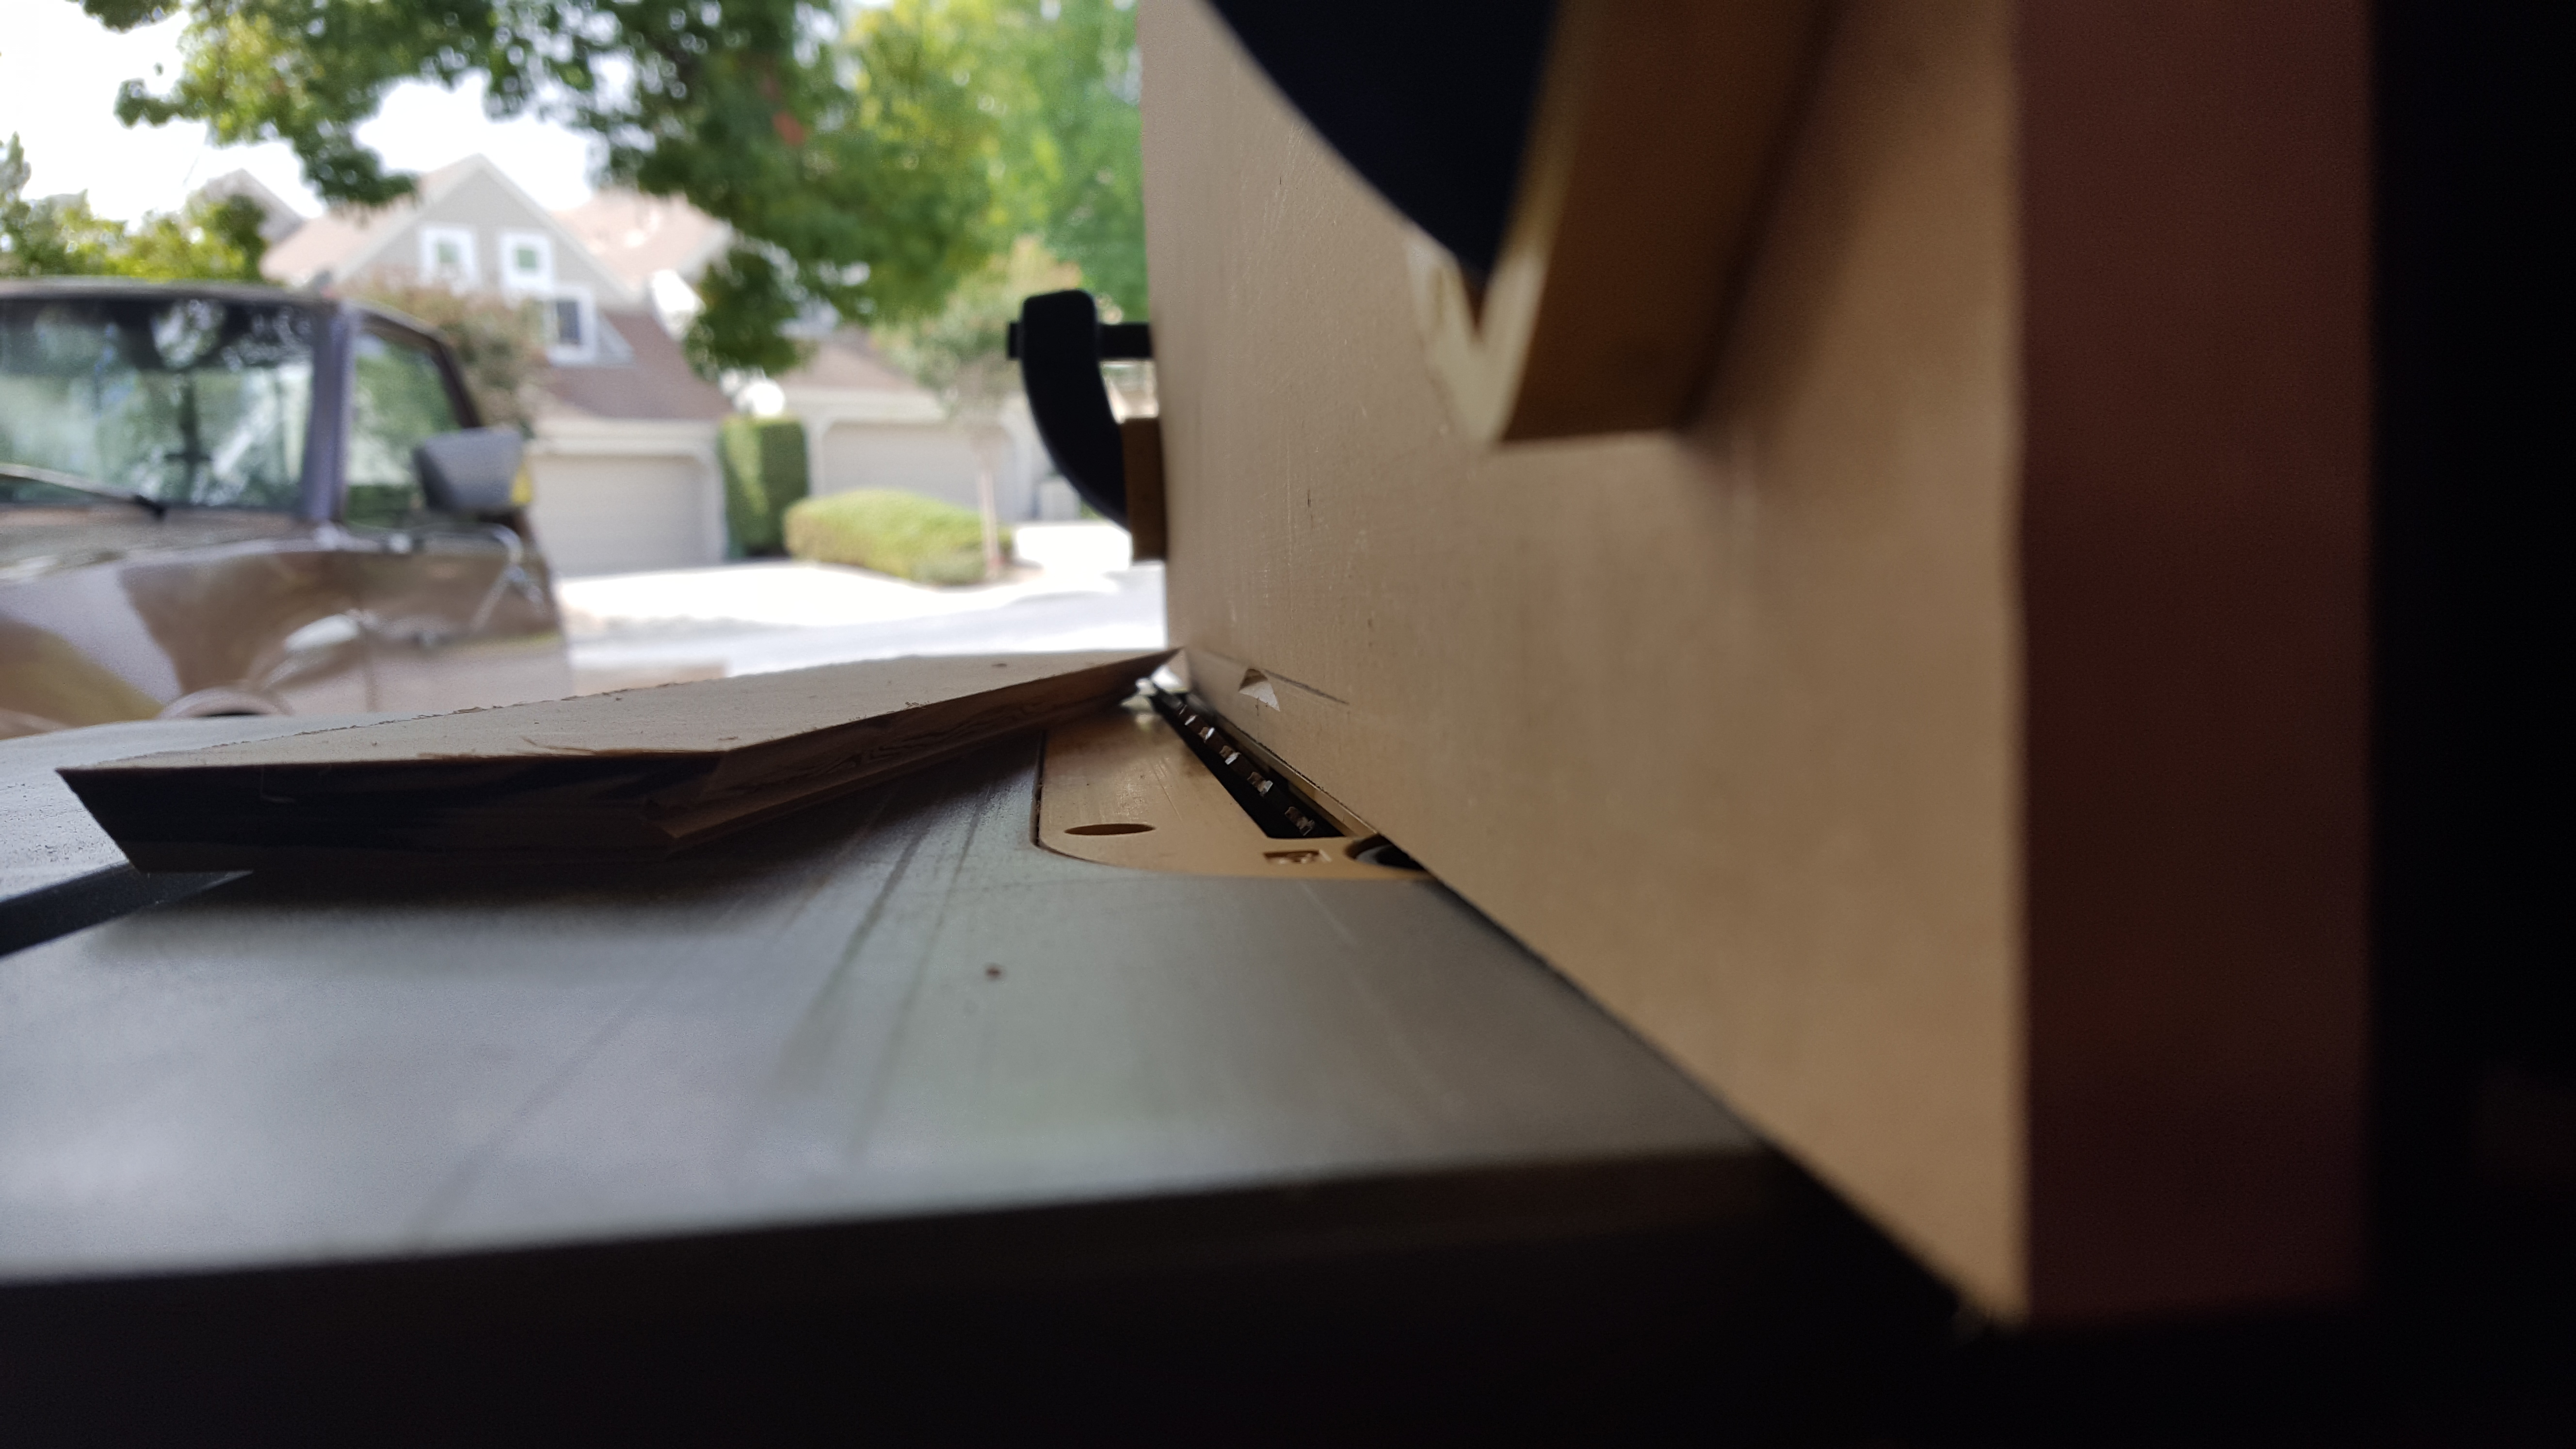
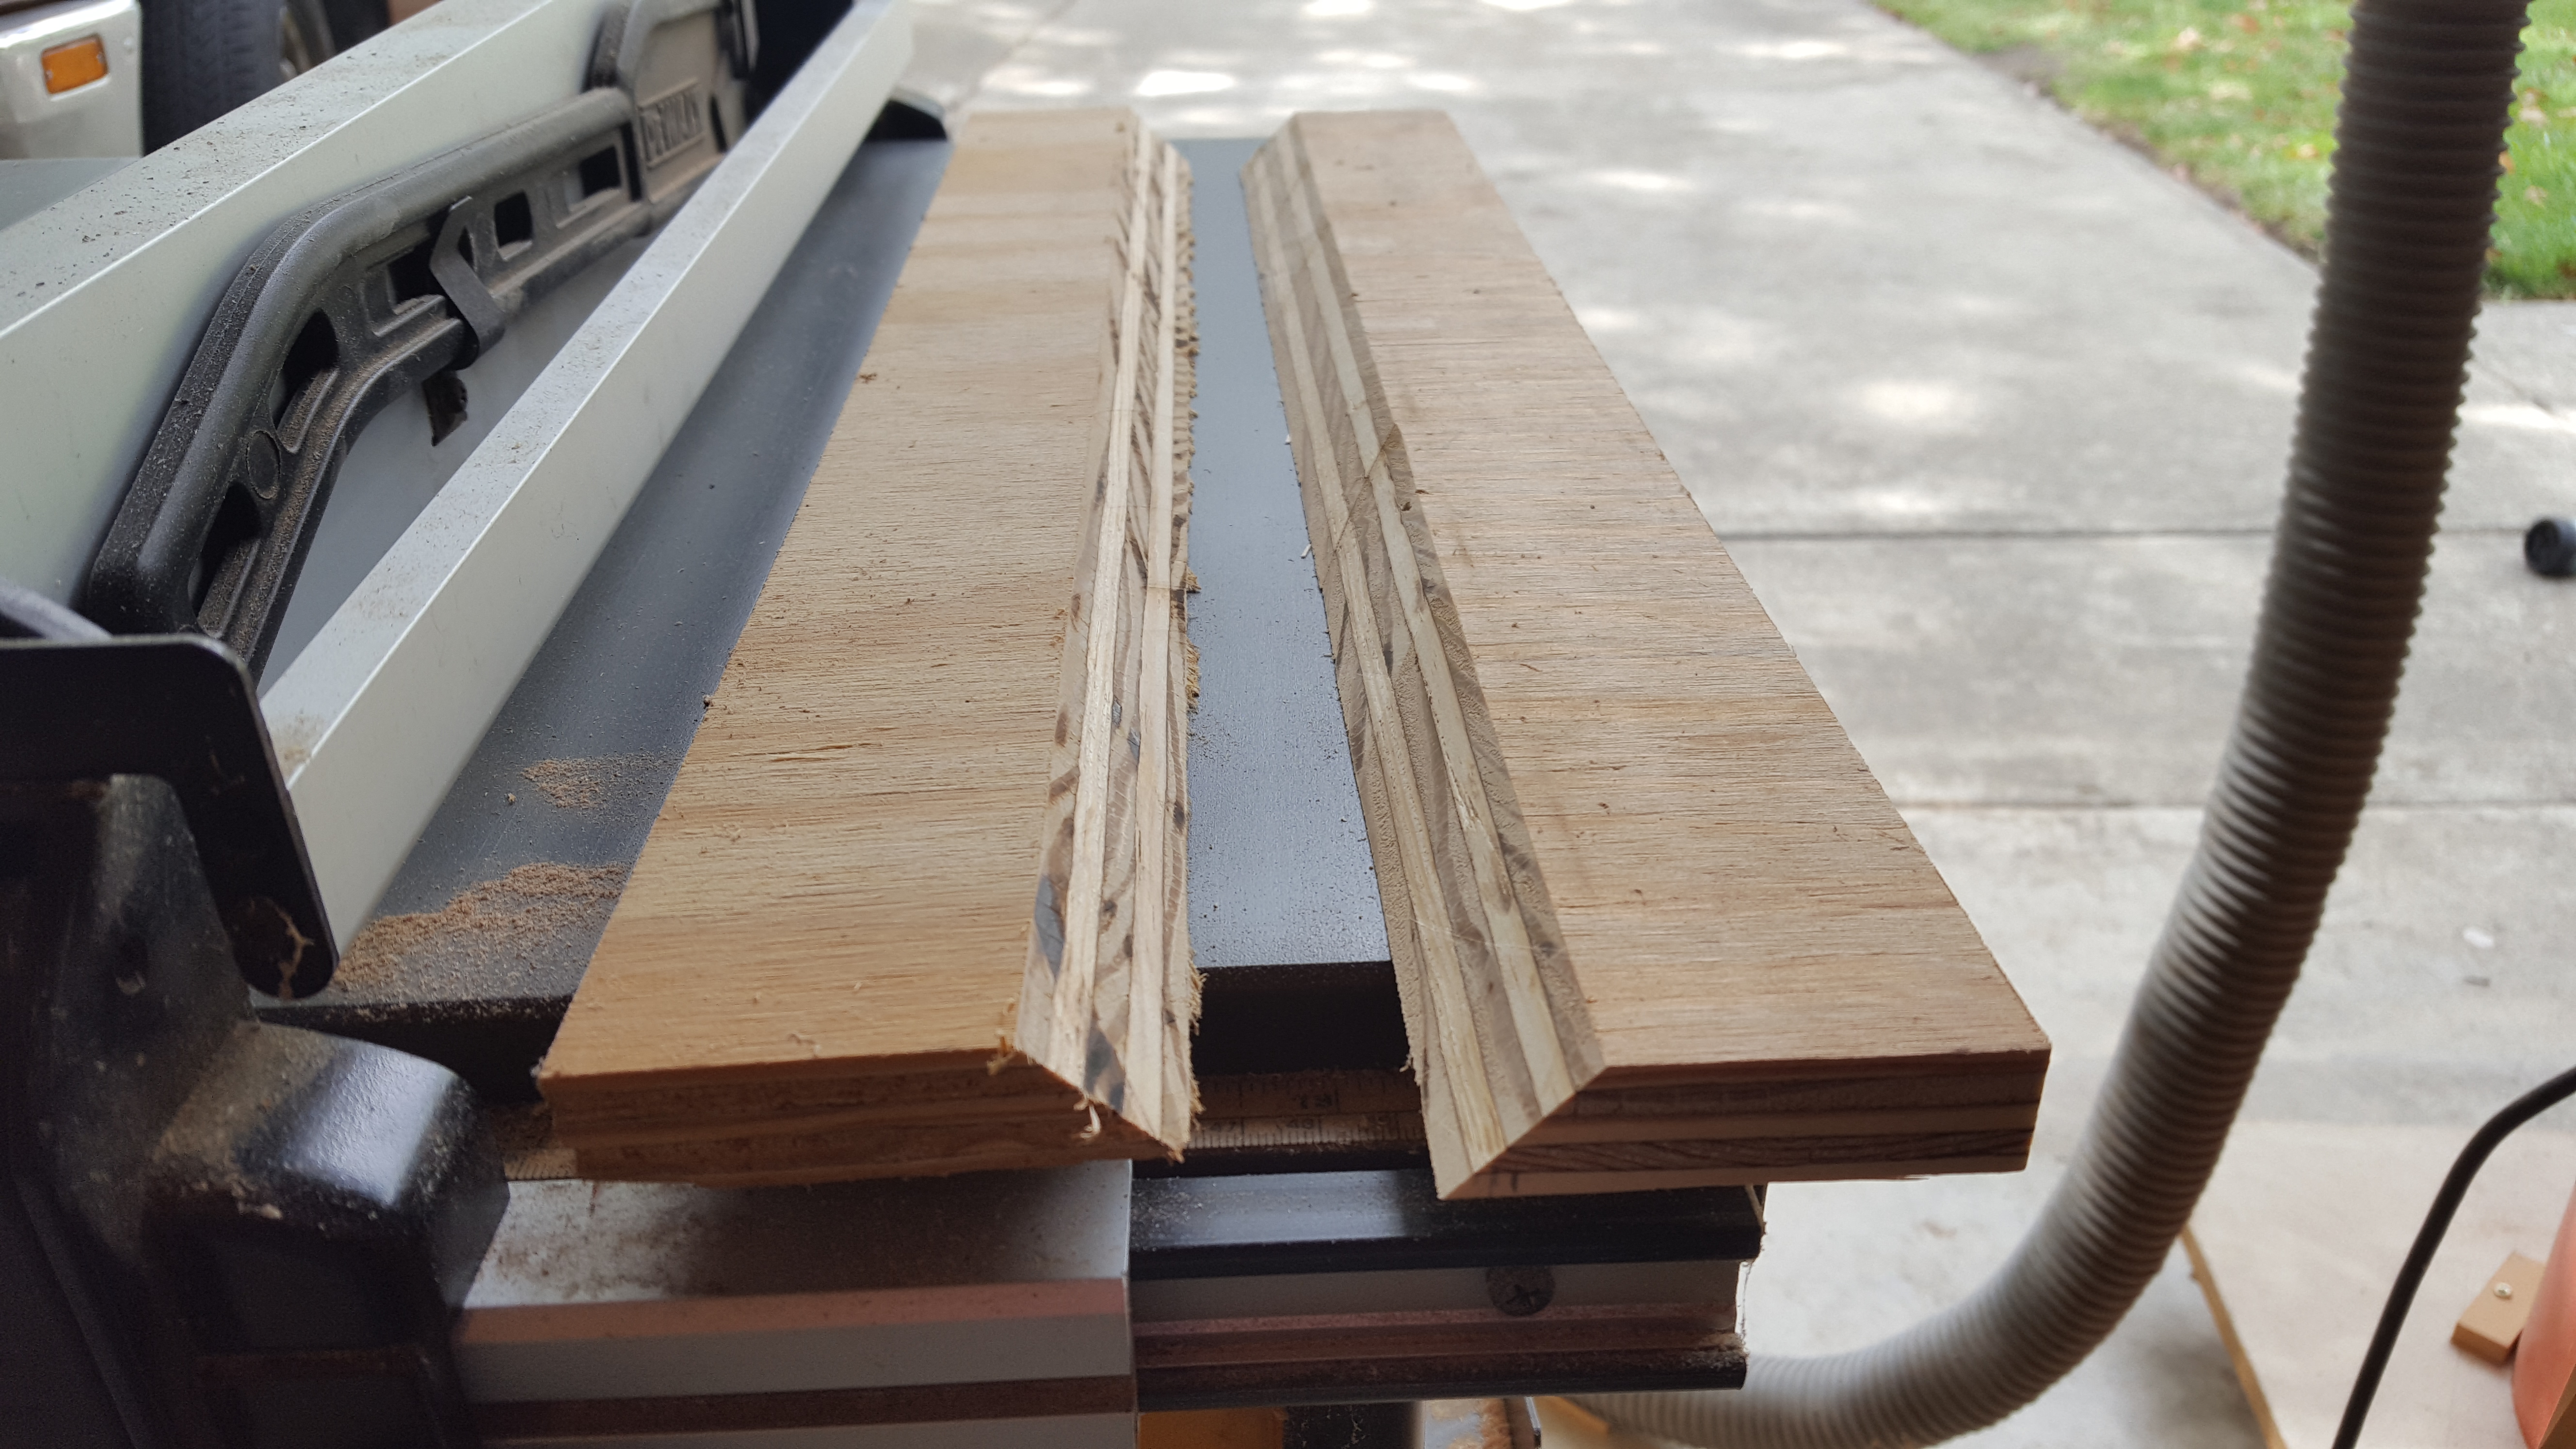
Spline Inserts
The fence gets put back on the right side of the blade and the blade is lowed to cut into the face of the miter. My blade is just about 1/2 the width of the plywood spline I’ll be using, so it took me two cuts to finish it. My finished slot is just wide enough for slight wiggle, but with all four sides assembled dry, it holds itself pretty straight.


Glue Up
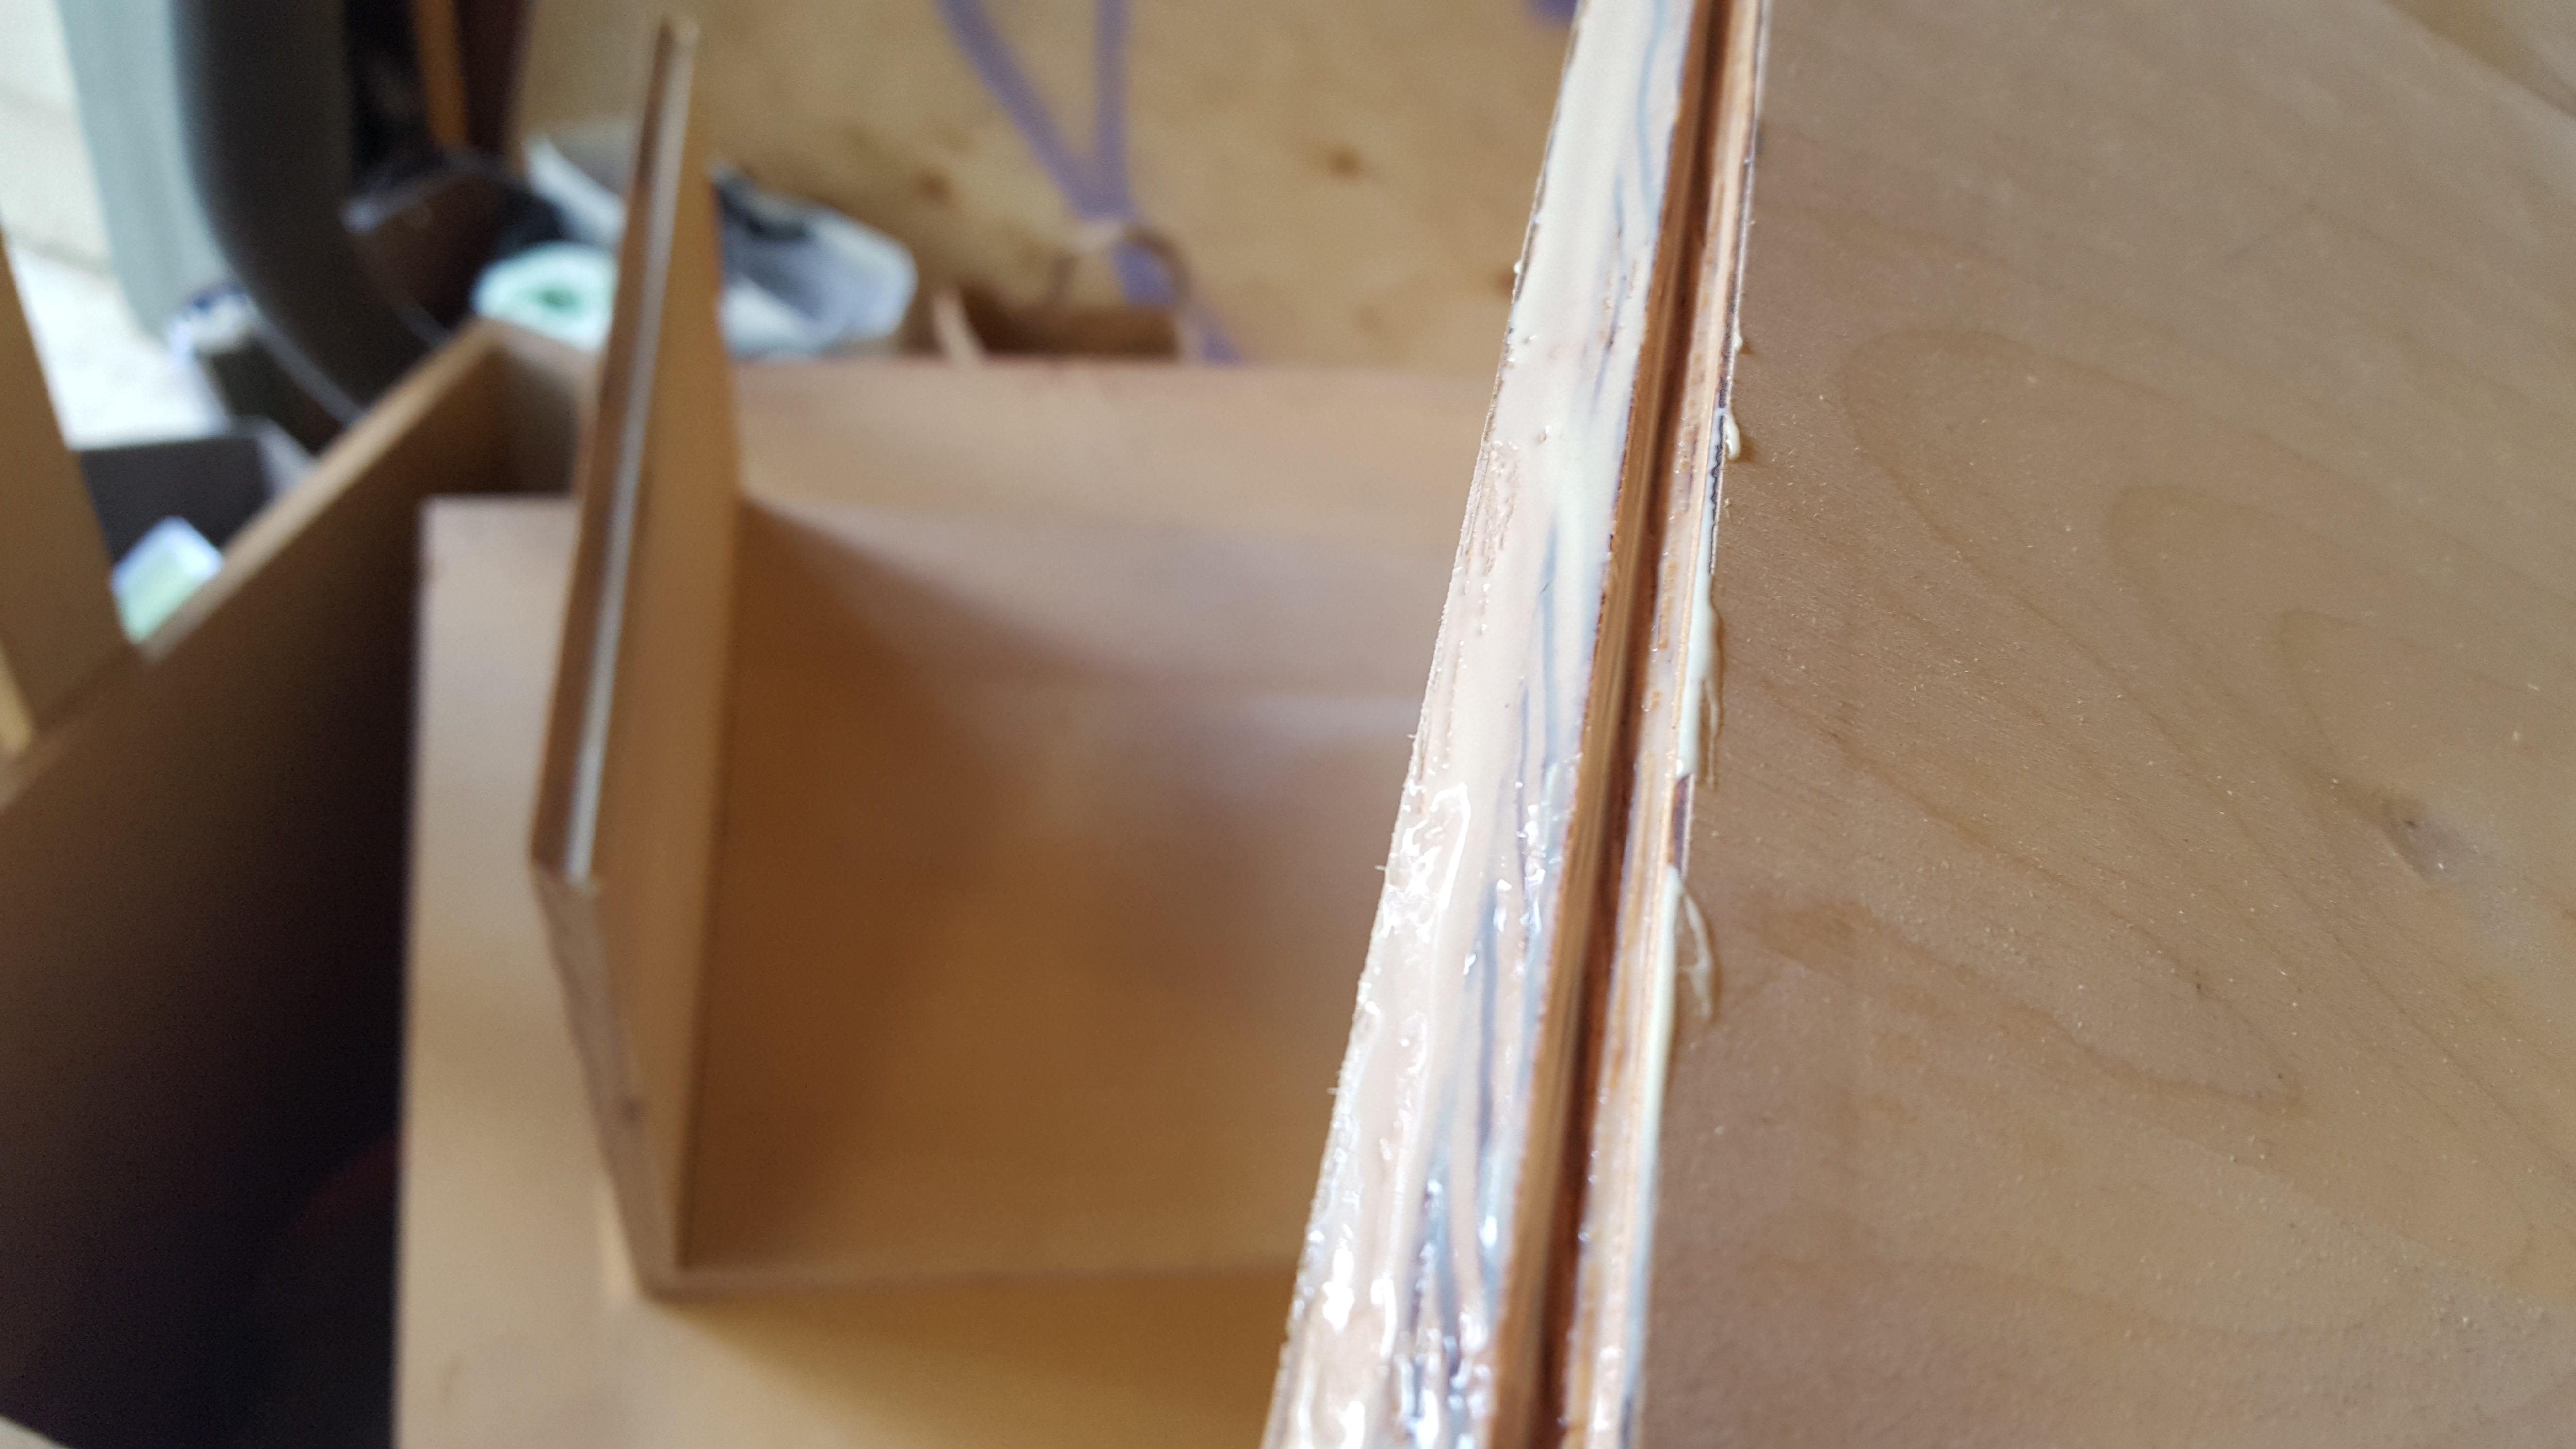
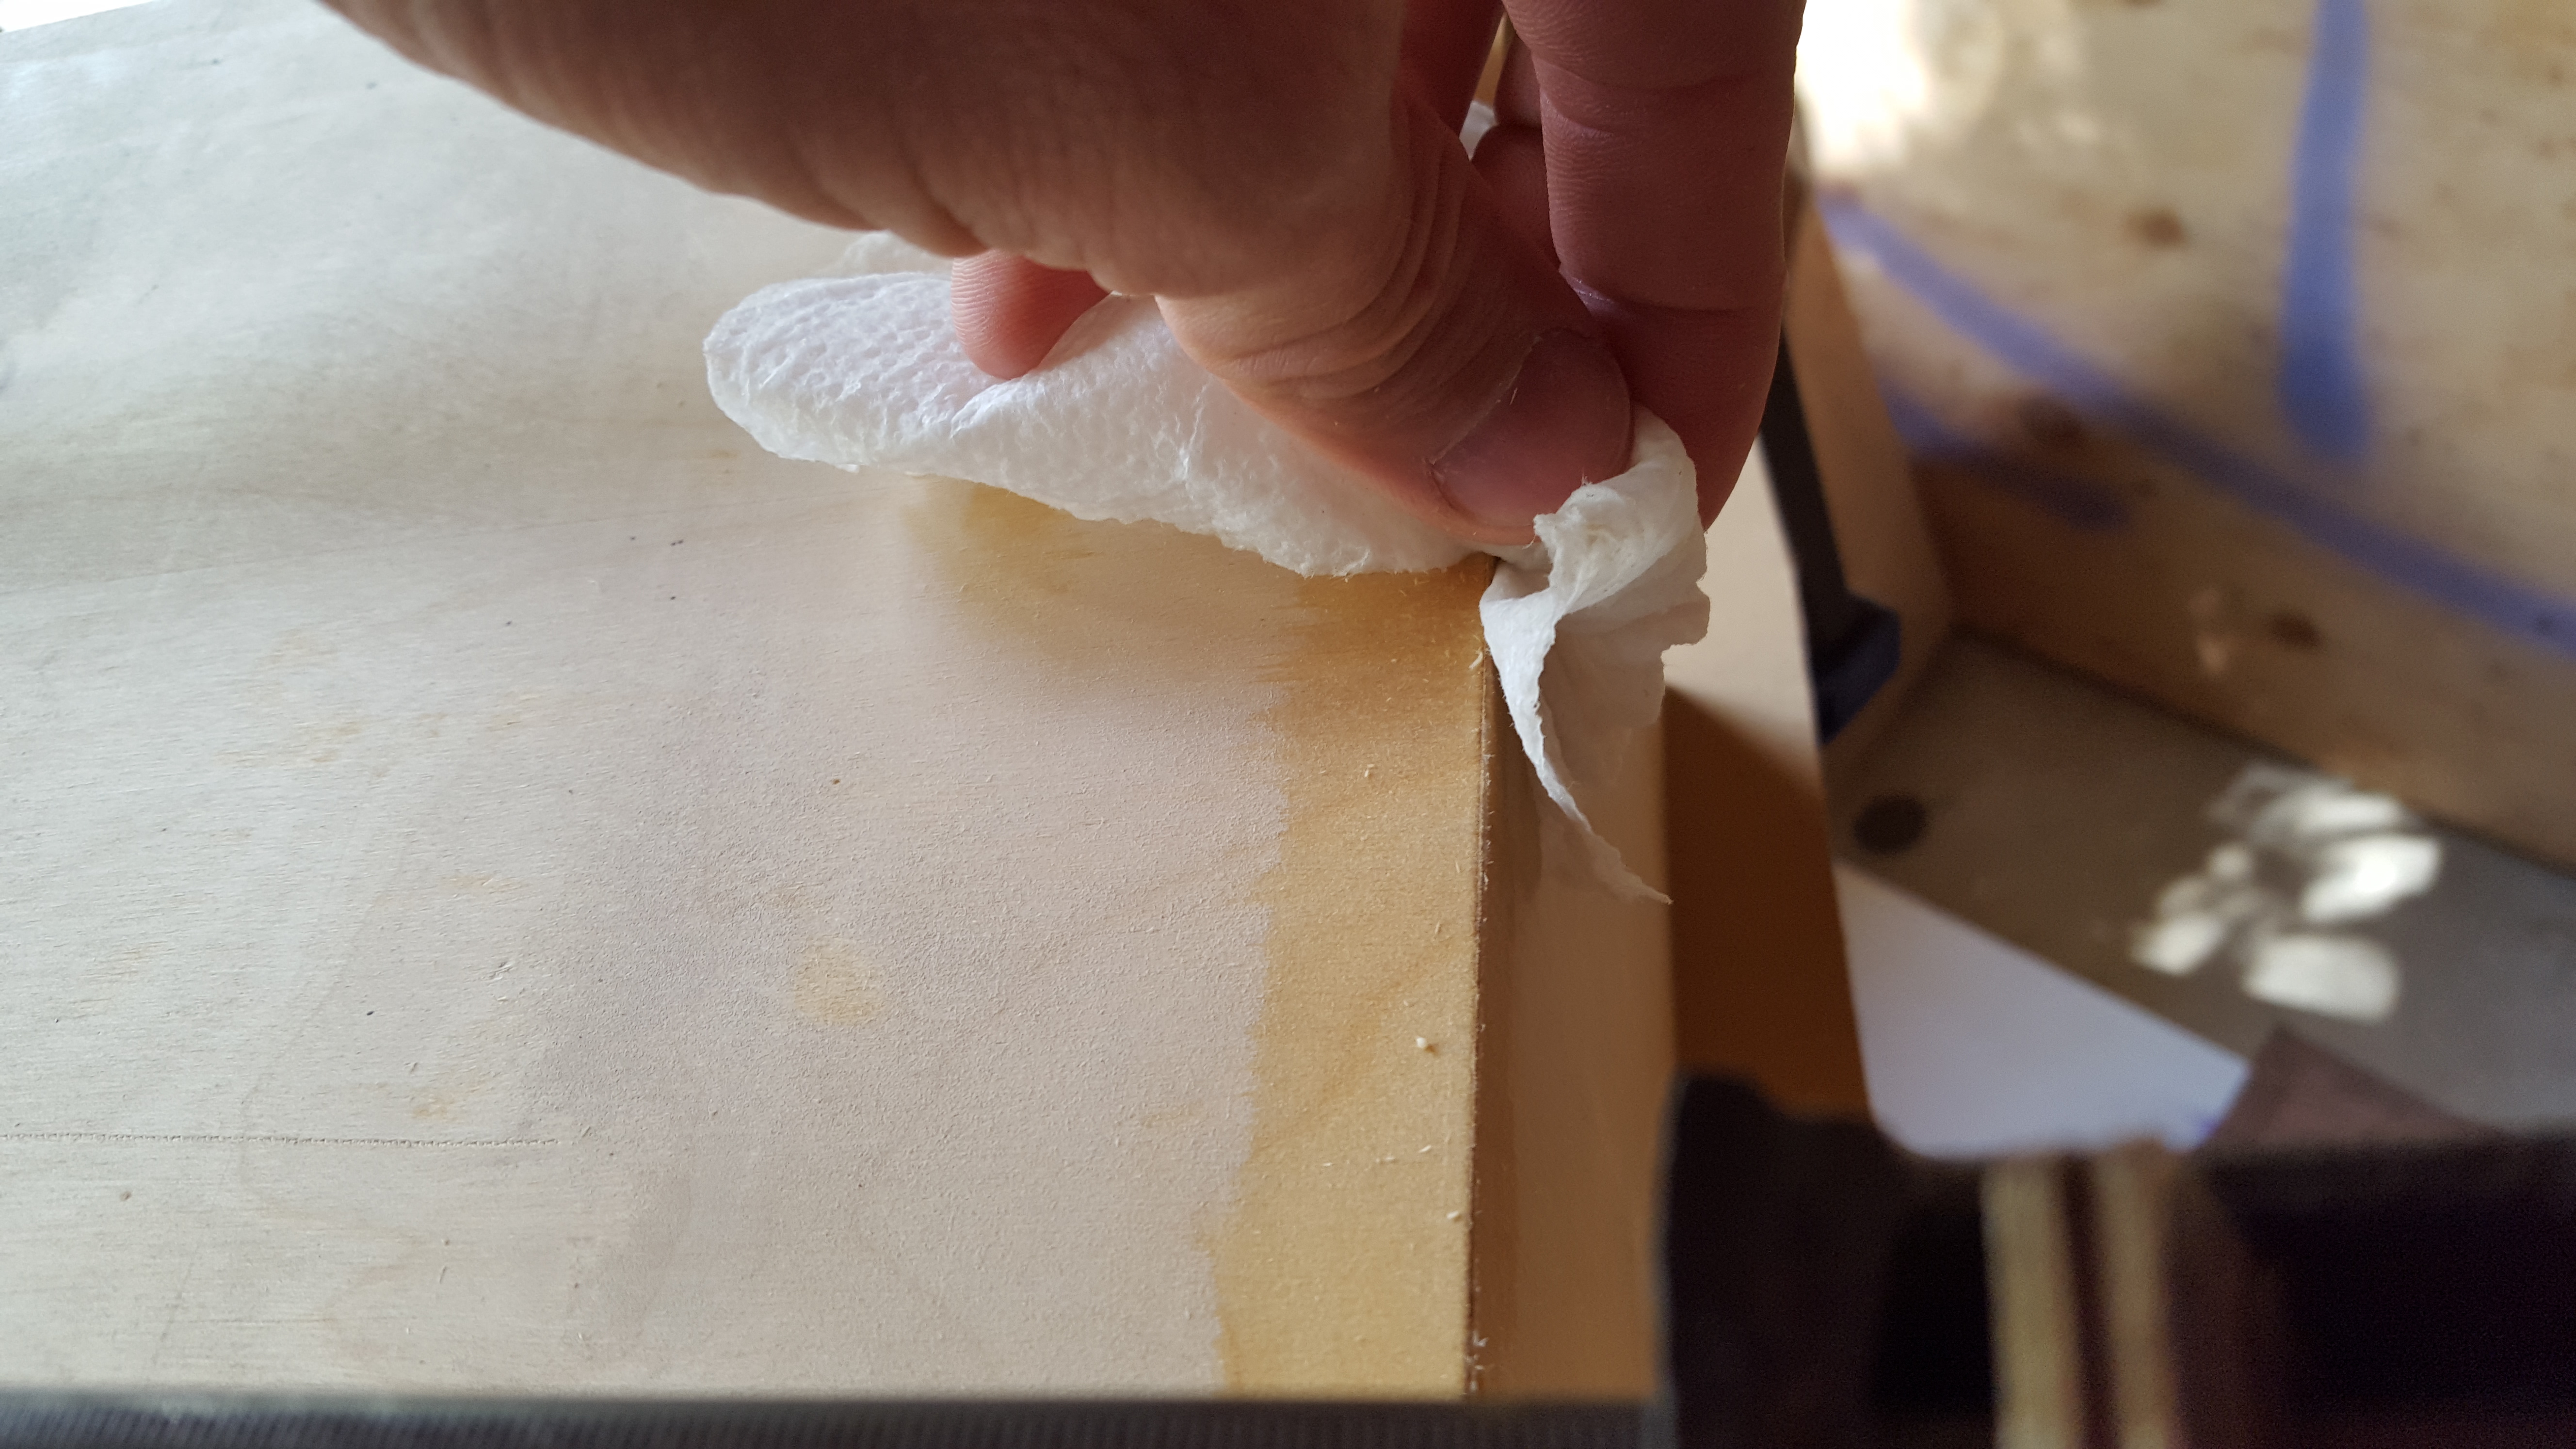
I put it together dry to make sure it fits and then left the bottom and sides together to only glue the top first and then the bottom after. I find two edges are easier to align at once than four. Once the glue was applied to all the surfaces, I added the clamps lightly and then tightened them all a little at a time to prevent warping. After a few minutes, I came back with a damp rag and wiped up the squeezed-out glue.


French Cleat
I like using french cleats since the support can be hung on the wall separate from the box (or cabinet, or whatever you’re hanging) and it is plenty strong. If you want to take the cabinet down, just pull up and out and you can easily readjust by moving the support. I used a 3/4″ plywood strip and ripped it down the center at a 45. Then I trimmed one side to just fit inside the back of the box and secured it with pocket screws after using my Kreg Mini jig to make the holes.


Front Trim
The box is simple and if you don’t mind the plywood edge showing (it could be considered rustic…) it’s done except for a stain or paint. To make it a little more refined, I’ll add some trim birch around the front to hide that edgegrain.
0 Comments on “Floating Nightstands with Box Miters”